Set up barcode check-in
Let clients check in at the front desk by scanning a barcode from their phone
Barcode check-in lets clients show a barcode on their phone (or a printed card) at the front desk. Your staff scans it with a USB barcode scanner, and the client is checked in instantly — no searching by name required.
This is ideal for gyms and studios with a front desk where you want fast, hands-free check-ins during busy hours. Need to share instructions with your clients? Send them Check in with your barcode →.
Barcode check-in is available on the Studio plan and above. If you don't see the barcode option in your settings, contact Arketa support to enable it for your account.
Enable barcode check-in
Turn on client check-in
Go to Settings → Business → General and scroll to Check-in Settings. Toggle on Enable Client Check-In.
- Pilot with a client tag — Pick a client tag. Only clients with that tag see the barcode check-in experience on the Home tab of your branded mobile app when they tap Check-in. Everyone else keeps the usual geolocation check-in.
- All clients (no pilot filter) — Use this when you're ready to turn barcode check-in on for everyone.
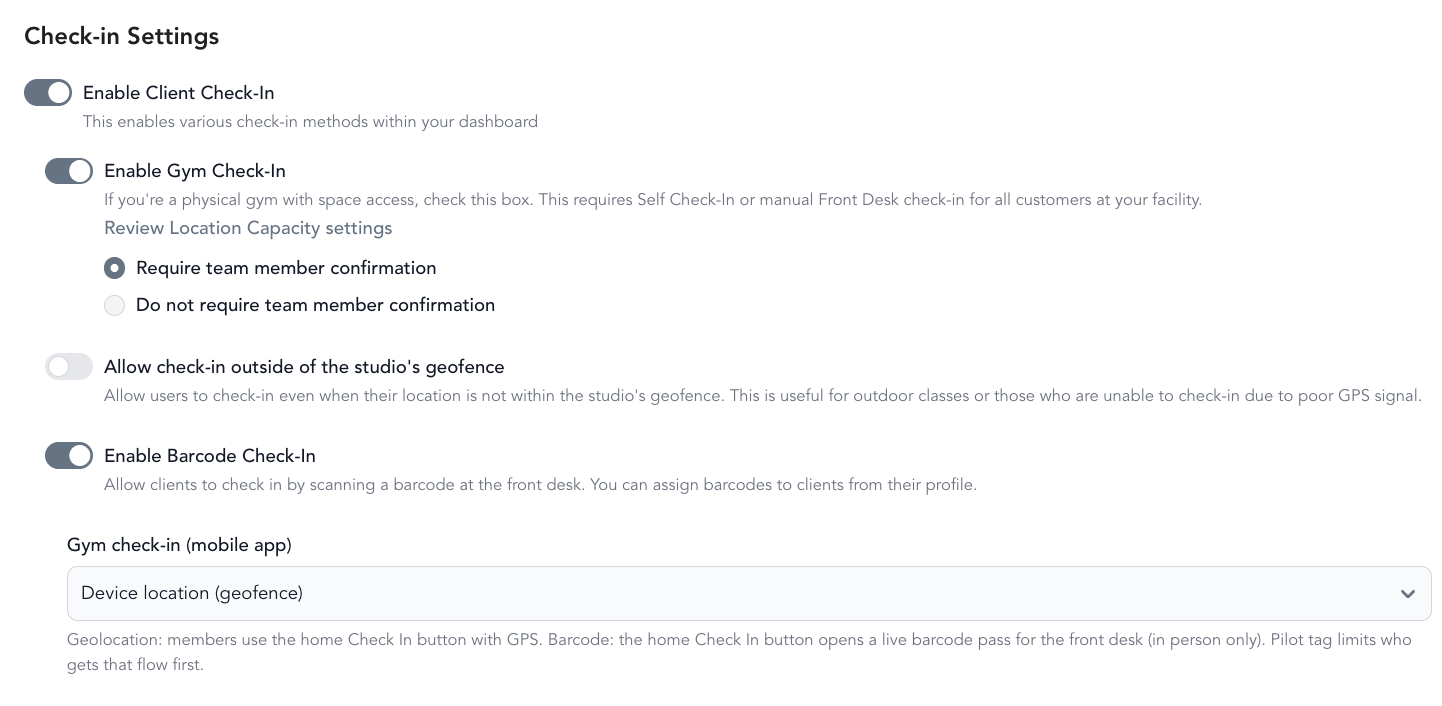
- On — each scan creates a pending check-in that staff must manually confirm
- Off — scans are auto-confirmed immediately (recommended for most studios)
Enable check-in per location
Go to Settings → Locations and open the location you want to enable. Toggle on Enable gym check-in.
Optionally set a Gym check-in capacity to limit how many people can be checked in at once.

If you use a Kisi smart lock, it pairs with barcode check-in — the door unlocks automatically when a client checks in through the mobile app.
What clients see (gym check-in)
When barcode check-in is active for a client, they open your branded mobile app and tap Check-in in the bottom-right corner of the Home screen. They see their barcode with the current date and time on screen so front desk staff can confirm it's a live check-in — not a shared screenshot.
Assign barcodes to clients
Clients who use your branded mobile app get a barcode automatically the first time they open the Account page — no action needed from you. You can also assign or manage barcodes manually from the dashboard.
Open the client profile
Go to Customers → Clients and click on a client's name.
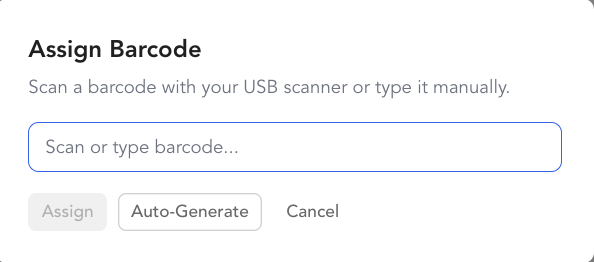
Find the barcode section
In the right sidebar of the client profile, scroll down to the Barcode section (below tags and segments).
To change or remove an existing barcode, use the Change or Remove links next to it.
You can also download an Apple Wallet pass for any client from their barcode section. Click Download Apple Wallet Pass to generate a .pkpass file you can send to the client.
What's next
Once barcode check-in is set up, your front desk staff can start scanning clients in.
Scan clients in at the front desk →