Barcode scanner check-in
Use a USB barcode scanner at the front desk to check clients in instantly
With a USB barcode scanner connected to your front desk computer, you can check clients in by scanning the barcode on their phone or printed card. The scan takes less than a second — no typing, no searching.
Looking for the client's perspective? Share Check in with your barcode → with your clients so they know where to find their barcode and how to use it.
Barcode scanning requires setup first. If you haven't enabled it yet, start with Set up barcode check-in →.
What you need
- A USB barcode scanner that supports keyboard wedge mode (most standard scanners do — they plug in via USB and act like a keyboard)
- A computer with the Arketa dashboard open
- Gym check-in enabled for at least one location
No special drivers or software are needed. Plug in the scanner and it works immediately.
Check in a client with a barcode
Open the Check-Ins page
Go to Customers → Check Ins in the dashboard.
Select a location
Use the location selector at the top of the dashboard to choose the location where you're checking clients in. Barcode scanning only activates when a specific location is selected — it won't work if set to "All Locations."
Scan the client's barcode
Point the scanner at the barcode on the client's phone or printed card.
- Success — a toast notification shows the client's name and "checked in." The check-in appears in the table.
- Failure — a panel opens on the right showing the client's profile and why check-in failed (e.g., no active membership, expired package).
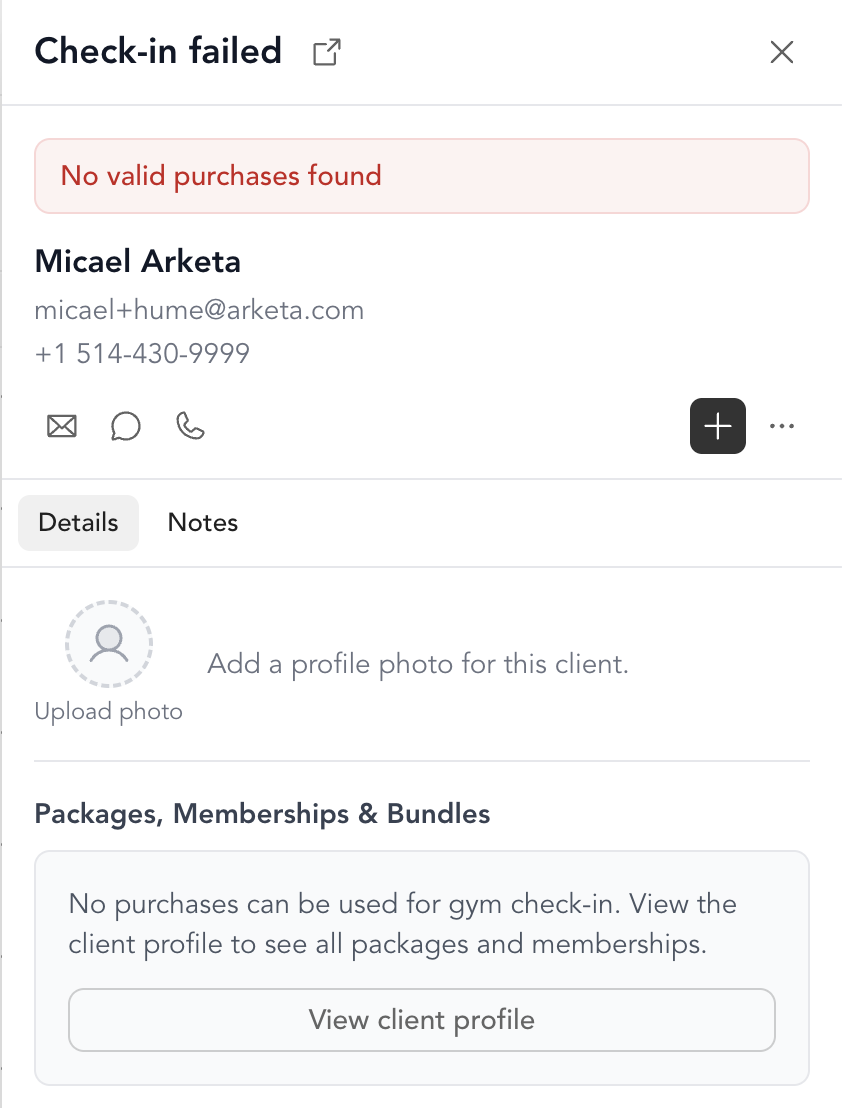
When a scan fails
If the barcode is recognized but the client can't be checked in, a details panel slides open on the right side of the screen. It shows:
- Why check-in failed — the specific error (e.g., "No valid purchases found")
- Client profile — name, email, and photo
- Active packages and memberships — so you can see what they have (or don't have)
- Link to full profile — click the arrow icon to open their complete client profile
This helps your front desk staff resolve the issue on the spot without leaving the check-ins page.
If the barcode doesn't match any client at all, you'll see a "Check-in failed" toast — no panel opens. This typically means the barcode hasn't been assigned to anyone.
Confirmation modes
Depending on your settings, scanned check-ins are either:
| Mode | What happens on scan |
|---|---|
| Auto-confirm | Client is checked in and confirmed immediately — no staff action needed |
| Manual confirm | Scan creates a pending check-in. Staff clicks Confirm in the table to complete it. |
You can change this in Settings → Business → General under Require confirmation for location check-in.
Most studios use auto-confirm for a faster front-desk experience. Use manual confirm if you need staff to verify identity or collect something before completing check-in.
Manual check-in (without a scanner)
If a client doesn't have their barcode or you don't have a scanner handy, click Manual Check-In at the top right of the check-ins page. Search for the client by name, email, or phone and check them in directly.