
Add a client to a class
How to add an existing or new client to a class from the check-in screen, with or without payment.
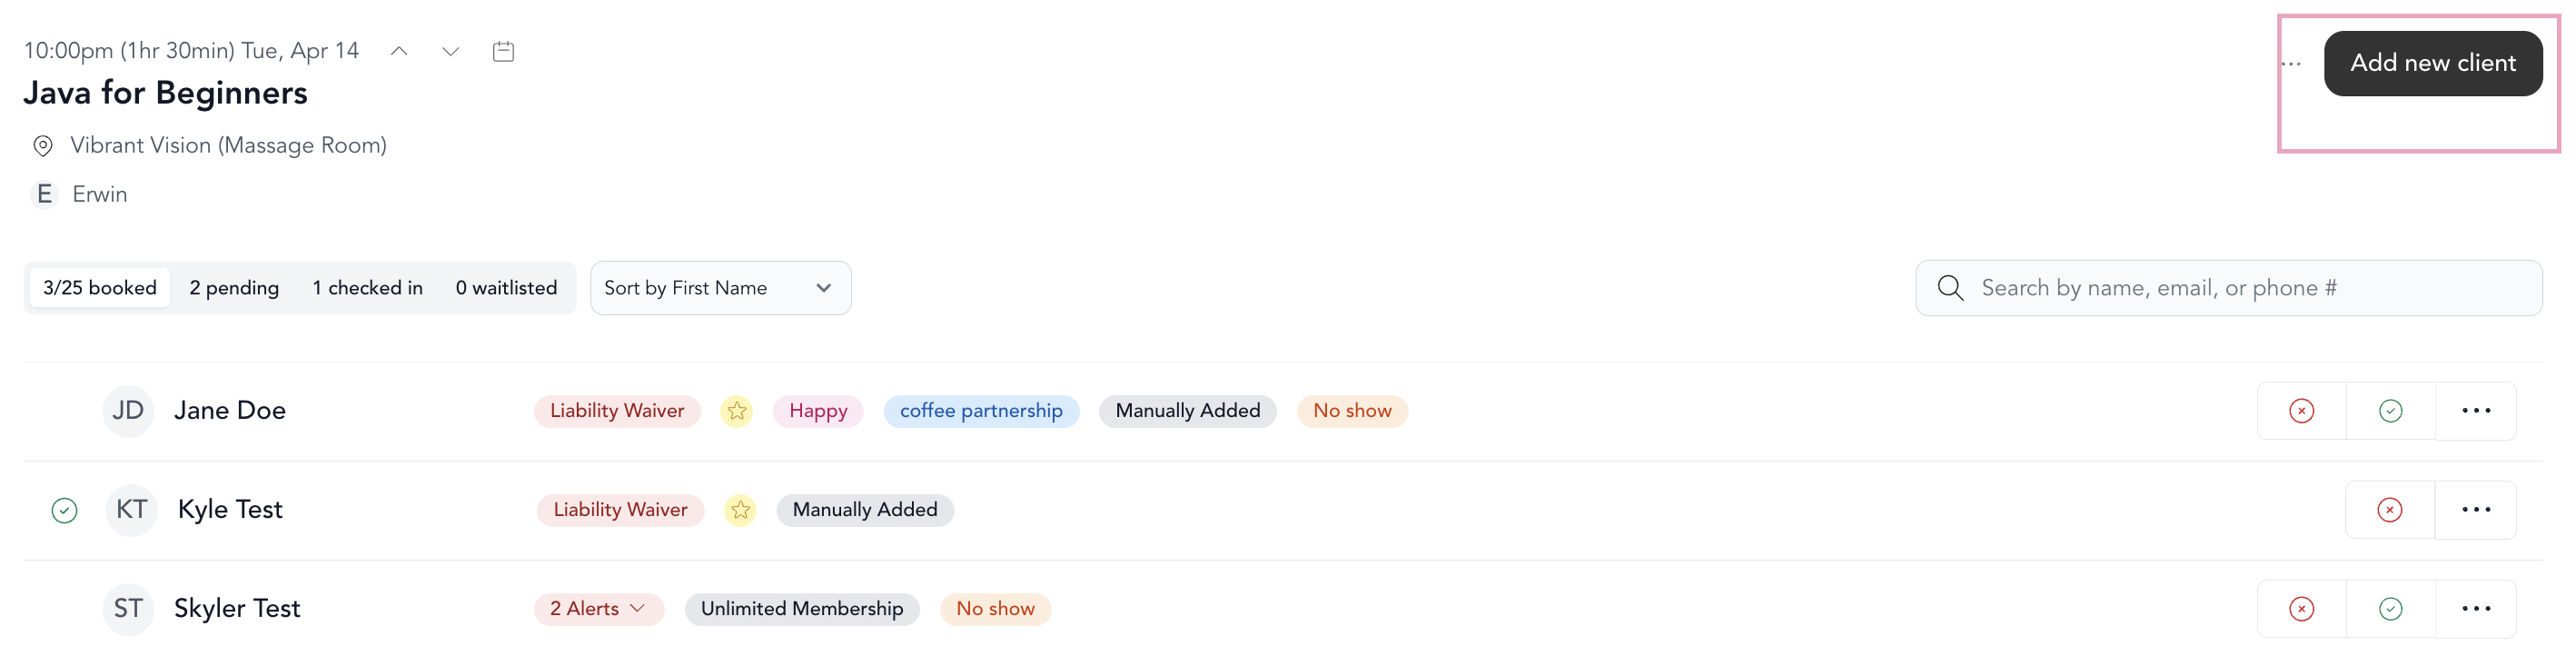
You can add clients to a class directly from the check-in screen — whether they have an existing package, need to purchase something new, or you want to add them for free.
Add a client with an existing package or subscription
Open the check-in screen
Go to Full Schedule and click the class.
Search for the client
Type their name, email, or phone number.
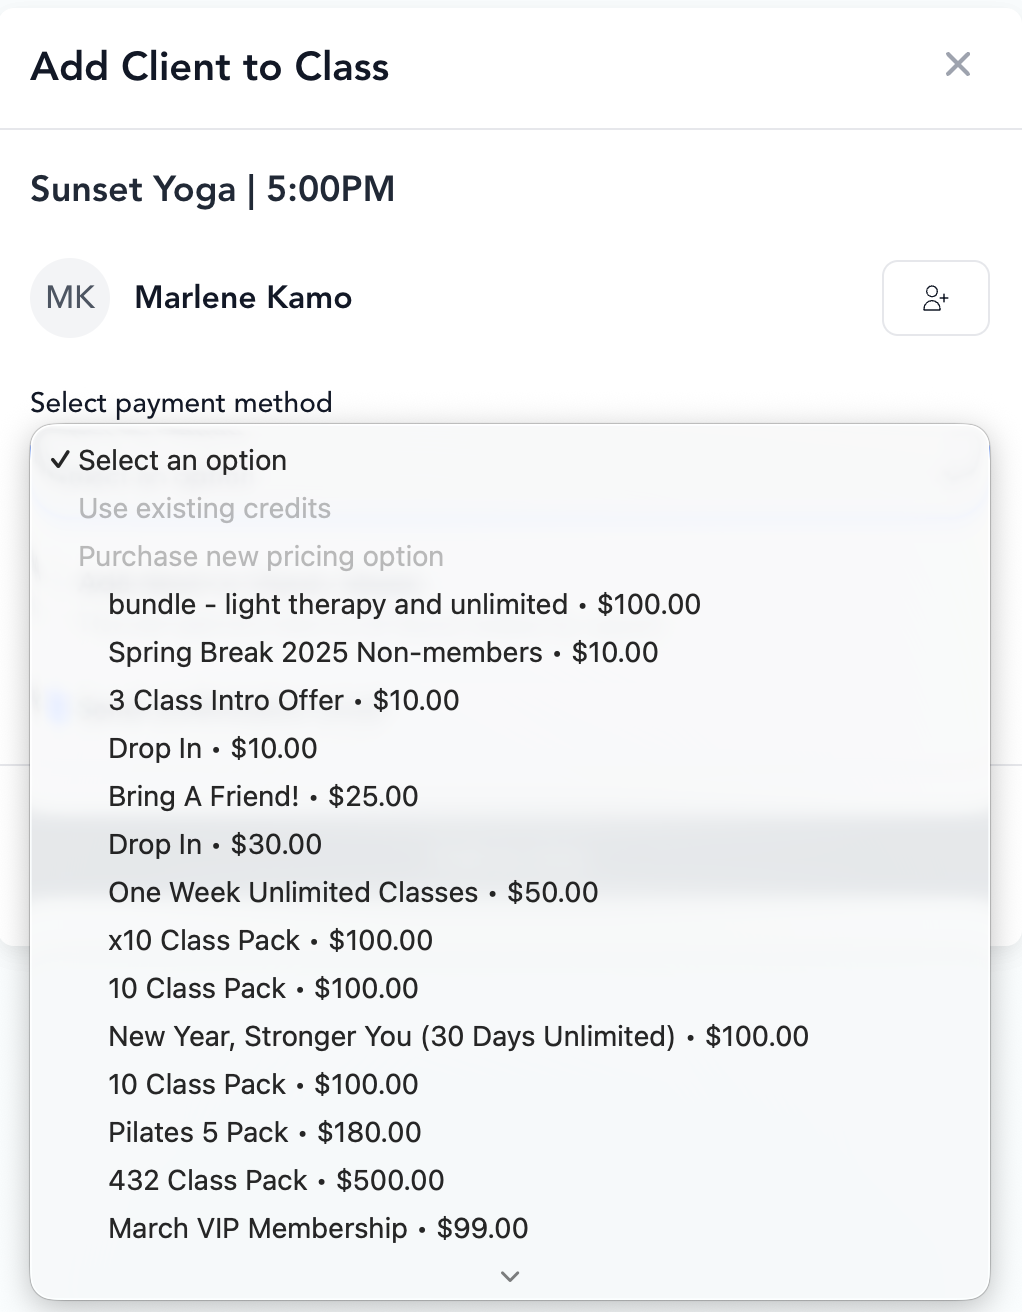
Select their payment method
Choose from their available packages, subscriptions, or other payment options.
Add to class
Confirm and they're in.
Add a new client and complete a purchase
If the client doesn't have an account yet:
Click Add New
From the check-in screen, click Add New.
Create a new client
Enter their name, email, and any other information.
Select a pricing option
Choose the package, subscription, or drop-in they're purchasing.
Add a payment method
Enter their card details or select another payment method.
Click Buy Now
This purchases the pricing option and adds them to the class in one step.
Purchase for a guest (one client pays for another)
Sometimes one client pays for someone else's spot — a friend they're bringing, or a booking covered by another client's account credit. The add-to-class window handles this with Purchase for a guest.
Search for the paying client
Go to Full Schedule, click the class, and search for the client who is paying. The payment options you're offered belong to this client.
Click Purchase for a guest
Click the person icon to the right of the client's name, then search for the guest the spot is for.
Select a payment method
Choose from the paying client's packages and subscriptions, or the class drop-in price.
Confirm
If the option needs payment, checkout opens with the class already in the cart under the paying client, and you take payment from that client.
The order matters. The client you search for first is the one who pays; the person you pick under Purchase for a guest is the one the booking is for. If you search for the guest first, you'll only see that person's own payment options.
Classes and events aren't listed in the point of sale on their own — the POS catalog covers memberships, packages, bundles, communities, retail, and gift cards. To sell a spot in a class or event, including an event with its own drop-in price, always start from the class on Full Schedule. Checkout opens from there with the class already in the cart.
Add a client to future classes
When the class is part of a recurring series, the add-to-class window also offers Add client to future classes. This books the client into the upcoming sessions of that series as unpaid.
- Tick Add client to future classes. The client needs a payment method on file, unless your studio allows recurring bookings without one.
- Under Select duration, choose how far ahead to book. The default is Forever, which keeps booking the client into the series indefinitely. Choose a number of weeks instead to stop on a set date — each option shows the date it runs through.
- Click Add to class.
If one of those sessions is full, the client goes onto its waitlist, or is skipped when the waitlist is full too.
Each class series is tracked separately. Setting a duration on one series does not change a recurring booking the client already has on a different series — if a client is still being booked week after week, check whether another series is set to Forever.
To stop a recurring booking, open one of the client's upcoming reservations in that series, cancel it, and tick Cancel upcoming reservations.
Quick purchase (for returning clients)
If you need to sell something fast — a drop-in, retail item, or add-on — use the quick purchase shortcut:
- Press ⌘K (Mac) or Ctrl+K (Windows) to open the POS search
- Find the item
- Select payment method and confirm
More about the quick purchase flow →
Add a client for free
To add a client without charging them (instructor covering a class, comp session, etc.):
- Click Add New
- Search for the client
- Under payment method, select Unpaid or Free
- Add to class
Adding a client as "free" or "manually added" can affect payroll calculations if your pay rates exclude manually added clients. Check your pay rate settings if this matters for your payroll. Pay rate settings →