Check-in screen overview
Everything you can do from Arketa's class check-in screen during and after class.
The check-in screen is your command center during class. You can access it by clicking on any class in your Full Schedule.
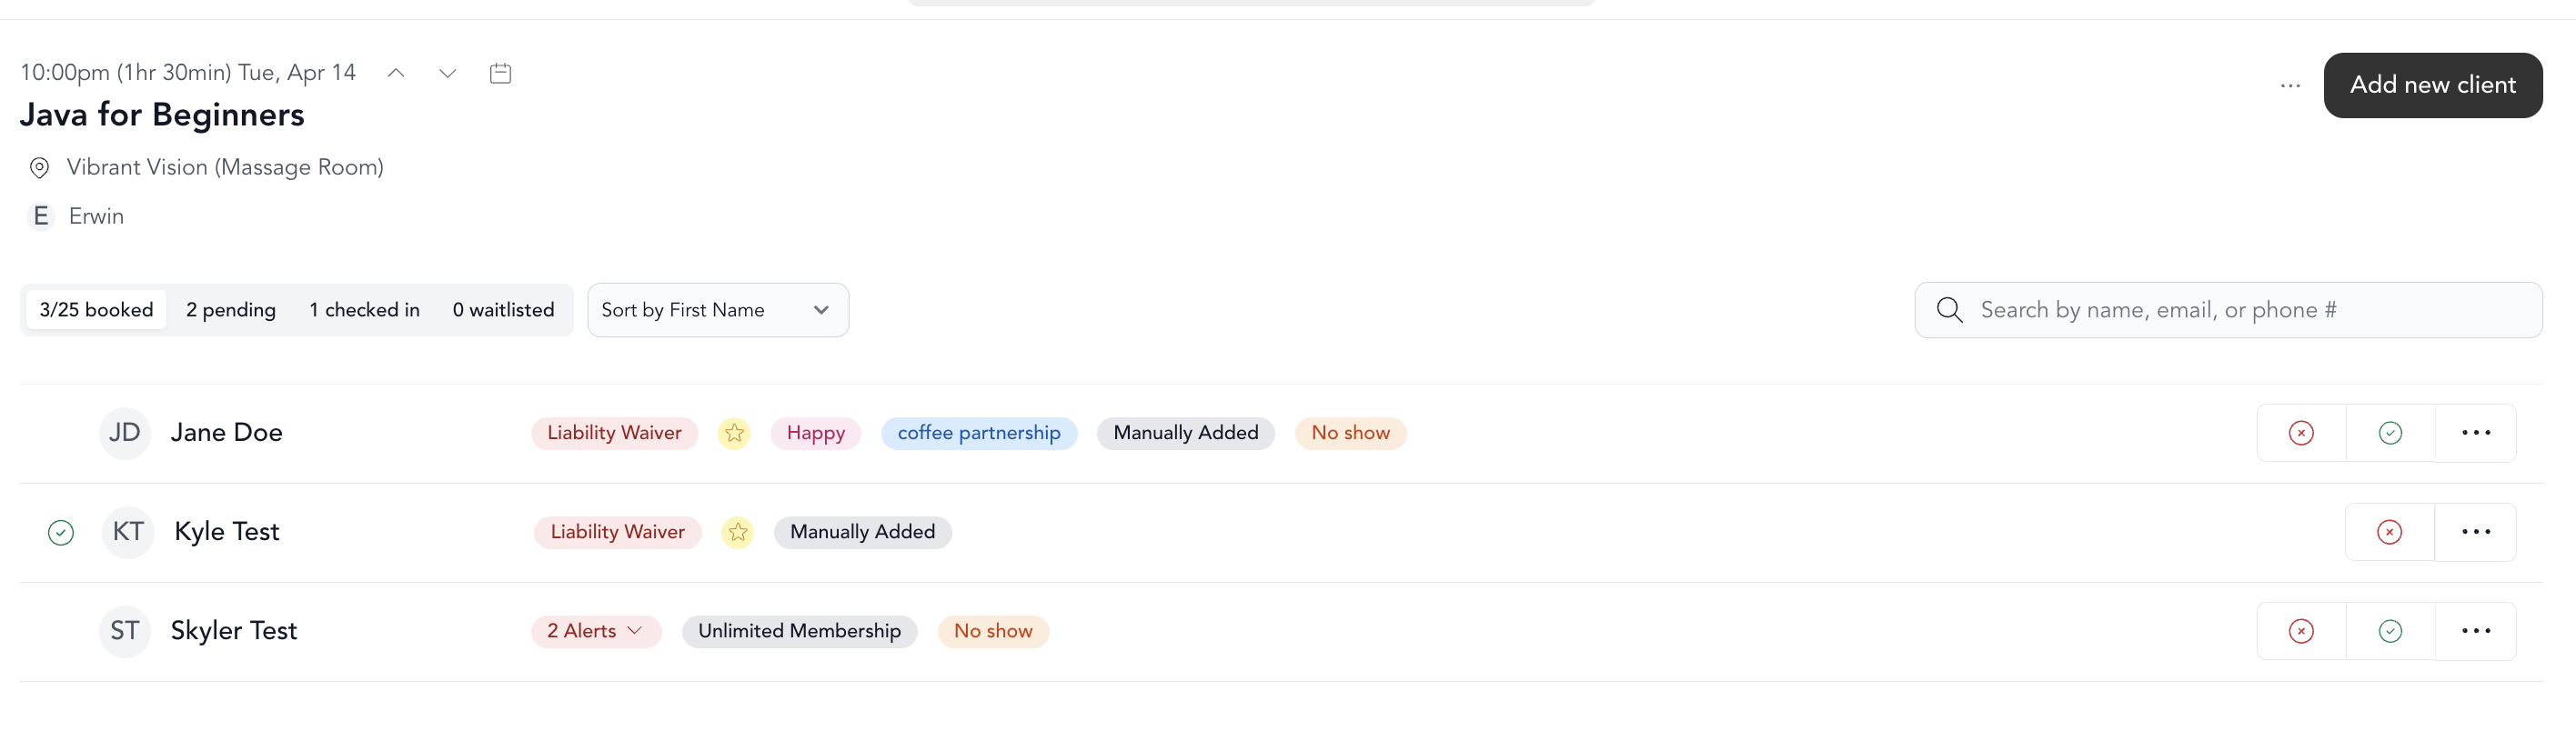
What you'll see
The check-in screen shows everyone who has booked the class, organized into tabs:
- Enrolled — clients who have booked and paid (or have a confirmed reservation)
- Waitlist — clients waiting for a spot to open up
- Cancelled — clients who cancelled their booking
Each client row shows their name, payment status, and check-in status.
Icons on the check-in screen
Small icons appear next to a client's name to give you helpful context at a glance. Here's what each one means:
| Icon | What it means |
|---|---|
| First-time student | It's the client's first livestream or in-person class, or their first private session with you. On-demand (VOD) views don't count. |
| Total class count | The total number of classes the student has taken — livestream/in-person classes plus private sessions. This does not include on-demand video. Tap the client's profile to see their total bookings across all class types. |
| Special milestone | The class-count icon turns bright blue when the student hits a milestone — 1, 10, 25, 50, 75, 100, 150, 200, 250, and then every 50th class after that. It's a cue to give them a little shoutout. |
| Birthday month | It's the client's birthday month. Hover over the icon to see the exact date. |
| Injuries | Shows any injuries the client reported in their profile. |
| Liability waiver required | The client hasn't signed your liability waiver yet. You can send them a waiver right from the roster. |
The first-time and total-count icons only reflect livestream, in-person, and private sessions. On-demand (VOD) video views are not included in these counts.
Navigating between classes
- Use the arrows next to the class name to jump to the previous or next class on the same day
- Click the Calendar link to jump to a different date
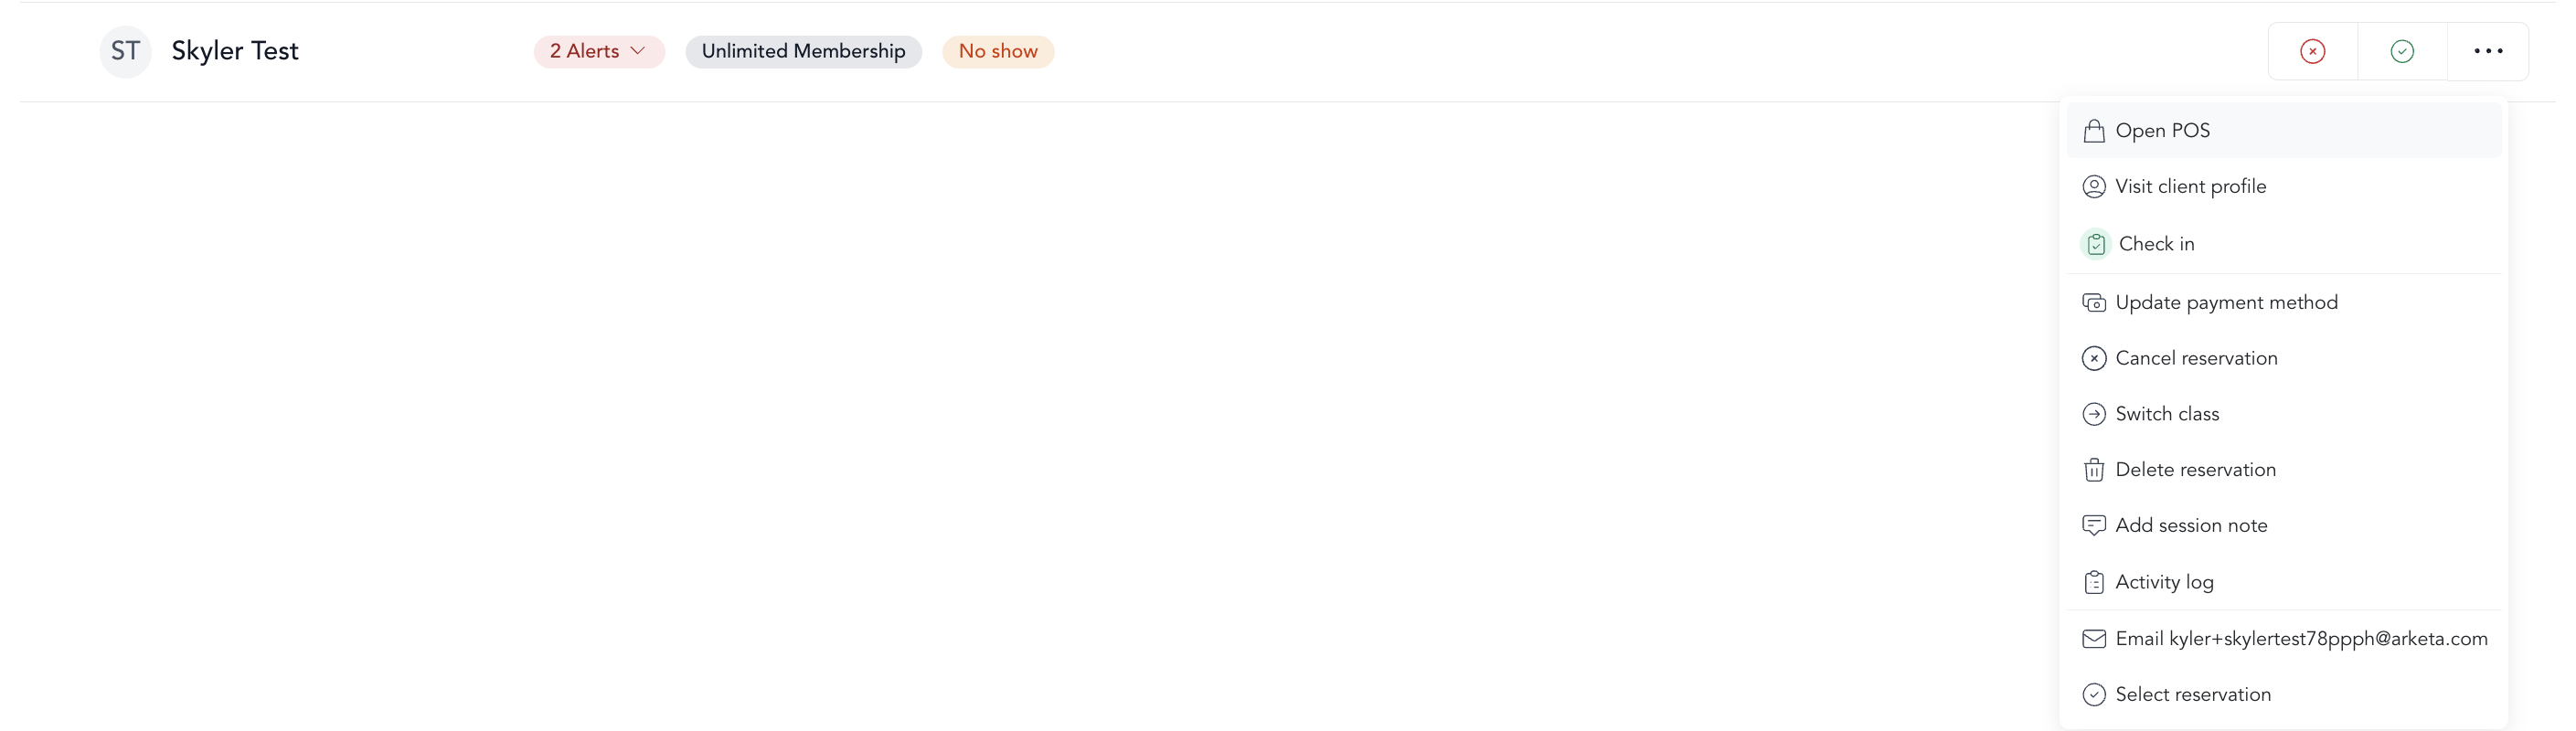
Actions available from the check-in screen
For the whole class:
- Add a new client
- Email all enrolled clients
- Export or print the roster (PDF or CSV)
- Send a liability waiver
For individual clients:
- Check in (or undo check-in)
- Cancel, delete, or late cancel their reservation
- Move them to a different class
- Swap their payment method
- View their profile
Quick keyboard shortcuts
- Press C to quickly open the Add Client dialog
- Press ⌘K (Mac) or Ctrl+K (Windows) to open the quick search/POS
Check-in status and no-shows
When class ends, clients who were never checked in are automatically tracked as no-shows. This data flows into your late cancel/no-show reporting.
If you have automated late cancel and no-show fees configured, those are applied automatically based on your settings. Set up automated fees →