Build an automation
Create triggered sequences of emails, texts, and tasks that run automatically.
Automations run in the background — once a client meets a trigger condition, they're enrolled and the sequence begins. You set it up once; Arketa handles the rest.
Automations require the Marketing Suite add-on. Contact Arketa support to enable it.
Create an automation

- Go to Marketing → Automations
- Click Create Automation
- Choose a trigger — what event starts the automation
- Optionally set a goal to measure success
- Click + to add actions (email, SMS, task, time delay, tag)
- Toggle it Live when you're ready
You can also start from a pre-made automation and customize it.
Step 1: Choose a trigger
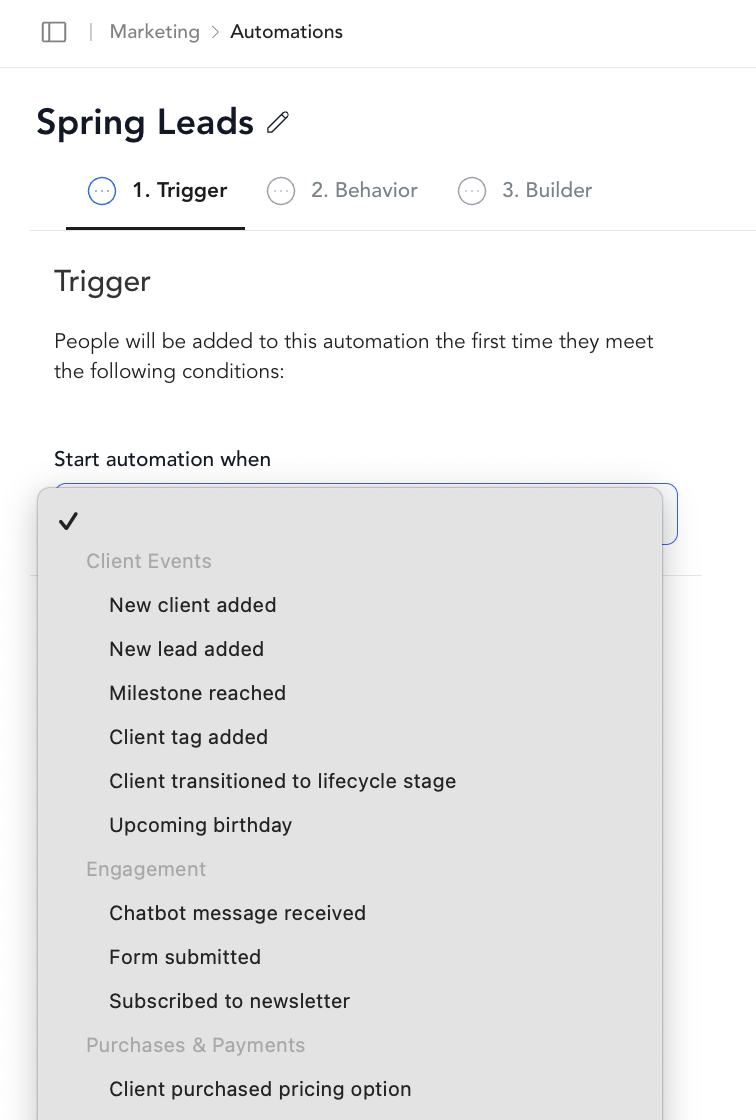
The trigger is the event that enrolls a client. See the full triggers reference for descriptions of each option.
Common starting points:
- New client added — welcome new clients automatically
- Client purchased pricing option — send onboarding sequences after a purchase
- Checked into first class — follow up after someone's first visit
- Milestone reached — celebrate loyalty milestones
- Subscription canceled — start a win-back sequence
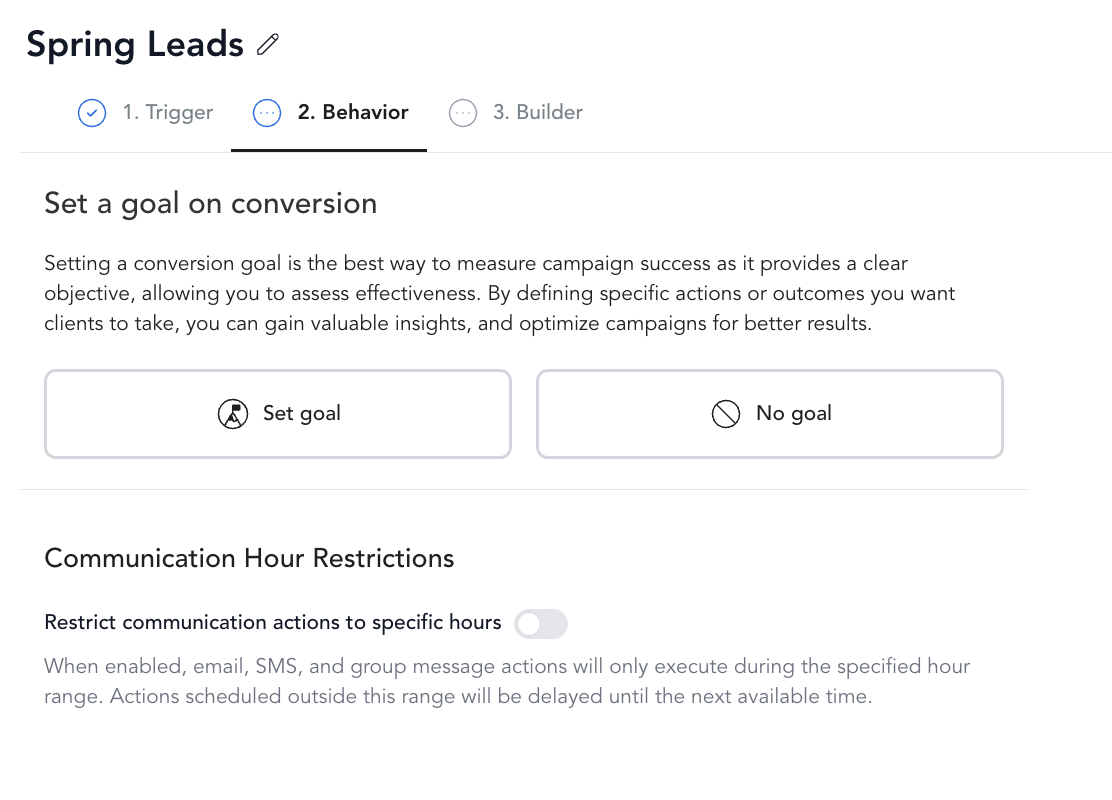
Step 2: Configure behavior
After choosing a trigger, you'll see a Behavior step with two optional settings:
Re-enroll — If a client triggers the automation again (e.g., purchases a second time), should they re-enter the sequence? Toggle on to allow re-enrollment. Off by default on new automations.
Restrict communication hours — Limit when emails and SMS go out. Enter a time range in 24-hour format based on your business timezone. If a message would send outside that window, it waits until the next valid hour.
Step 3: Add actions
Actions are the steps in your sequence. Mix and match:
| Action | What it does |
|---|---|
| Send an automated email to the client |
See actions reference for details on each.
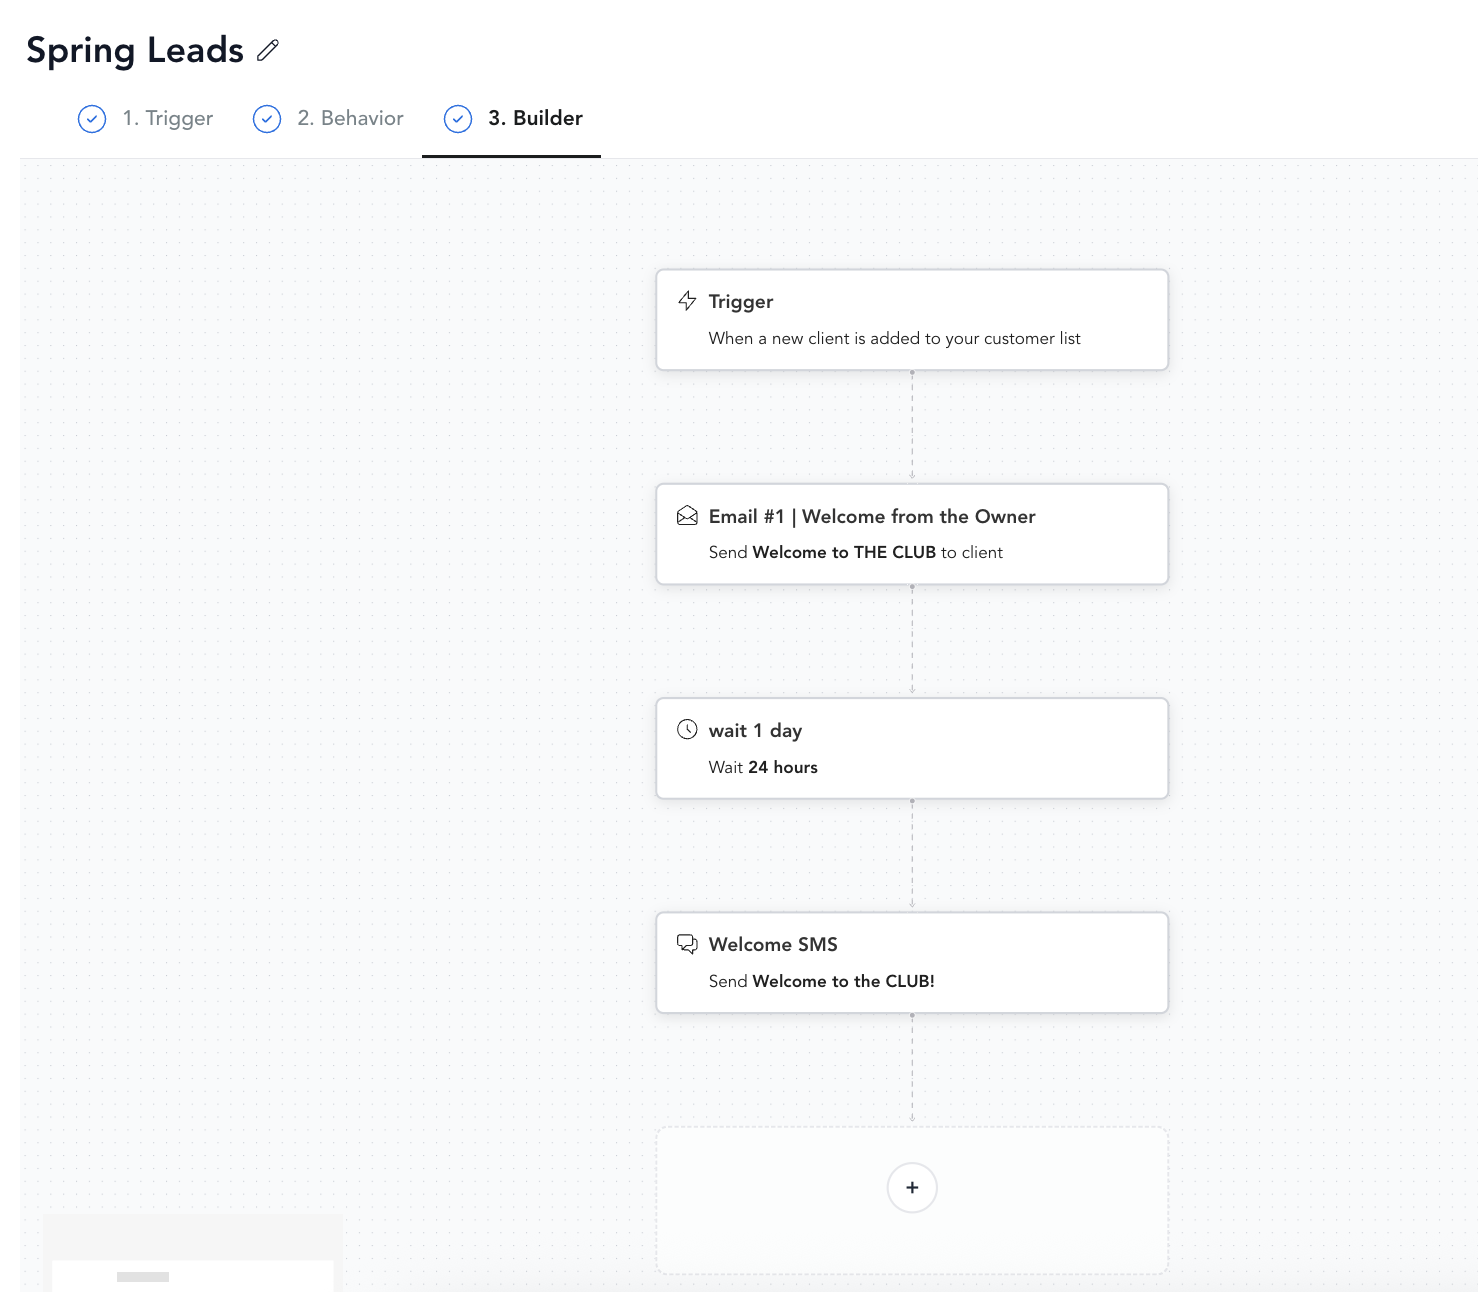
Use time delays between messages and before/after conditional statements to avoid overwhelming clients and ensuring your automation has time to work effectively. A welcome email followed immediately by an upsell feels pushy — space them out by a few days.
Step 4: Set a goal (optional)
Goals let you track whether the automation is working. For example, if your goal is for a client to purchase a membership, you can measure how many enrolled clients converted.
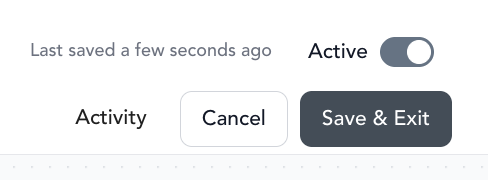
Step 5: Go live
When the automation is ready, toggle it Live in the top right corner. From that point forward, any client who meets the trigger condition will be enrolled automatically.
Automations only enroll clients whose trigger event happens after the automation goes live. They don't reach back and enroll clients who already met the condition in the past — for example, someone who purchased an eligible pricing option before you created the automation won't be enrolled. To include a specific past client, open the automation's Enrollments tab and use Enroll User to add them manually.
Managing automations
To edit a running automation:
- Go to Marketing → Automations
- Click the edit pencil under Actions
- Make your changes — they take effect going forward for clients not yet enrolled
- To pause it, toggle the automation Off
An automation set to Off stays in your list but stops enrolling clients and doesn't run any actions.
You can't manually remove individual clients from an automation mid-sequence. To stop the automation from running, toggle it off or change the trigger conditions.