Create a spot map
Set up a visual room layout so clients can choose their bike, mat, or station when booking, and match class capacity to your spots to prevent overbooking.
Spot booking lets clients pick a specific spot -- bike, rowing station, yoga mat, barre position -- when they book a class. To enable this, you first need to create a spot map for each room.
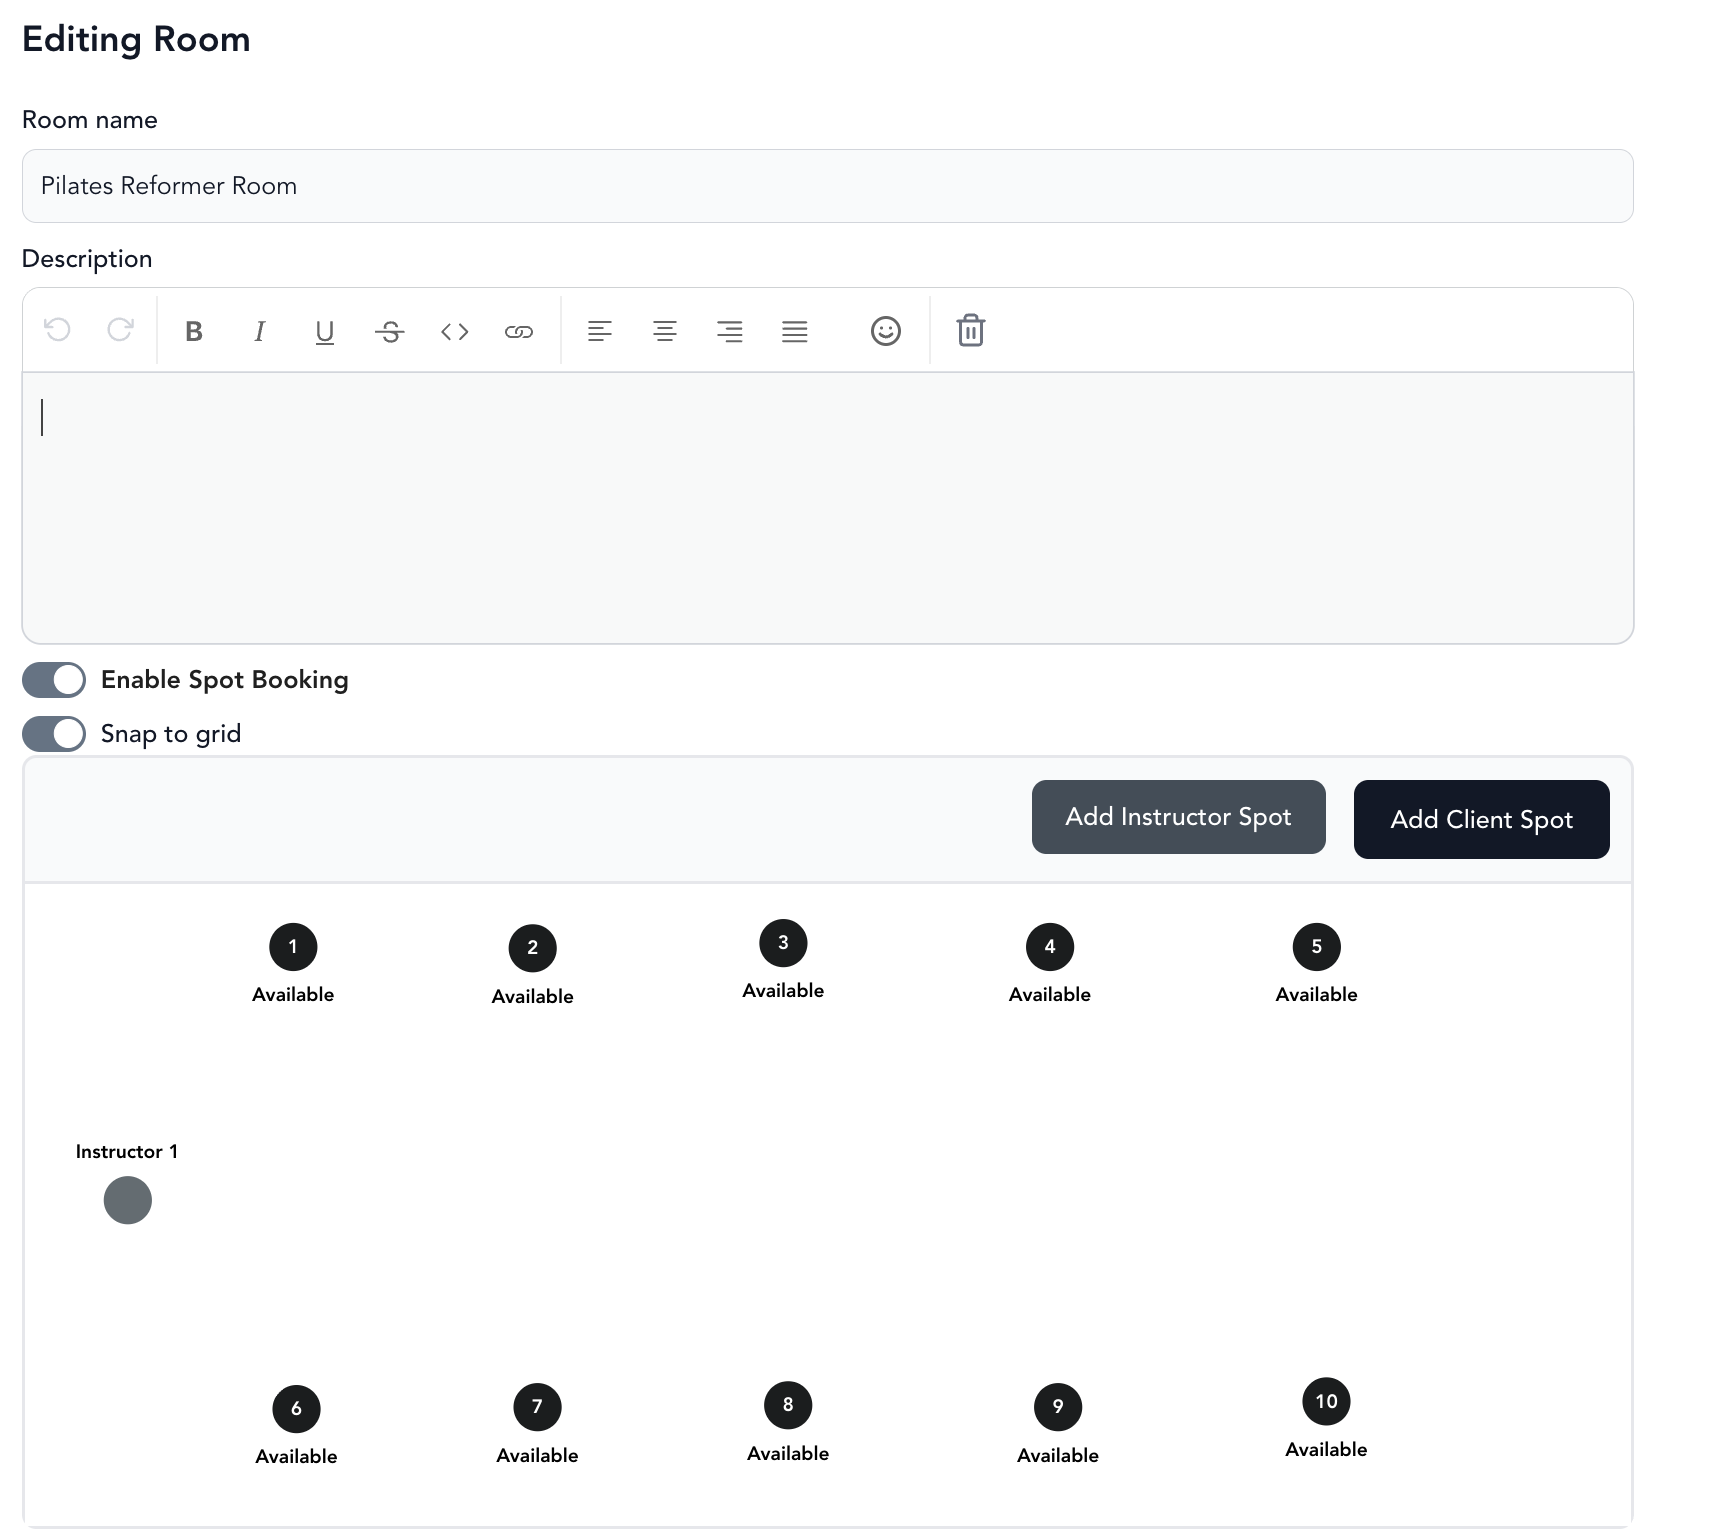
Set up a room with spots
-
Go to Settings → Locations
-
Select your location (or create one if you haven't yet)
-
Click Add Room or tap into an existing room to edit it
-
Use the map builder to lay out your room:
- Add Instructor Spot — marks where the instructor will be positioned
- Add Client Spot — adds a bookable spot (bike, mat, station, etc.)
-
Drag spots into position to match your actual room layout
-
Set the room's capacity and select which services use this room
-
Click Save Details
Naming and labeling spots
Each client spot can have a custom name or number. Click on a spot to edit its label -- for example, "Bike 1", "Mat A", or "Row 3".
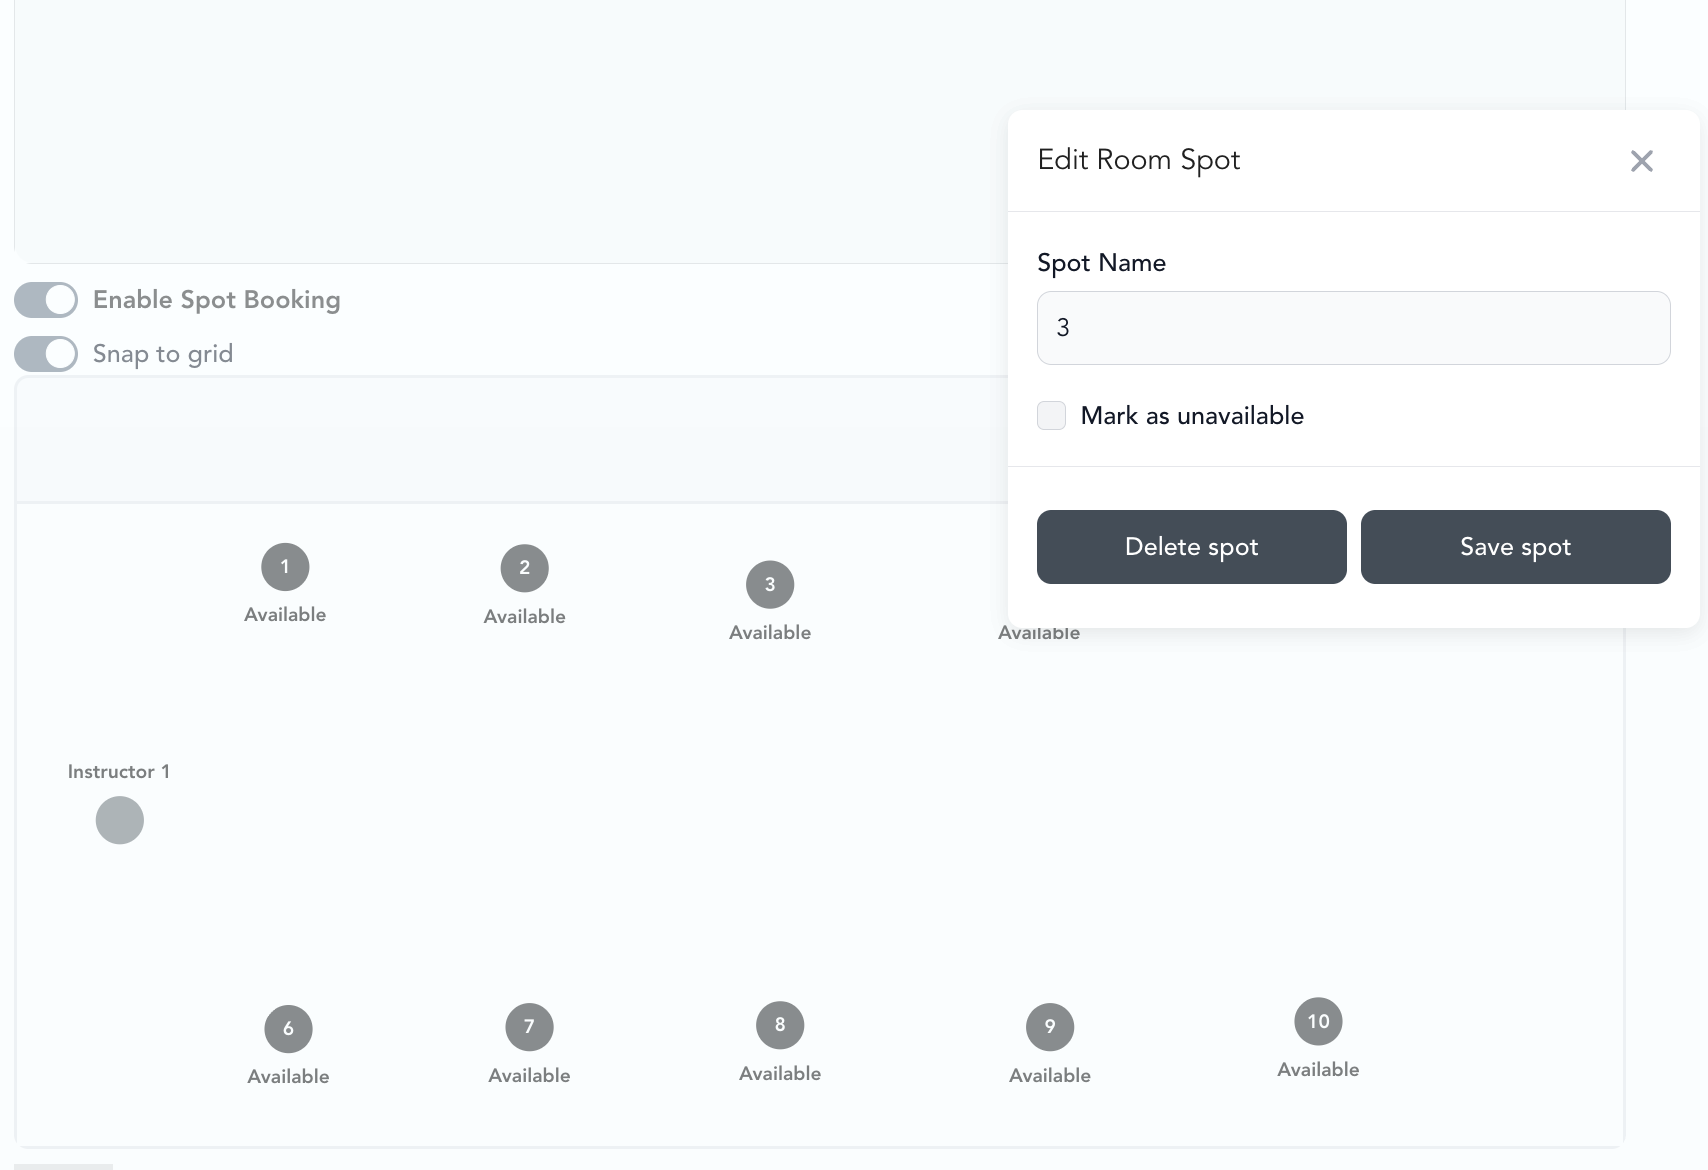
You can also mark individual spots as unavailable if a piece of equipment is out of service. See manage spots for how to do that.
Connecting a room to a class
Once your room is saved, it becomes available to assign to classes that take place in that location. When you create or edit a class, select the room — clients will then see the spot map at checkout.
Set up your spot map before you schedule classes that use that room. Clients who've already booked a class won't automatically be assigned a spot — you'll need to assign them manually from the roster.
Match class capacity to your spot map
Two separate settings control how many clients can be in a spot-booking class, and they do not sync with each other automatically. If they get out of step, clients can complete a booking with no spot left to assign to them.
| Setting | Where to set it | What it controls |
|---|---|---|
| Class max capacity | Group Classes → My Schedule → edit class | The hard ceiling on total bookings. Once reached, the class shows as full and new clients are directed to the waitlist. |
| Room capacity | Settings → Locations → [Location] → Rooms | The number of physical spots (bikes, reformers, stations) built on the room's spot map. |
These two settings do not automatically sync with each other. If your class max capacity is higher than the number of active client spots on the map — for example, capacity set to 20 but only 15 client spots built — clients can still complete a booking, leaving some with no assignable spot.
To prevent this, set your class max capacity to exactly match the number of active client spots on the room's map. If your room has 20 bikes, set the class capacity to 20 — or lower if you want to hold spots in reserve.
How overbooking happens
Class capacity exceeds the spots on the map
The most common cause. When your class max capacity is higher than the number of active client spots, the capacity counter still shows open seats even though the map has no spots left to assign. Clients fill the seats but not the map.
Prevention: Match class max capacity to the number of active client spots on the room's map.
Staff booking a client past capacity from the dashboard
Adding a client from the client-list view rather than the map view can complete a booking even when the class shows as full, leaving the client on the roster with no spot.
Prevention: Use the map view to confirm an open spot before completing a manual booking, and verify the roster count against available spots before class begins.
Automated waitlist moves a client in after the map is full
When automated waitlisting is on, a client can be pulled off the waitlist as soon as a capacity seat opens — even if every mapped spot is already taken.
Prevention: Watch for this on any class where the capacity is higher than the number of mapped spots. Keeping the two numbers matched removes the risk.
Resolve a duplicate or unassigned spot
A duplicate assignment — the same spot given to two clients — usually happens when bookings are made from different views at the same time. Here's how to sort it out.
Find the conflict
Open the class from the roster or check-in screen and review the assigned spots. Look for the spot that's been given to two clients, or the client who was left with no spot.
Reassign one client to an open spot
Move one of the affected clients to an open spot. See book a spot for a client.
Make room if there aren't enough spots
If there are genuinely more clients than spots, either add a spot to the map or move a client to another class or the waitlist. Then lower the class max capacity to match the map so it can't happen again.
How the spot map looks in the mobile app
On the mobile app, the spot map automatically adapts to fit a phone's tall, narrow screen. If your room is wider than it is tall in the dashboard builder, the app rotates the layout so the spots are larger and easier to read and select. Because of this, the orientation a client sees in the app can look different from the dashboard — for example, an instructor spot placed along the top edge in the builder may appear along the side in the app.
The spots keep the same positions relative to one another, so a client can still tell which spot sits next to the instructor or a neighboring spot. This rotation is automatic and is meant to make wide rooms easier to use on a phone.