Add a retail product
Create a new product in your retail inventory.
Add a product
- Go to Beyond Classes → Retail Products
- Click Add Product
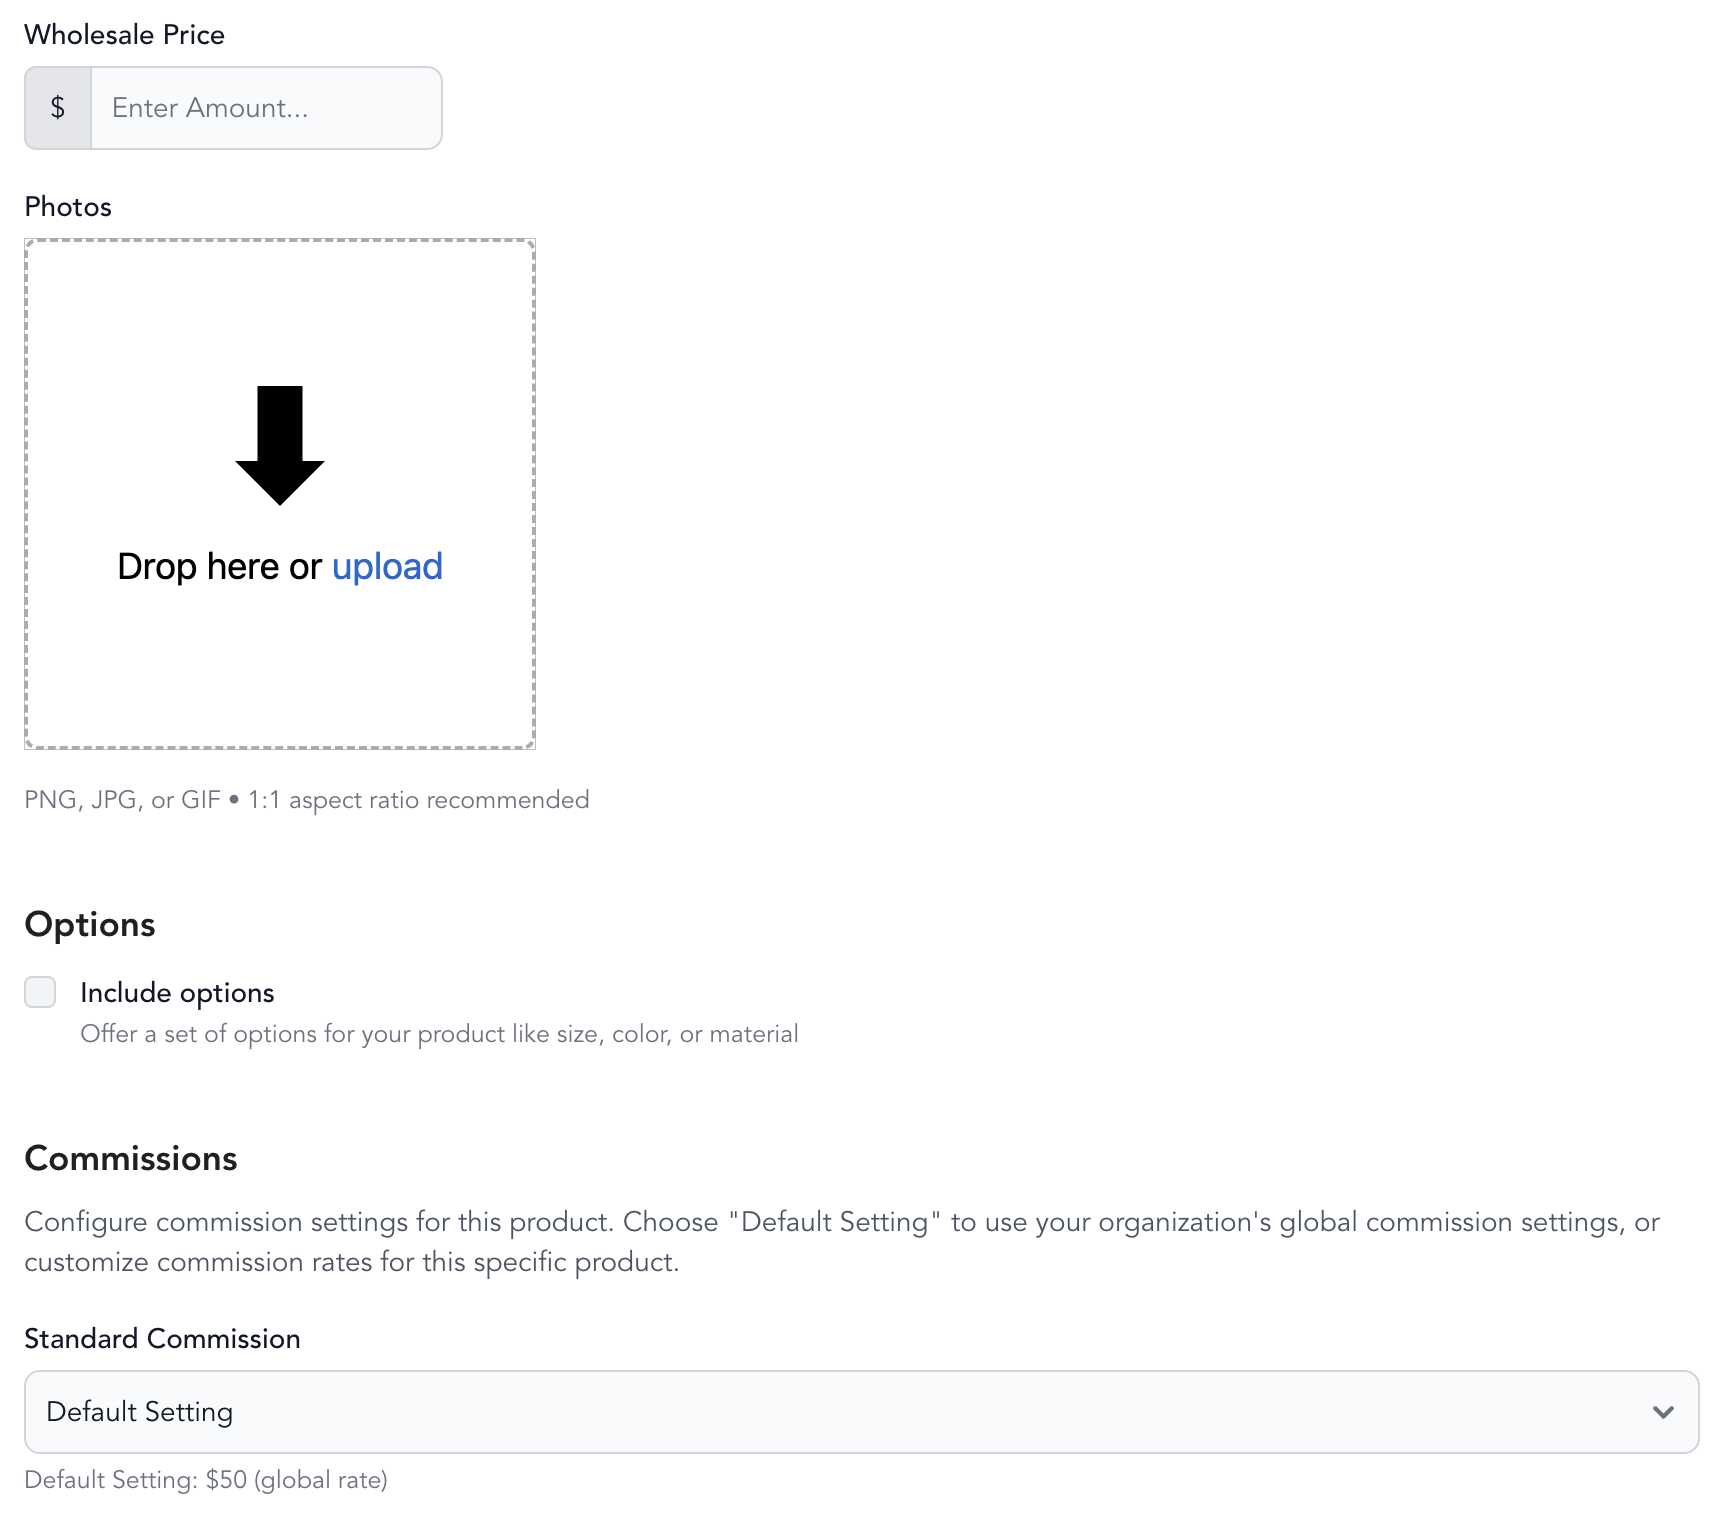
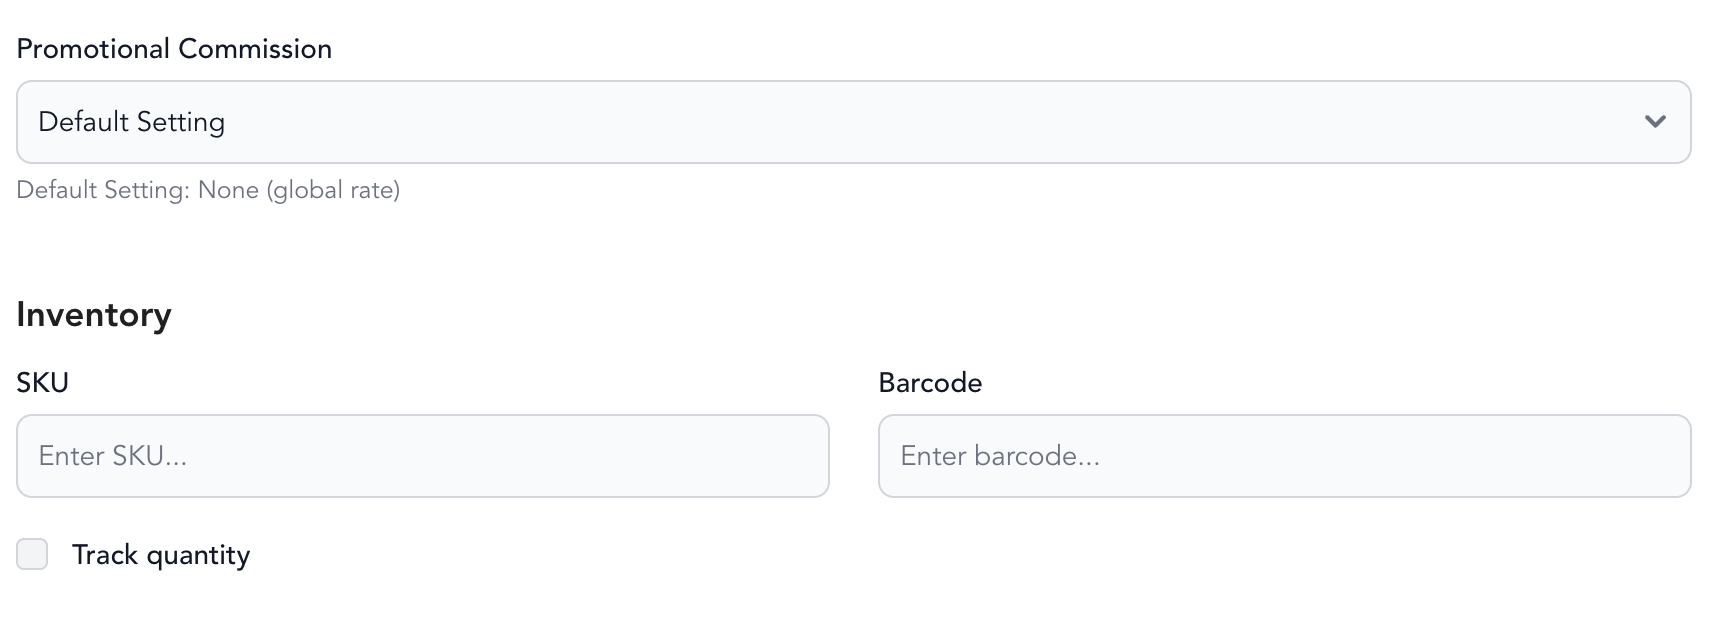
- Fill in the product details:
| Field | Description |
|---|---|
| Name | What clients see — keep it clear and descriptive |
| Description | Product details, materials, sizing info |
| Supplier | The vendor or supplier name. Click "Add new supplier" to add one. |
| Retail price | What clients pay |
| Wholesale price | What you paid — used for margin calculations in reporting |
| Photo | Product image shown at checkout |
| Options | Size, color, material — add variants here |
| SKU | Internal stock-keeping unit identifier |
| Barcode | Product barcode digits |
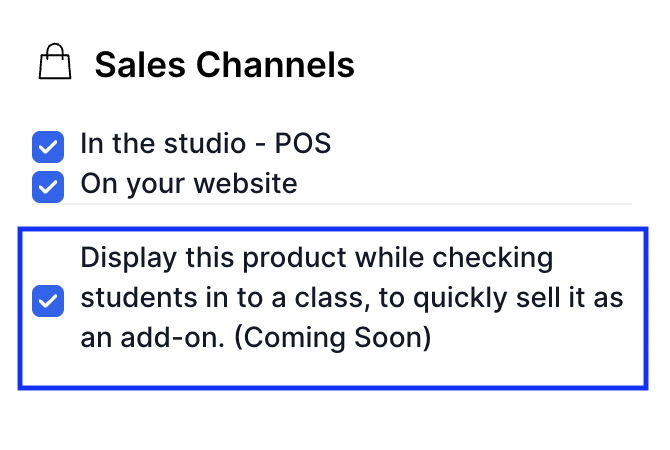
- Select where the product should be listed (POS, online widget, or both)
- Set Product status to Active when ready to sell
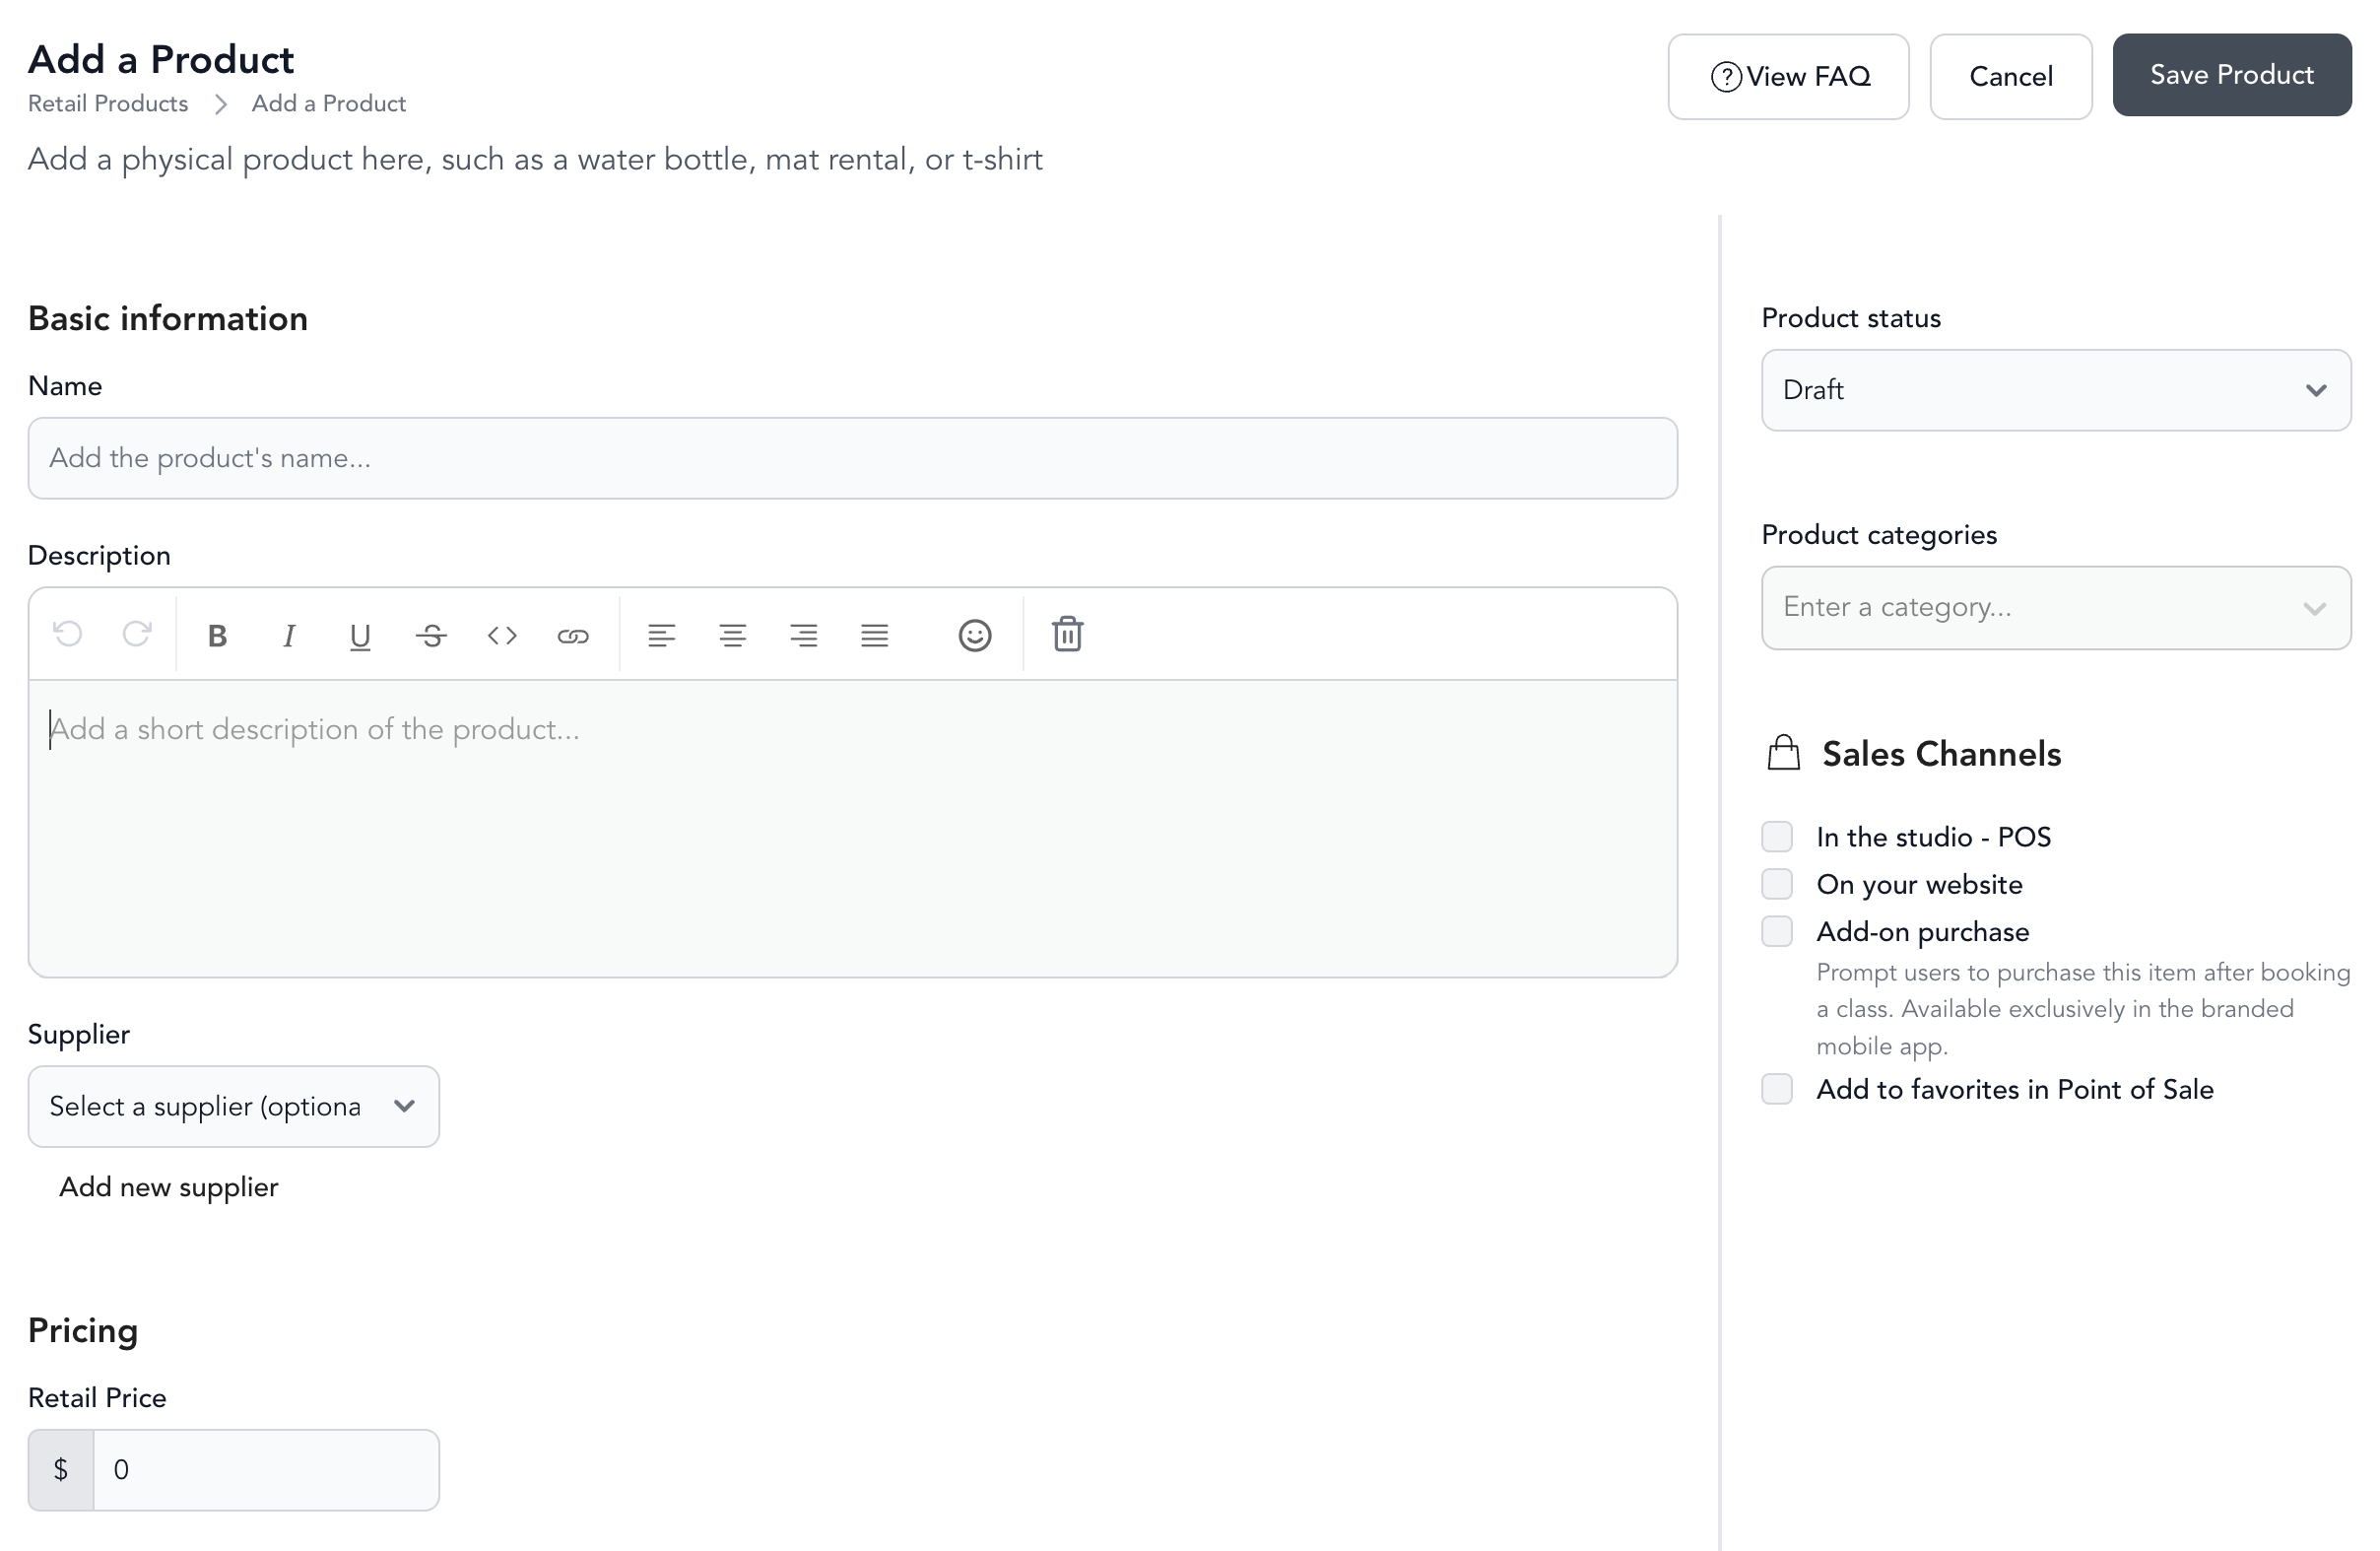
Products in Draft status don't appear at checkout. Use Draft to build out a product before making it available.
Manage products
In Beyond Classes → Retail Products, hover over a product to reveal its actions. From there you can:
- Duplicate — copy an existing product as a starting point for a similar one
- Edit — update the product's details
- Delete — remove the product from your inventory
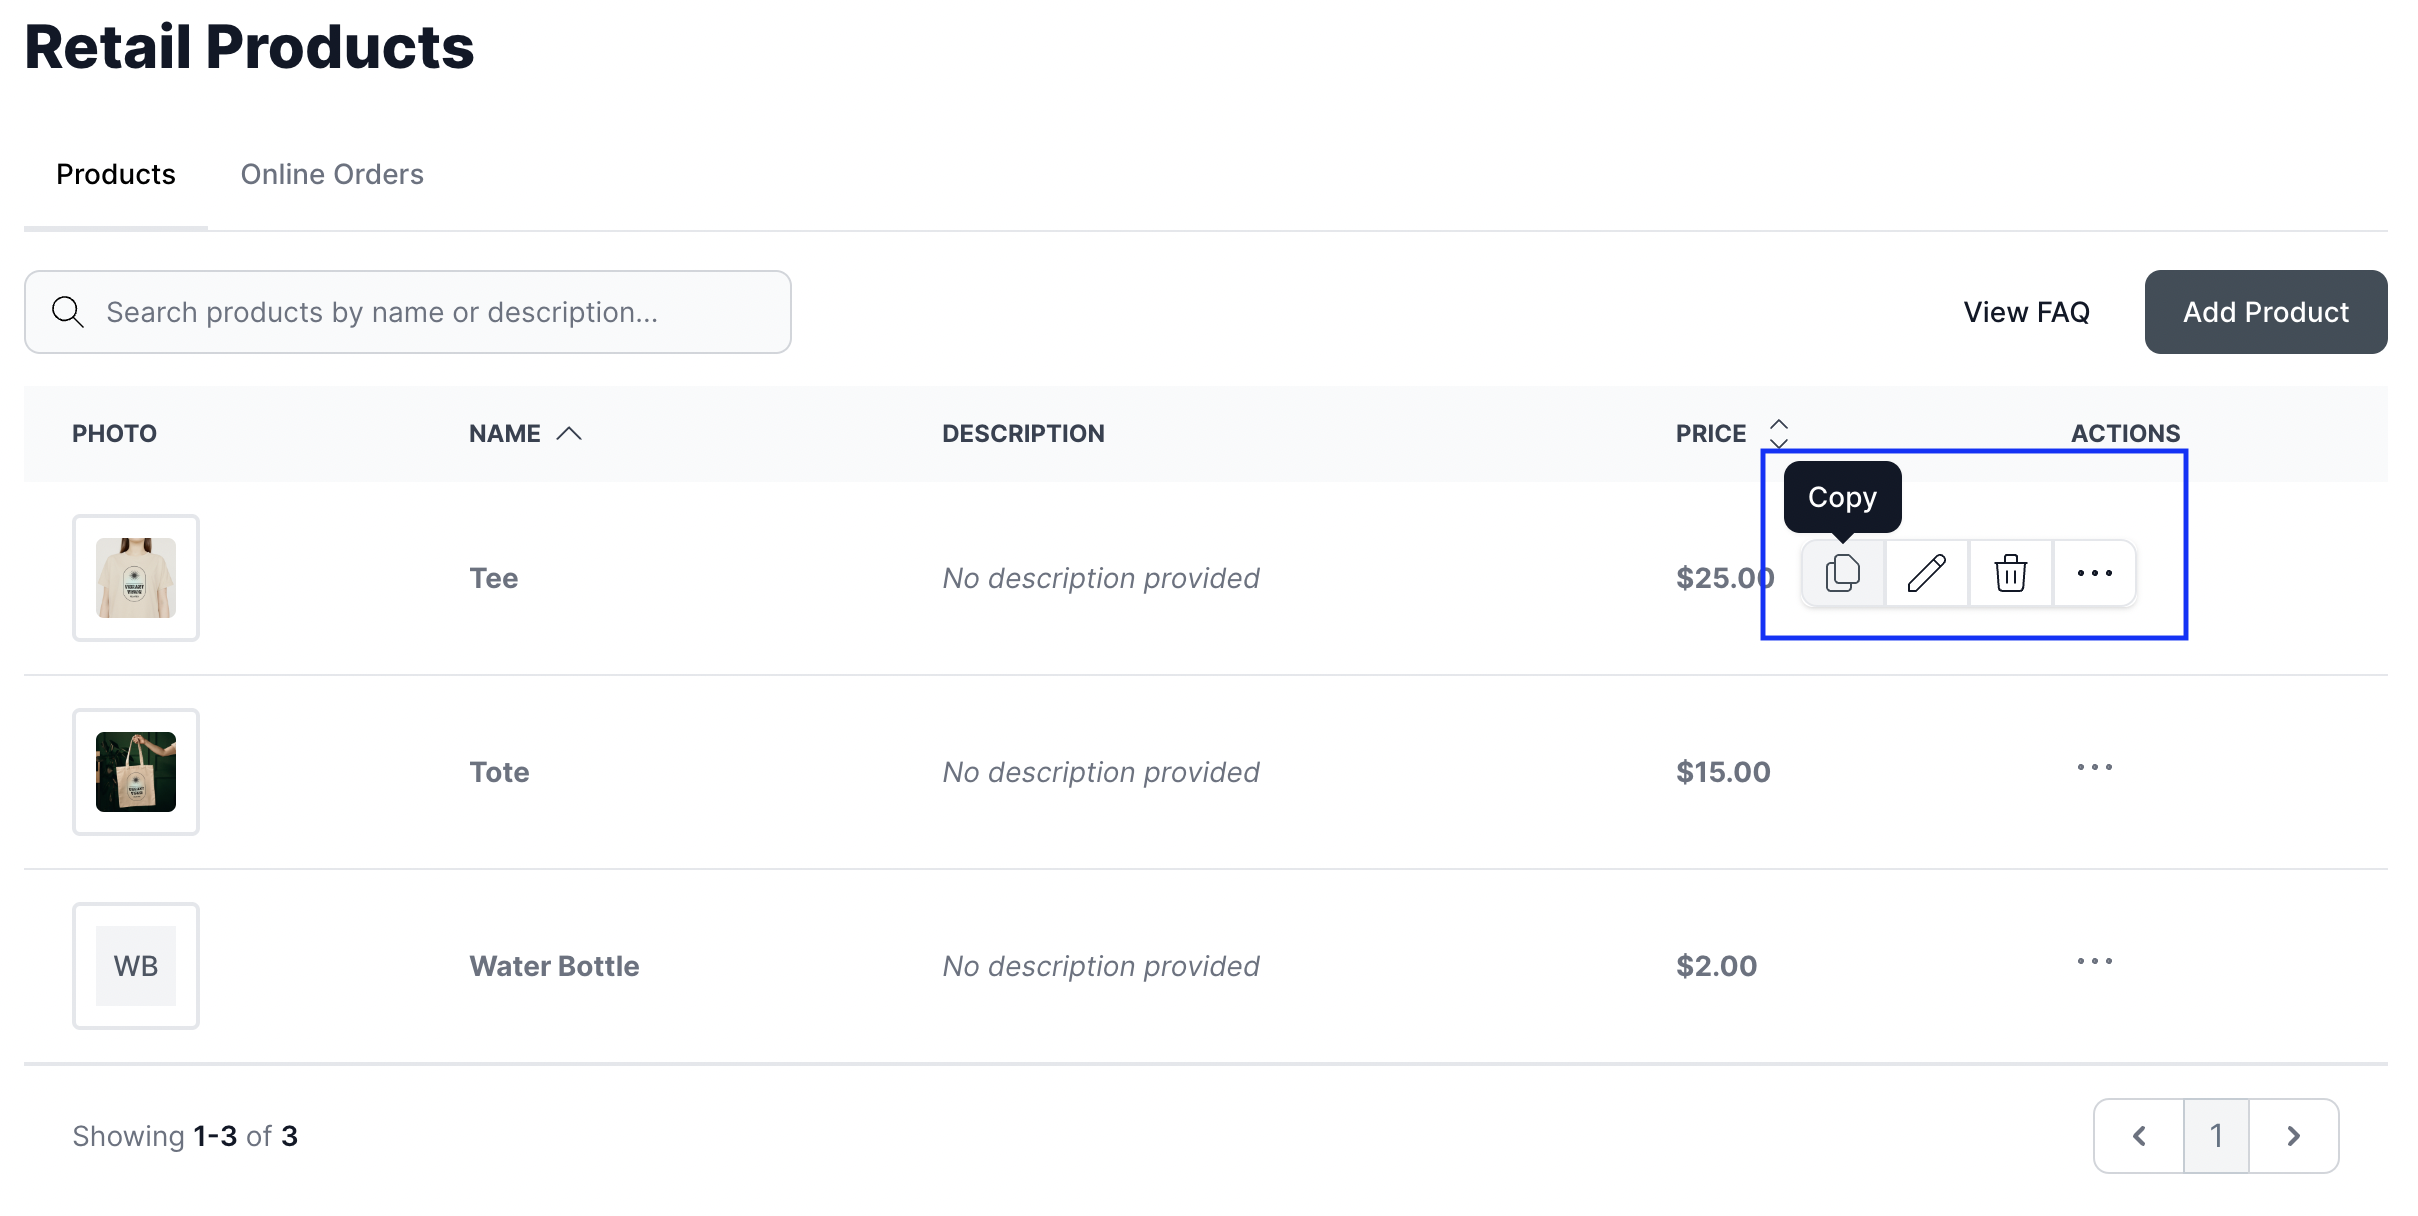
To favorite a product, check the third box. Favorited products appear while you check students in to a class, so you can quickly sell them as an add-on.
Retail taxes
To apply a tax rate to a product:
- Go to Settings → Taxes
- Create a tax rate (name and percentage)
- Under Actions → Apply to Product, select specific products or "Apply to all retail products"
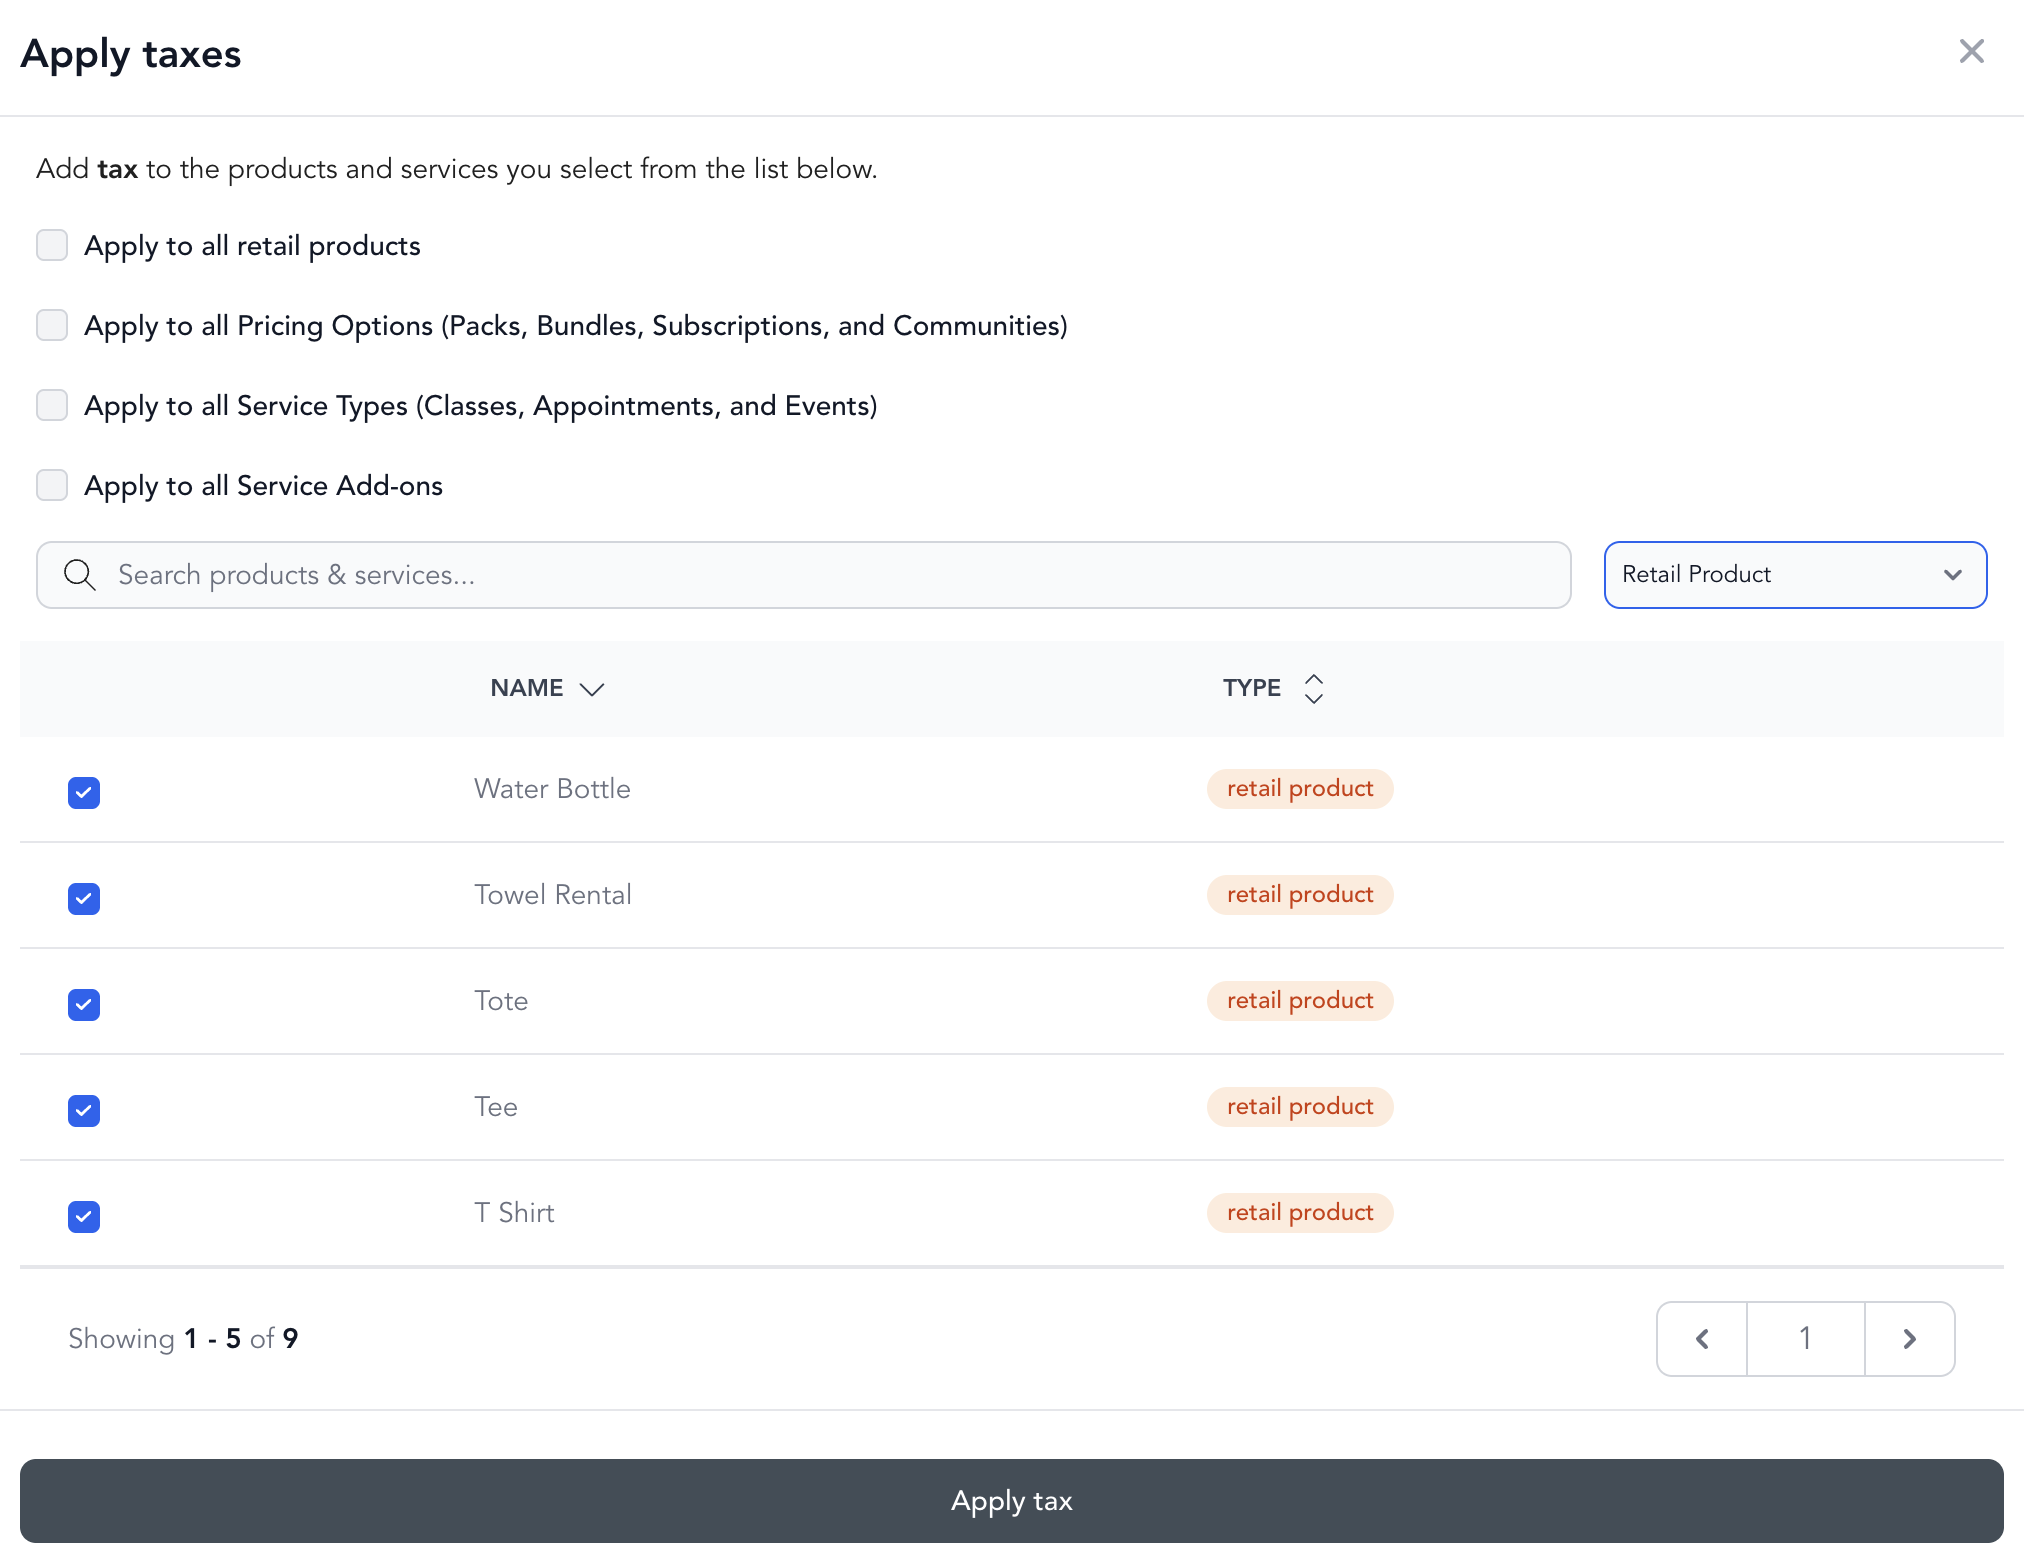
See taxes and fees for more details.
Bulk uploads
Contact Arketa support via live chat to bulk upload a large product catalog. The team can help migrate your existing store inventory into Arketa.
Was this helpful?