Upload a video
Add a video to your on-demand library, set pricing, and publish it for clients.
Adding a video to your library takes a few minutes. You'll fill in the details, upload the file (or paste a YouTube/Vimeo link), set your pricing, and save.
How to upload a video
- Go to Beyond Classes → On-Demand Video
- Click Add New → Video
- Fill in the fields below and click Save
Video details
| Field | What it does |
|---|---|
| Class (optional) | Links the video to a specific class. Class attendees can access this recording until the expiration date. |
| Name | Title of the video as it appears in your library |
| Instructor | Who taught the class (studios only) |
| Preview image | Thumbnail shown in the library |
| Type of video | Choose: Video file, YouTube link, or Vimeo link |
| File | Upload your video file (max 5GB per video) |
| Playlist link | Optional Spotify or Apple Music link to share alongside the video |
| Description | Shown on the video detail page |
| Digital download | Attach a PDF or other file clients can download below the video |

For the Preview image, use widescreen 16:9 dimensions. We recommend 800x450 pixels. On a Mac, you can crop the image with the built-in Preview app; on a PC, use Paint.
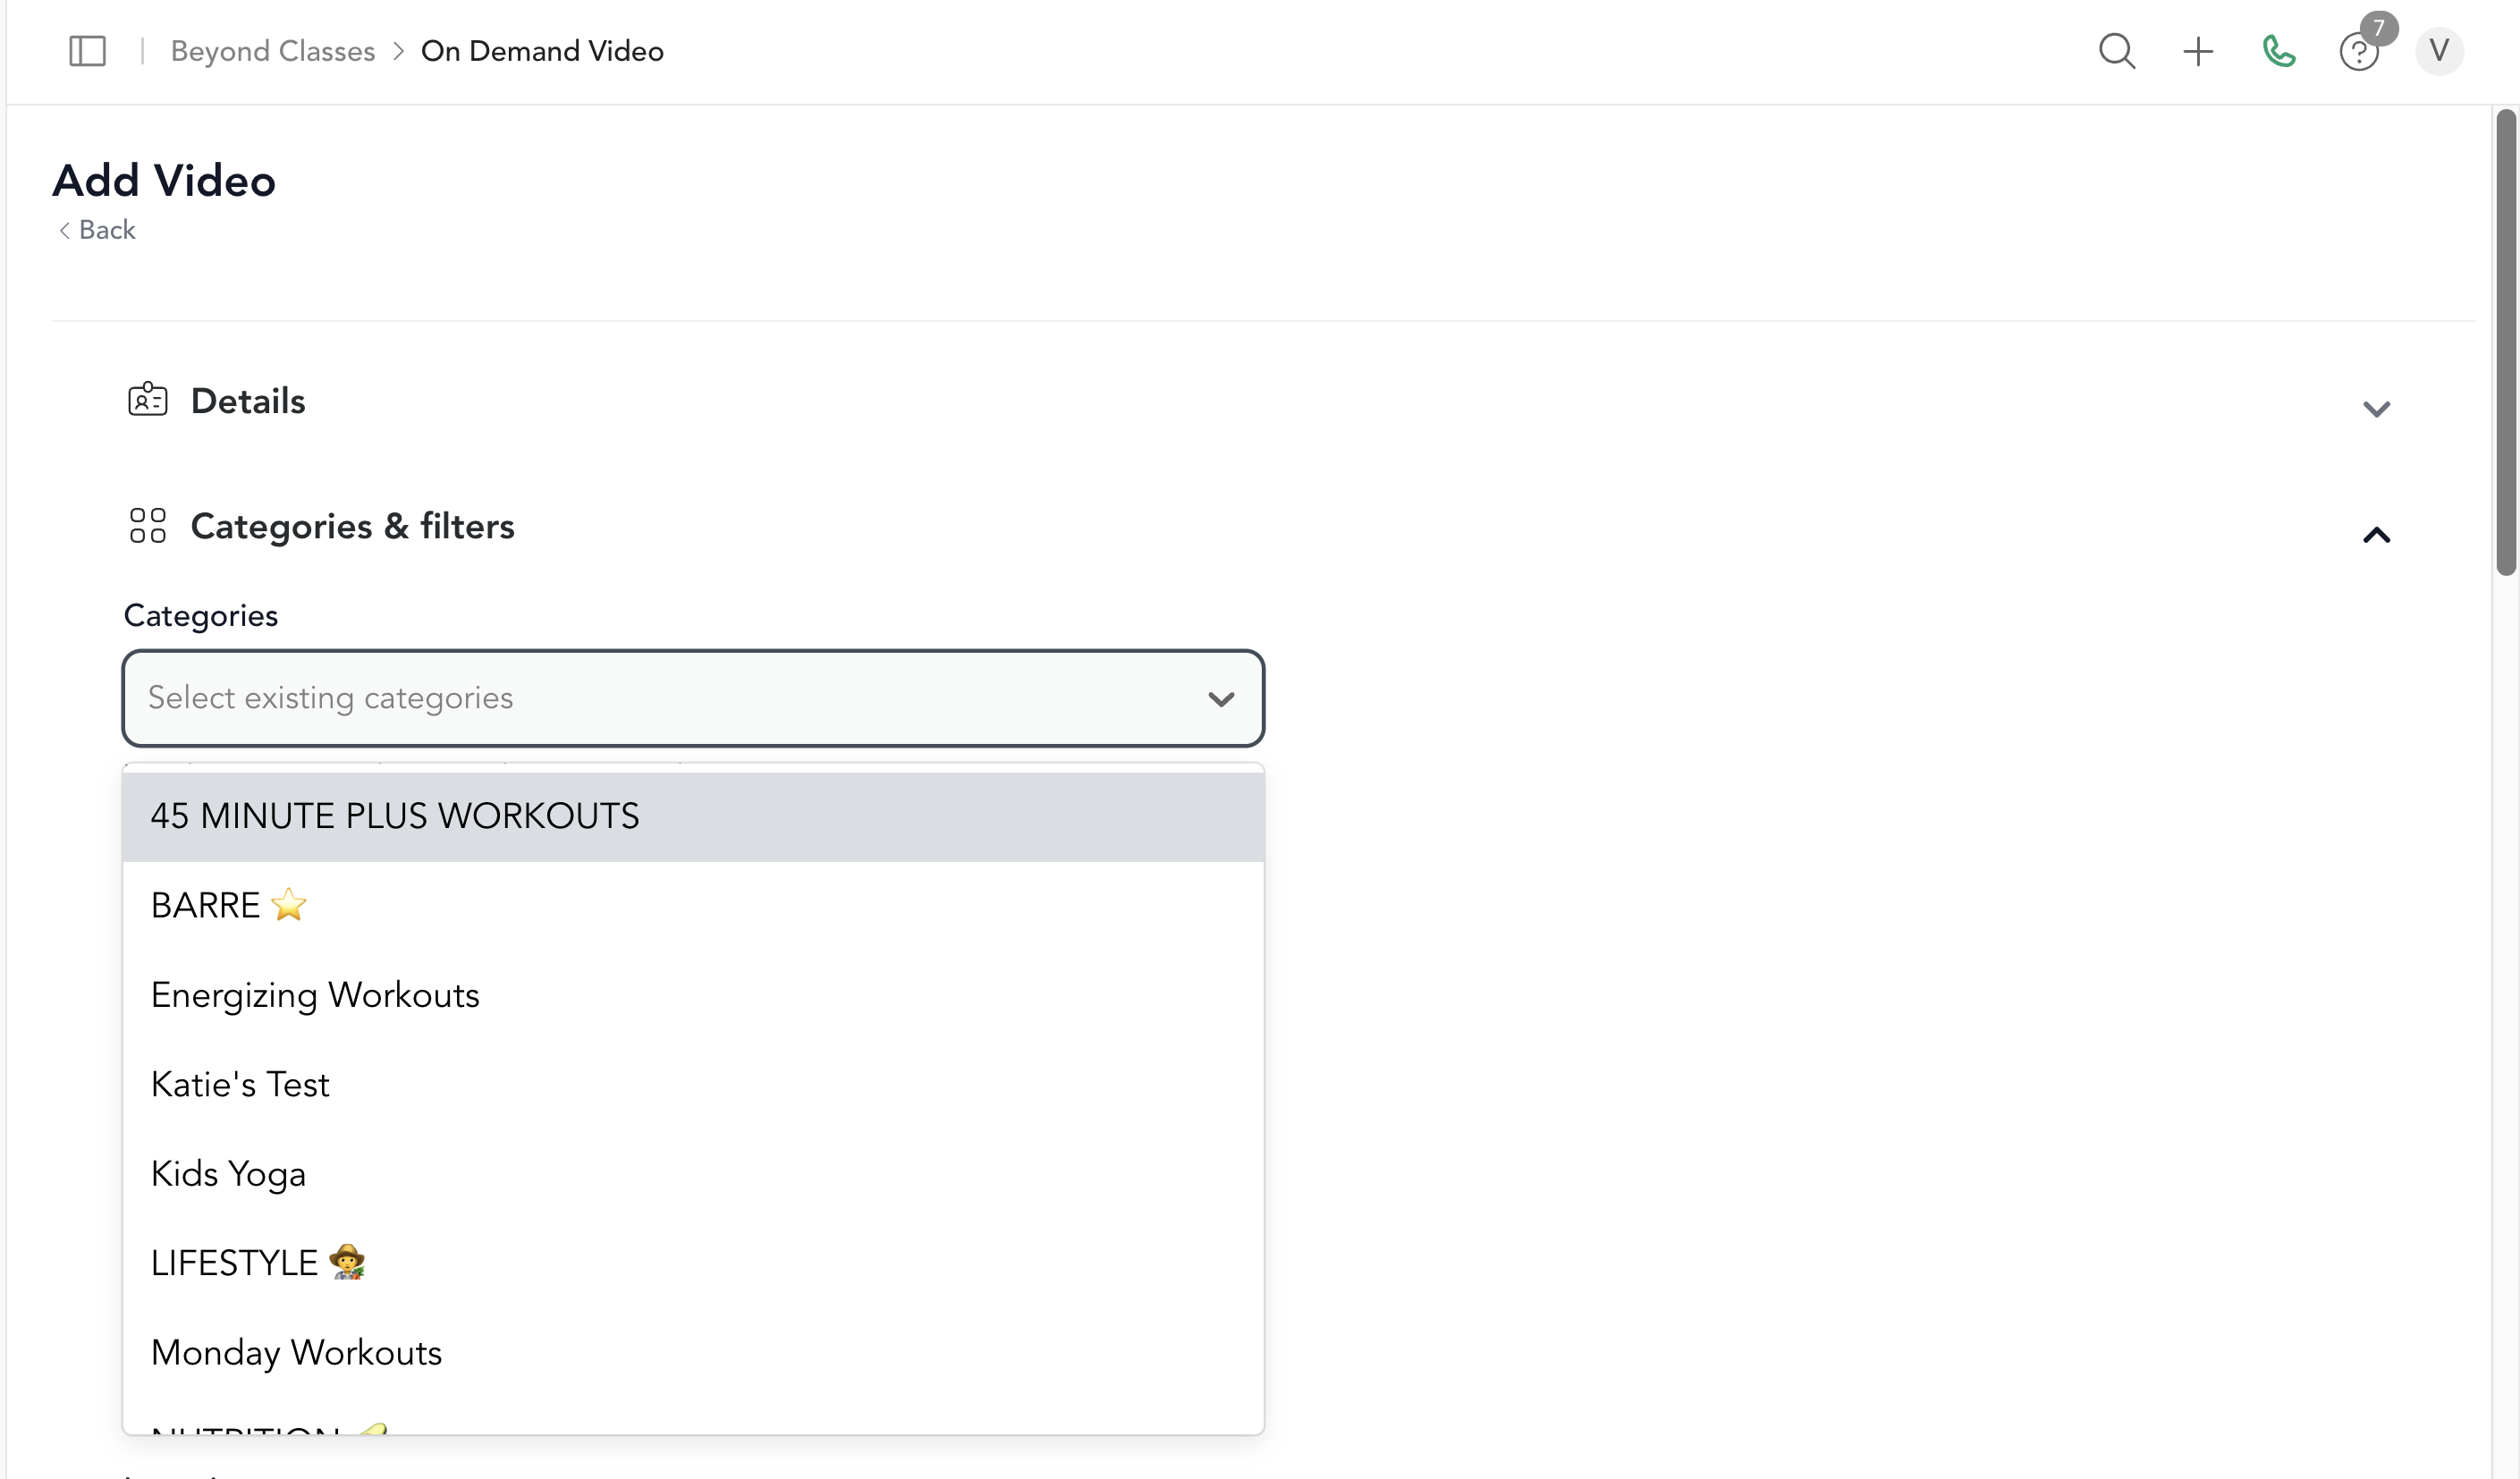
Categories and filters
Assign the video to one or more categories so it appears in the right carousels on your library page. You can also add filters so clients can search for it by workout type, body focus, intensity, equipment, or duration.
If you haven't created categories yet, do that first at On-Demand → Categories.
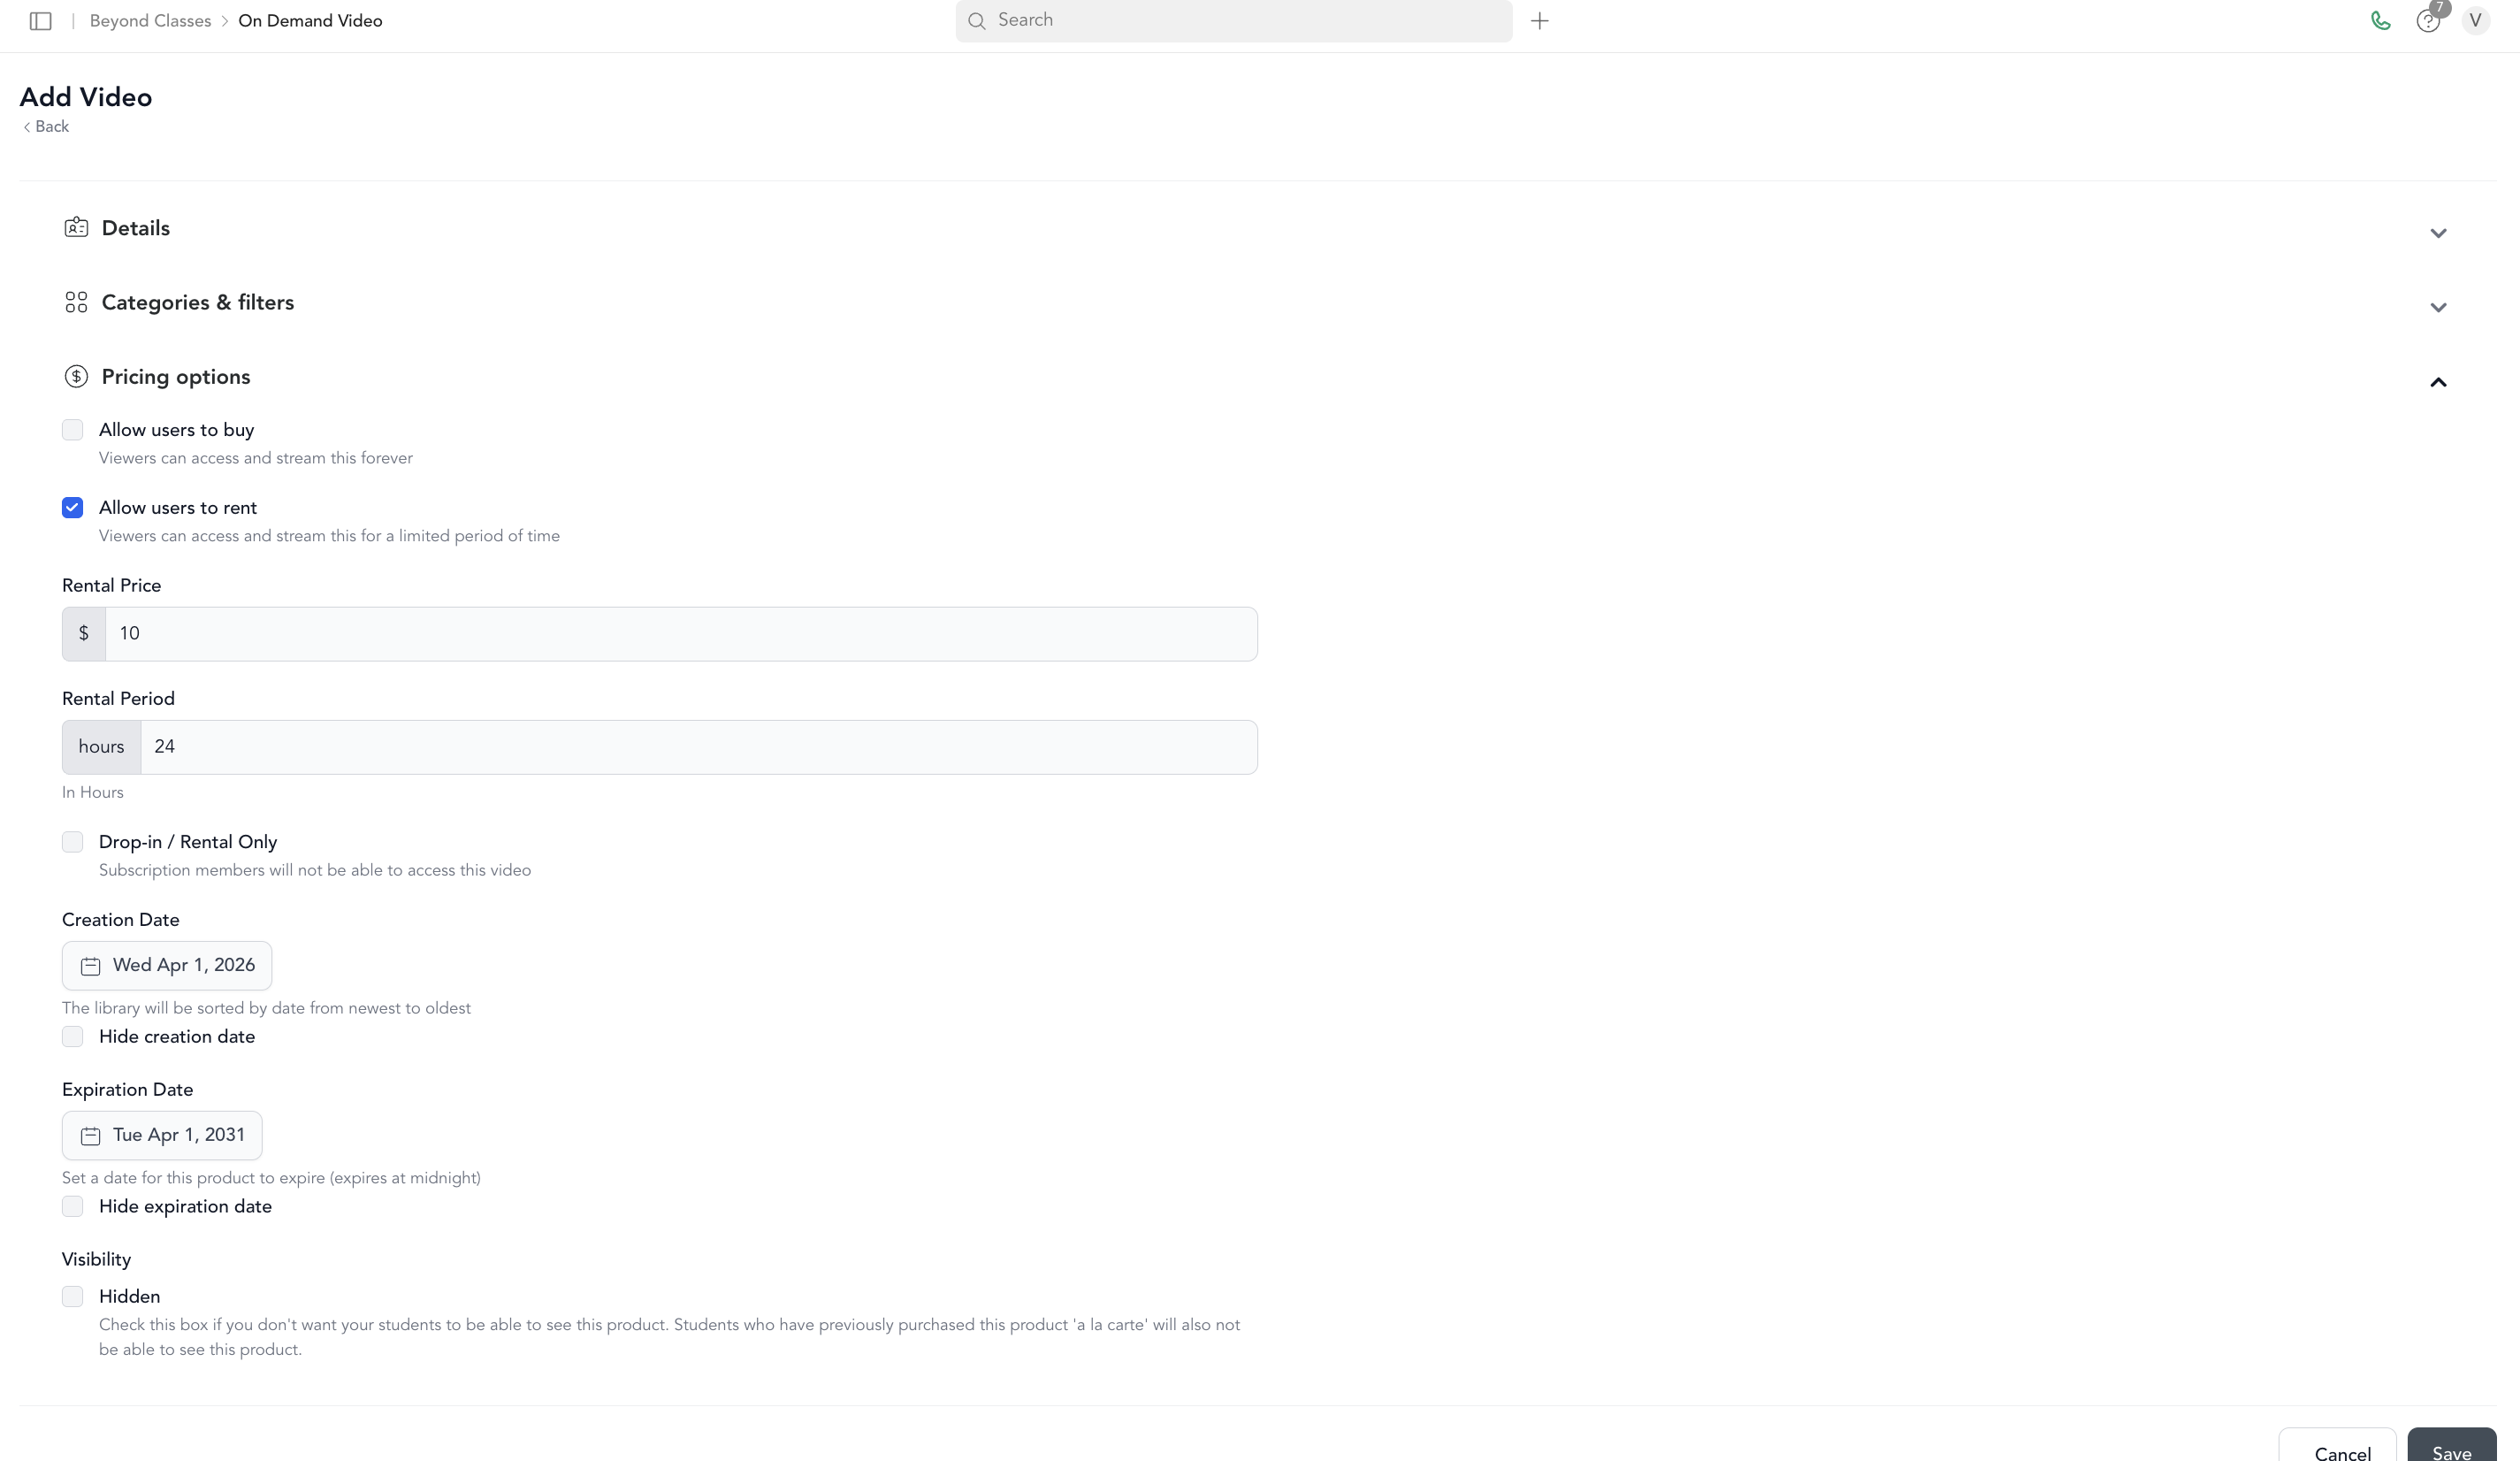
Pricing and configuration
| Setting | What it does |
|---|---|
| Allow users to buy | Clients pay a one-time price for permanent access |
| Allow users to rent | Clients pay for a limited rental window (e.g., 24 hours) |
| Subscription/package only | Uncheck buy and rent — only members and packholders can watch |
| Drop-in/rental only | Packages and subscriptions can't unlock this video — pay-per-view only |
| Creation date | Set a future date to schedule the video to go live automatically |
| Hide date | Hides the creation date on your library |
| Expiration date | Video is removed from your library after this date |
| Hidden | Video exists but isn't visible in the library (useful for class-recording-only content) |
After saving
Your video appears in Beyond Classes → On-Demand Video. If you set a future creation date, it will show a status tag until it goes live. Once live, the status updates to Live.
Upload speed depends on your file size and internet connection. A 1GB video on a 10 Mbps upload connection takes about 13 minutes. See file types and limits for tips on reducing file size.