Share and push automations
Add automations to your organization library, push them to your studios, and track which studios have them.
This guide is for organization admins. It covers getting an automation into your organization library, sending it to your studios, and keeping track of which studios have it.
Step 1: Get an automation into the library
There are two ways to add an automation to the library.
Build a new one in your template studio
- Switch to your organization and go to Sharing → Automations
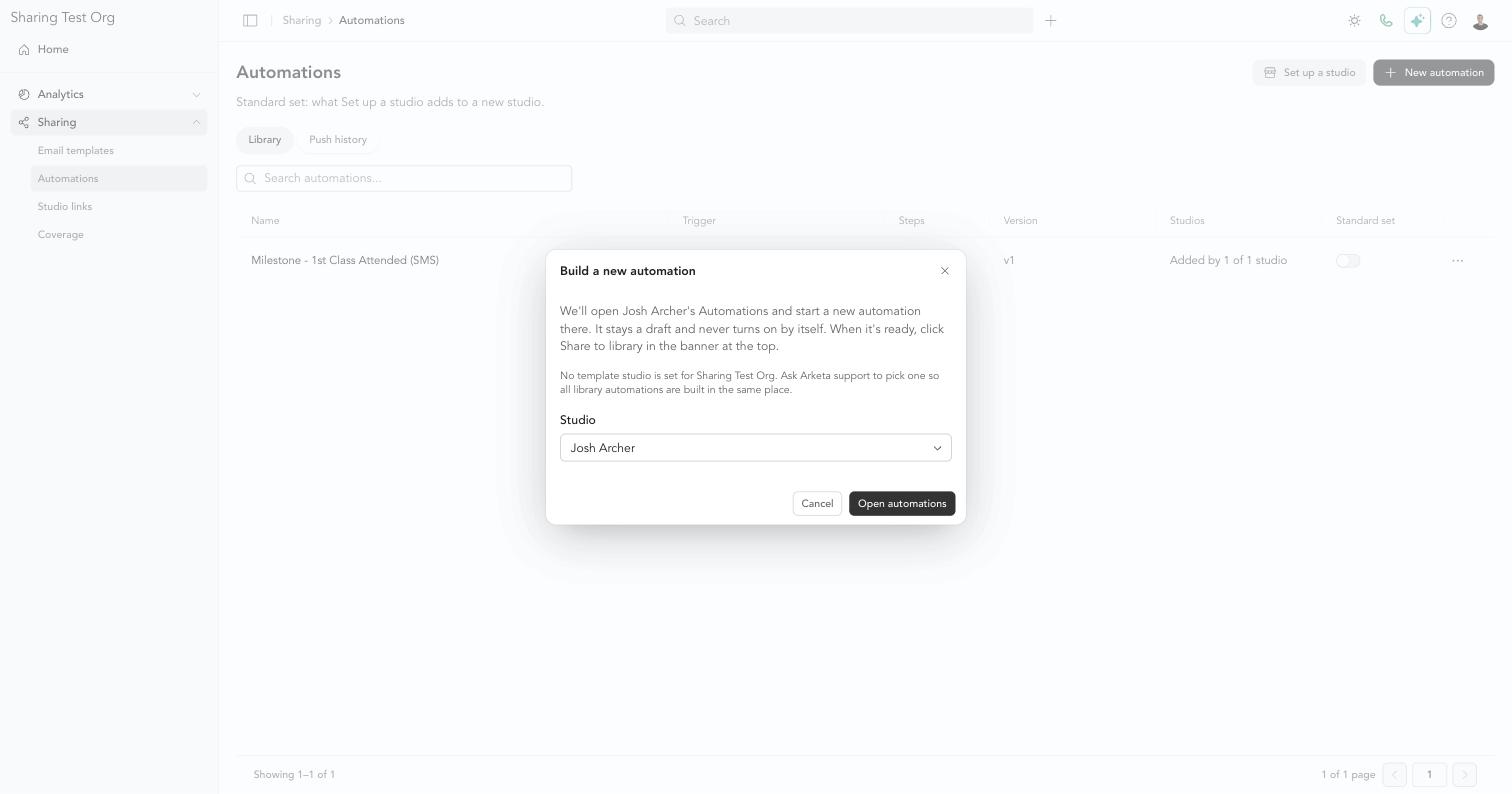
- Click New automation
- Pick the studio to build in — your organization's template studio is selected for you — and click Open automations
Arketa opens that studio's Automations page with a banner across the top: Building for the [organization] library in [studio]. Drafts here stay off. Build the automation as usual. It stays a draft in that studio, so it never enrolls clients there.
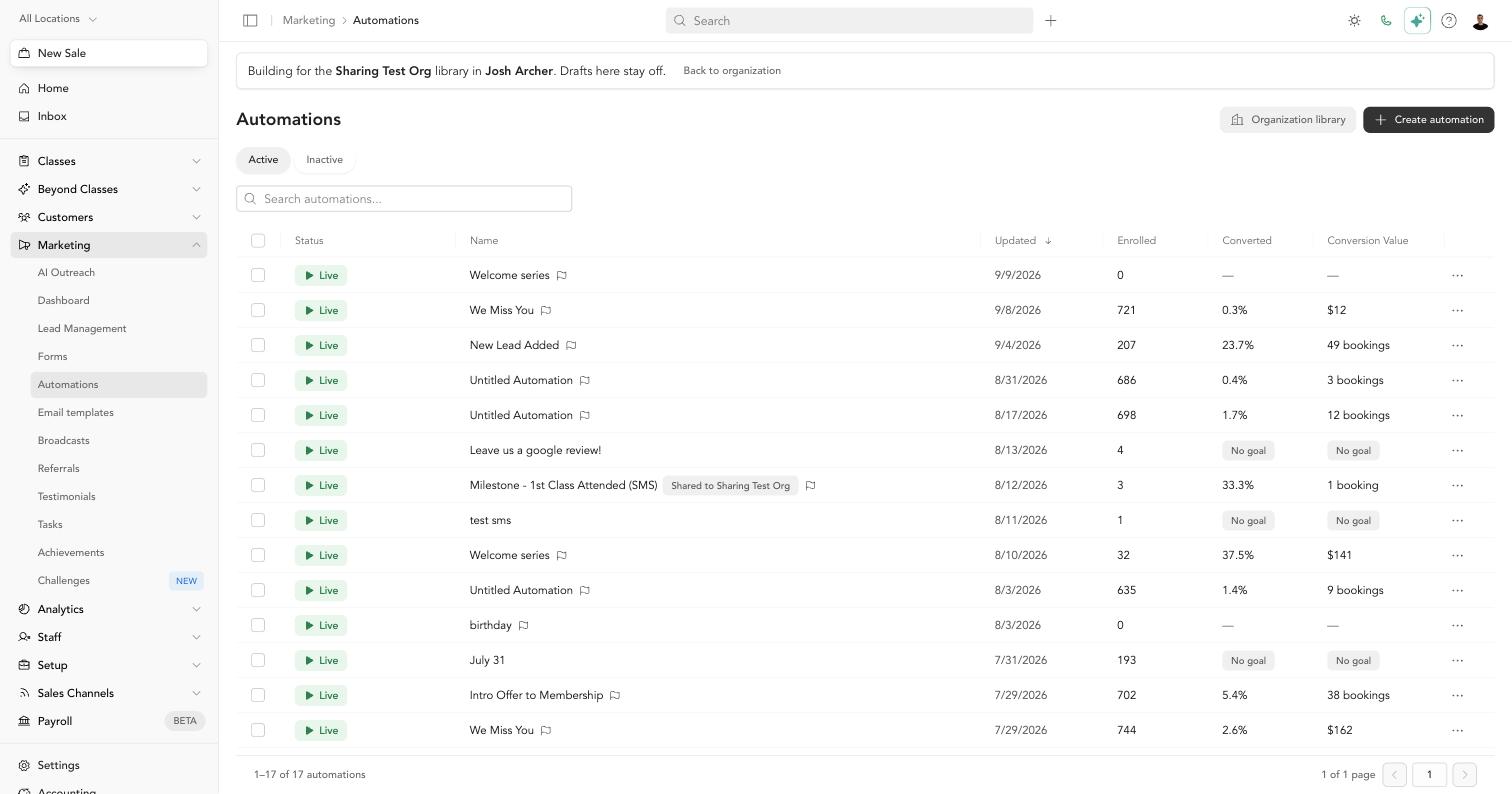
When it's ready, click Share to library in the banner. Click Back to organization to return to your organization.
Build library automations in one studio — your template studio — so every version lives in the same place. If no template studio is set, Arketa asks you to pick a studio each time. Contact Arketa support to set one.
Share an automation a studio already has
Any organization admin can share an existing automation from a studio's dashboard:
- In the studio, go to Marketing → Automations
- Click ⋯ on the automation, then Share to organization
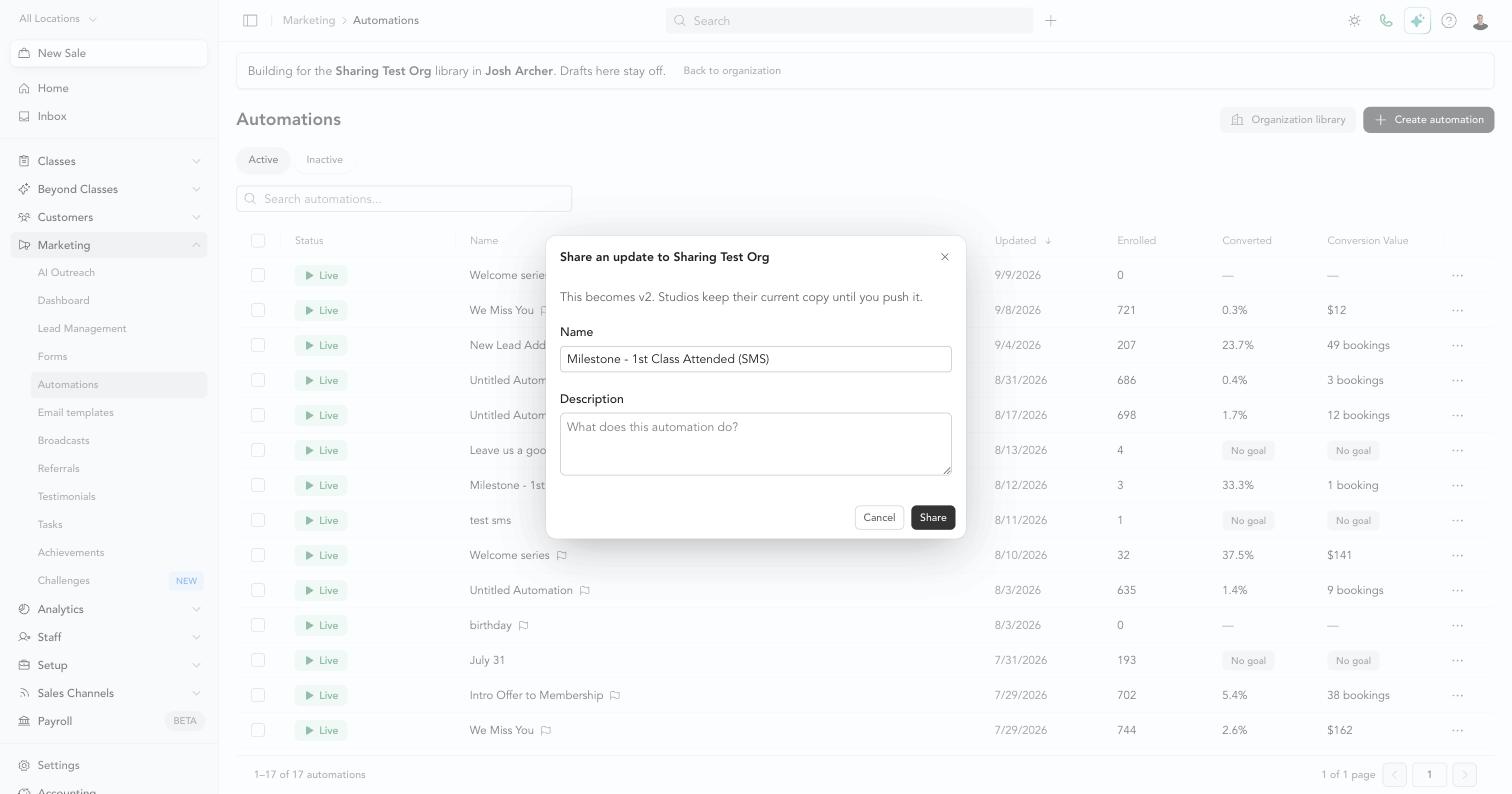
- Give it a name and description for the library, then click Share
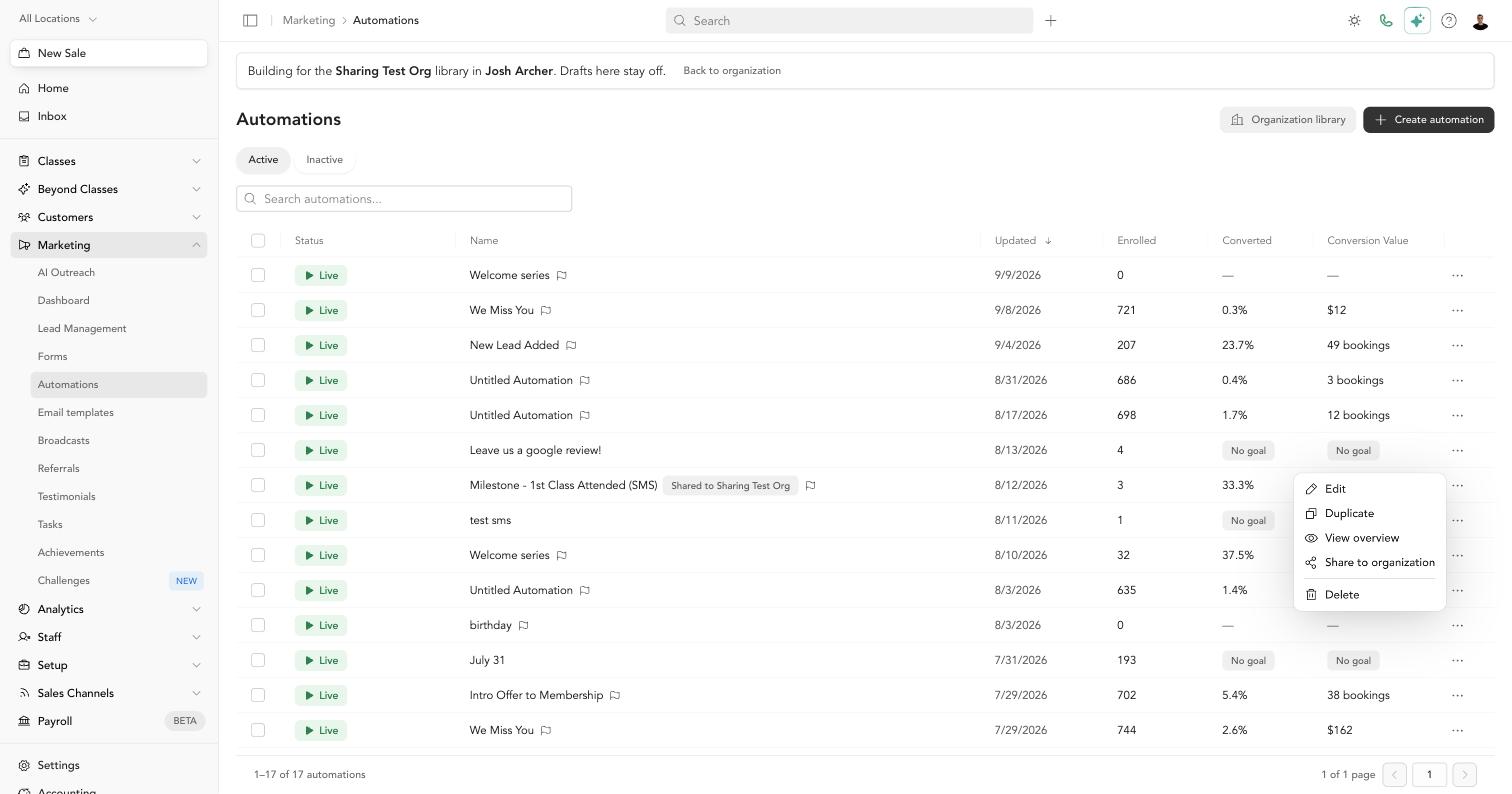
The studio's automation shows a Shared to [organization] badge. The library keeps a snapshot, so later edits in the studio don't change the library until you share again.
Sharing again creates a new version
Share the same automation again and it becomes the next version — v2, v3, and so on. Studios keep their current copy until you push the new version to them.
Studios that already have an older copy see Update available in their Organization library.
Step 2: Push it to your studios
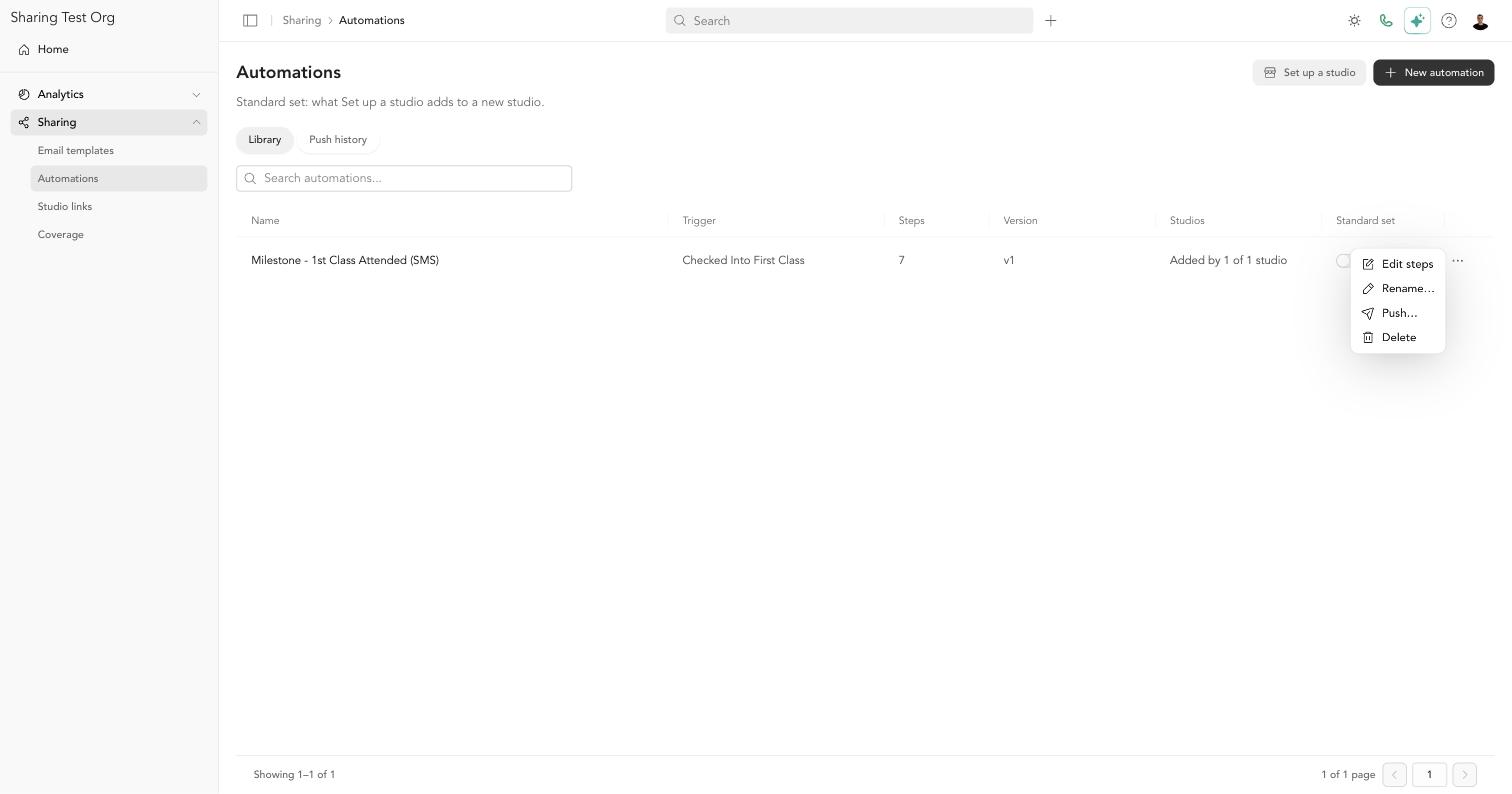
- Go to Sharing → Automations
- Click ⋯ on the automation, then Push…
- Choose the studios. Studios that already have this automation are marked with its current state (Draft, Live, Paused, and so on)
- Choose what happens at studios that already have it (see below)
- Click Push to [n] studios
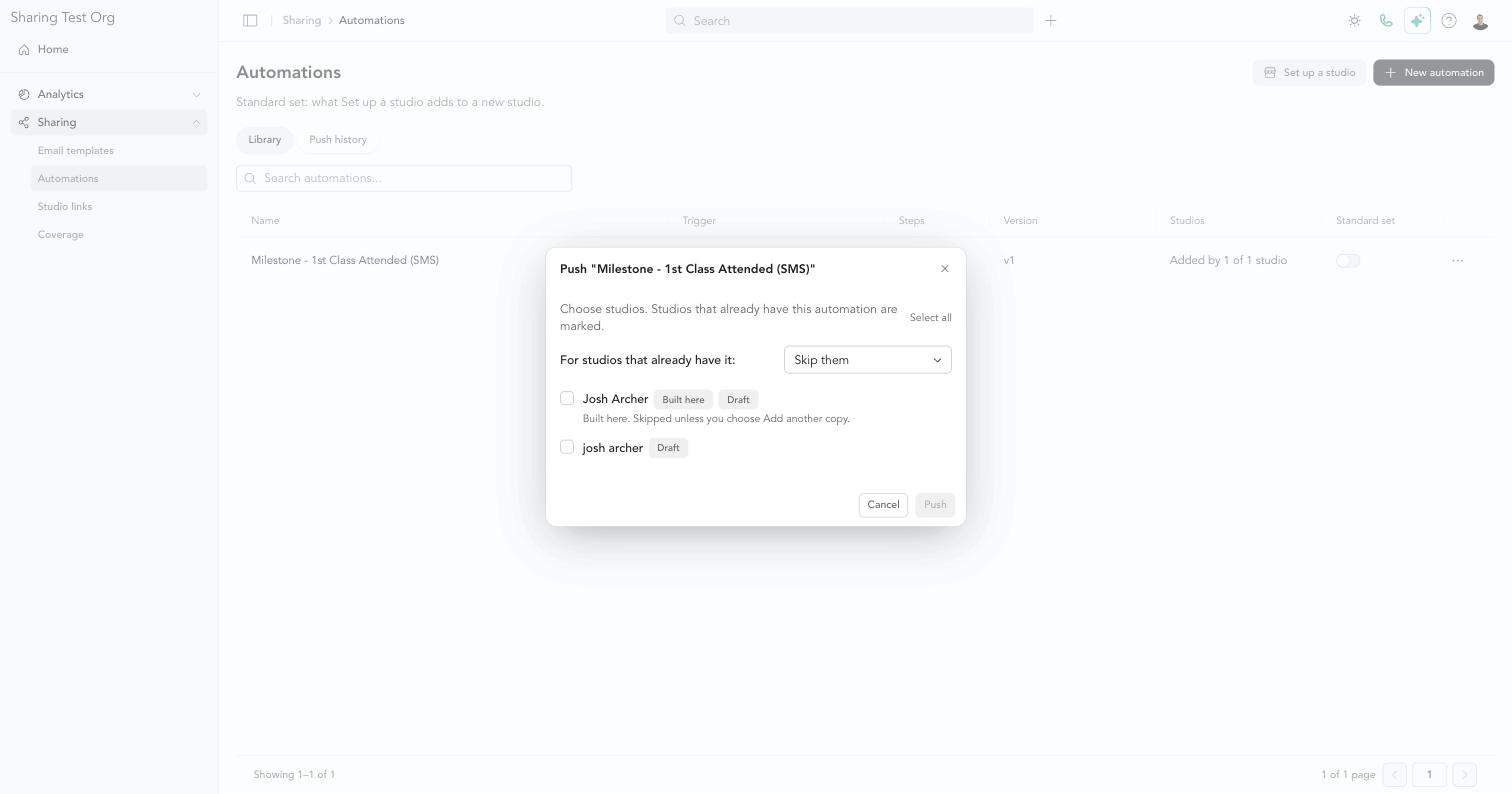
Studios that already have it
| Option | What happens | When to use it |
|---|---|---|
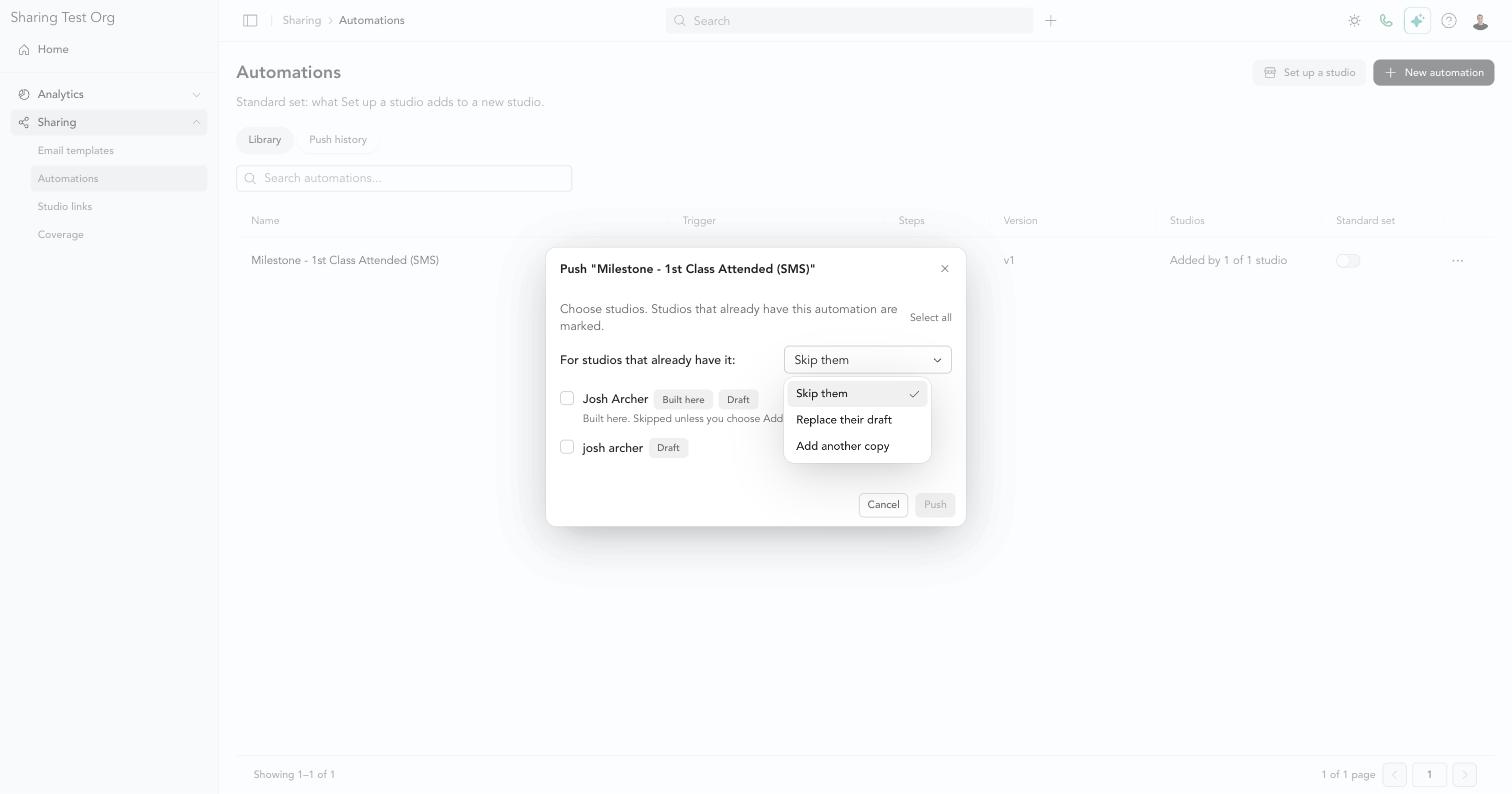
| Skip them (default) | Studios with a copy are left alone. Only studios without one get a draft. | Rolling an automation out to new studios without touching anyone's work. |
| Replace their draft | A studio's draft copy is replaced with this version. A studio whose copy is live or paused is skipped. | Sending a fix to studios that haven't turned their copy on yet. Their matches and edits on the old draft are lost. |
| Add another copy | Every chosen studio gets a new draft, even if it already has one. | Giving a studio the new version alongside a copy that's already live. The studio turns on the new one and then deletes the old one. |
Each studio row explains what will happen before you push — for example, Their draft is replaced with v1. Edits and matches on the old draft are lost.
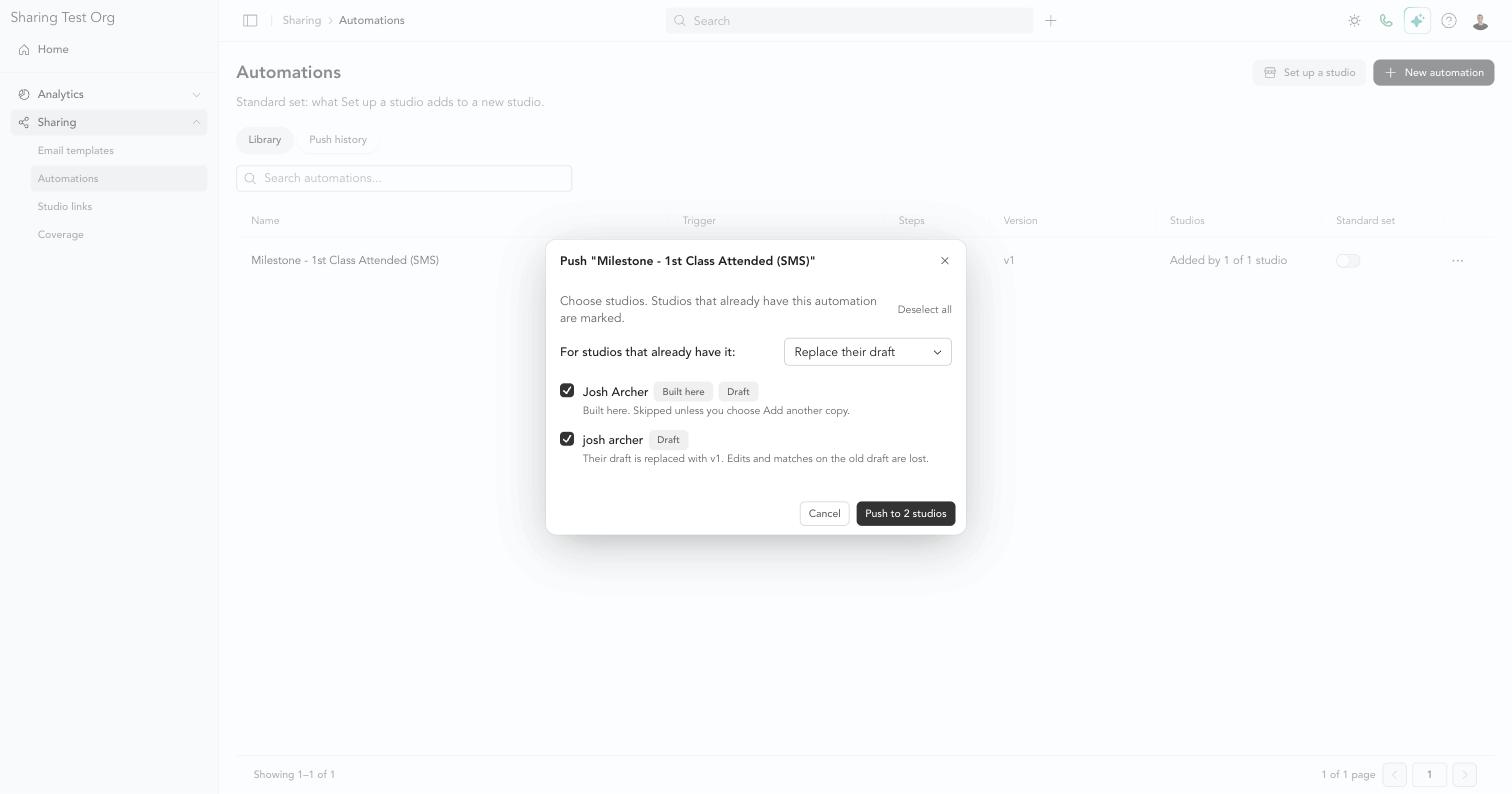
A push never turns an automation on and never sends anything to clients. A live copy is never replaced — that's why Replace their draft skips live and paused copies.
Why is the studio it was built in skipped?
The studio an automation was built in already has the original, so it's marked Built here and skipped. Choose Add another copy if you really want a second copy there.
Step 3: Check the results
When the push finishes, you see what happened at each studio:
- Pushed — a draft is waiting at that studio. If anything needs matching, the result says how many items were matched automatically and how many the studio still needs to match
- Skipped — with the reason, such as built here, already has a draft, or live or paused here
- Couldn't copy — something went wrong at that studio. The other studios aren't affected; try again for that studio
Click Open on a result to go straight to that studio's copy.
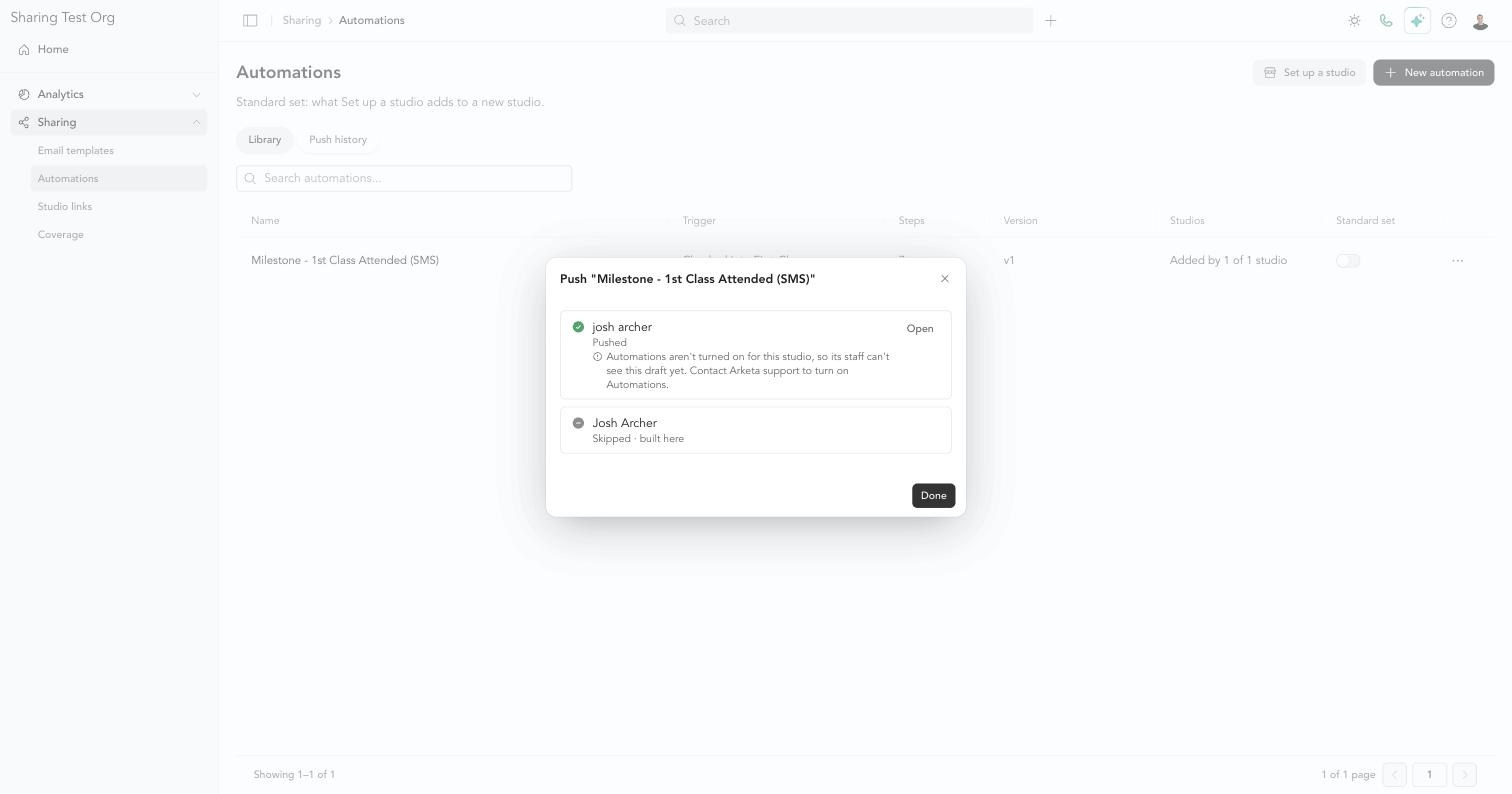
If a result says Automations aren't turned on for this studio, the draft was still created, but that studio's staff can't see it until Automations are turned on. Contact Arketa support to turn on Automations for that studio.
Push history
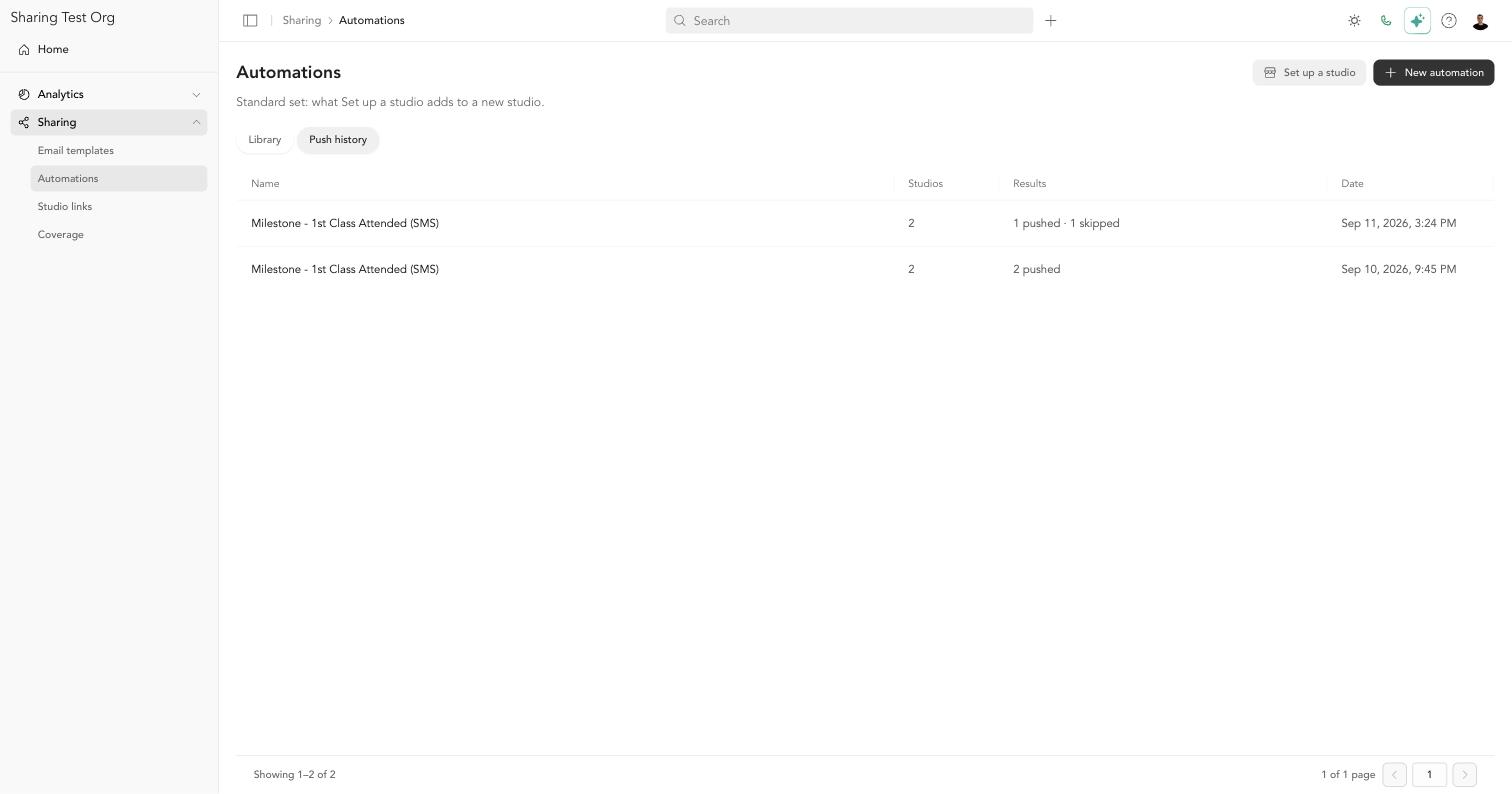
The Push history tab on Sharing → Automations (and Sharing → Email templates) lists every push: what was pushed, how many studios, the results, and when.
Coverage: which studios have what
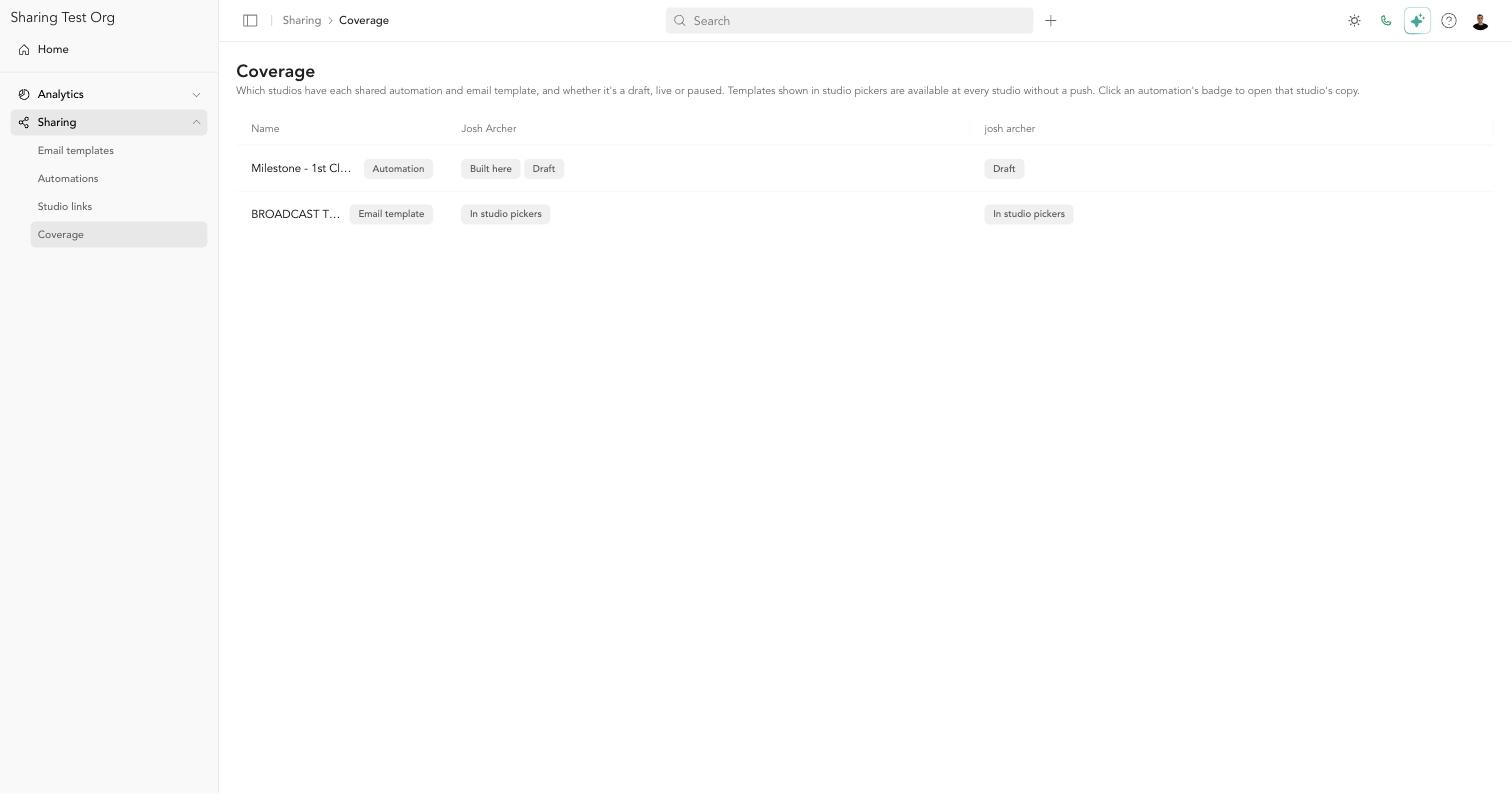
Sharing → Coverage shows every library automation and email template down the side and every studio across the top. Each cell shows that studio's copy:
| Badge | Meaning |
|---|---|
| Built here | The studio the automation was built in |
| Draft | The studio has a copy that isn't turned on yet |
| Needs setup (n) | The studio's copy has items left to set up before it can turn on |
| Live / Paused | The studio's copy is on, or turned off after being on |
| Not added | The studio doesn't have it |
| Removed by studio | The studio deleted its copy |
| [n] copies | The studio has more than one copy |
| v1 → v2 | The studio's copy is an older version than the library's latest |
| In studio pickers | An email template every studio can use without a push |
Click an automation's badge to open that studio's copy. Click an automation's name to push it.
Edit, rename, or delete a library automation
Click ⋯ on an automation in Sharing → Automations:
- Edit steps — opens the automation in the studio it was built in. Share it again to save your changes as a new version.
- Rename… — changes the library name and description. Studios' copies keep their names.
- Push… — sends it to studios.
- Delete — removes it from the library. Copies studios already have are theirs to keep.