
App publishing
What to know about publishing your branded app to the App Store and Google Play.
Publishing your branded app looks a little different depending on the platform. Your iOS app publishes under your own Apple Developer account, which you own and maintain — Arketa builds, configures, and submits it on your behalf. Your Android app continues to publish under Arketa's Google Play developer account, with Arketa managing that submission end to end.
How iOS publishing works
| You | Arketa |
|---|---|
| Own and maintain your Apple Developer account | Build your branded app |
| Accept Apple's agreements | Configure it for submission |
| Pay Apple's annual fee | Submit and manage App Store review |
| Supply your branding and content | Handle any review feedback from Apple |
Apple charges $99 a year for the developer account, billed directly to you. Arketa doesn't collect or process this fee.
How Android publishing works
Android apps publish under Arketa's Google Play developer account — there's no separate account for you to set up. You supply your branding and content, and Arketa builds, submits, and manages the Google Play review.
What you provide
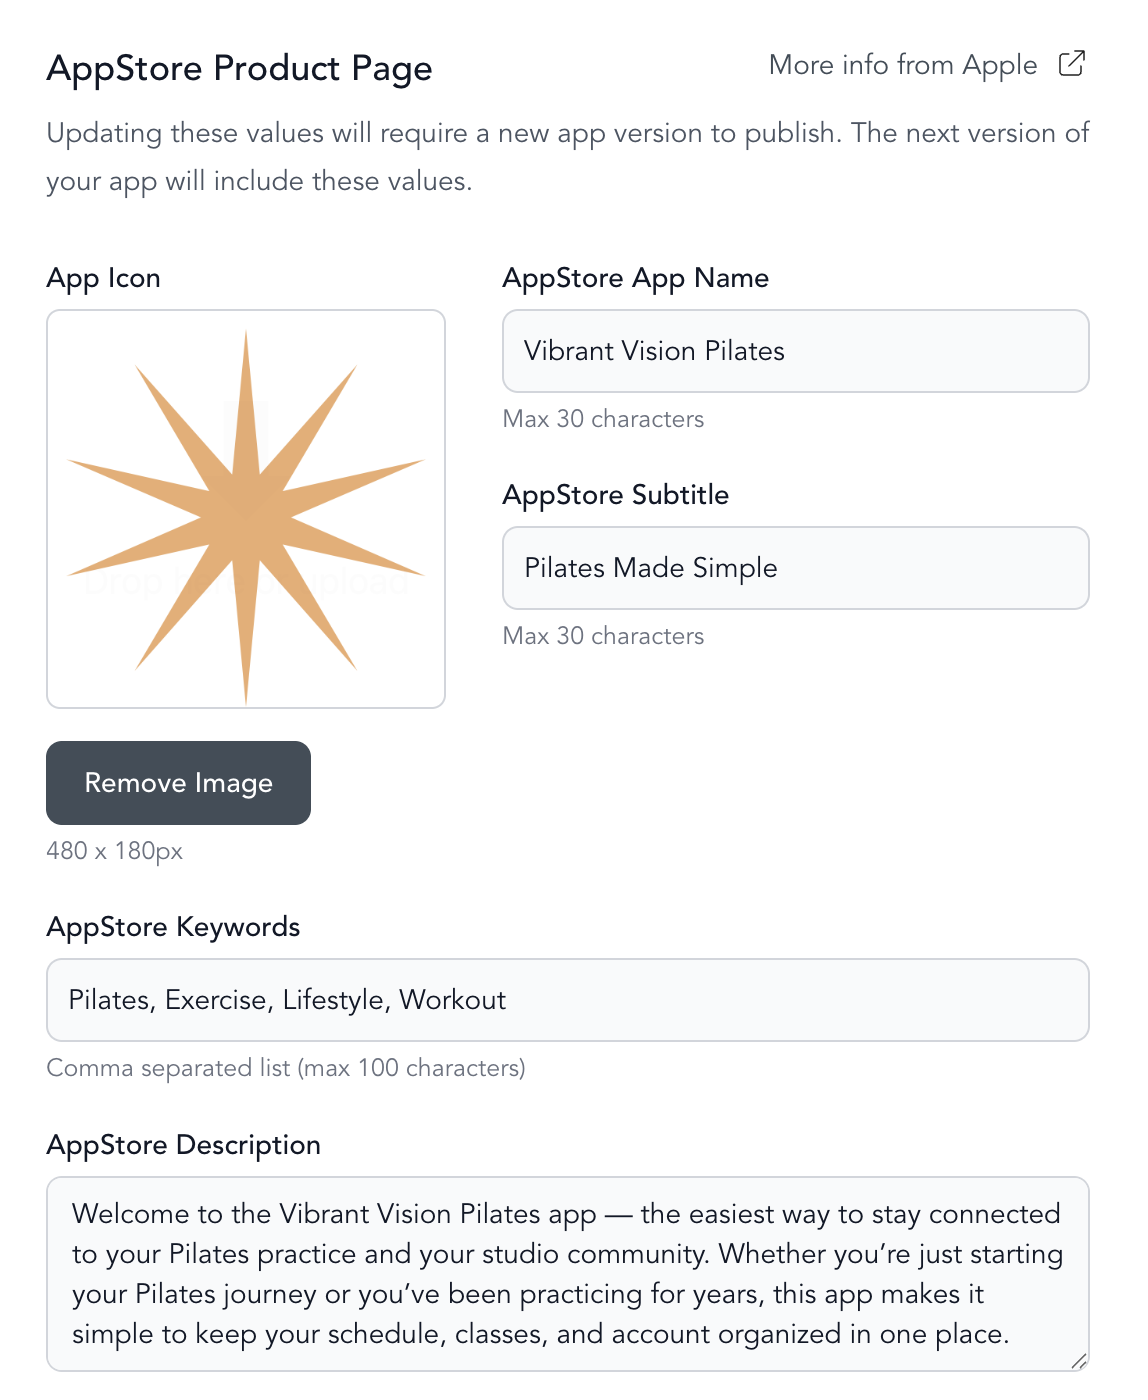
- App name (max 30 characters)
- App icon (1024 x 1024px)
- App Store subtitle (max 30 characters)
- Keywords (comma-separated, max 100 characters)
- App Store description
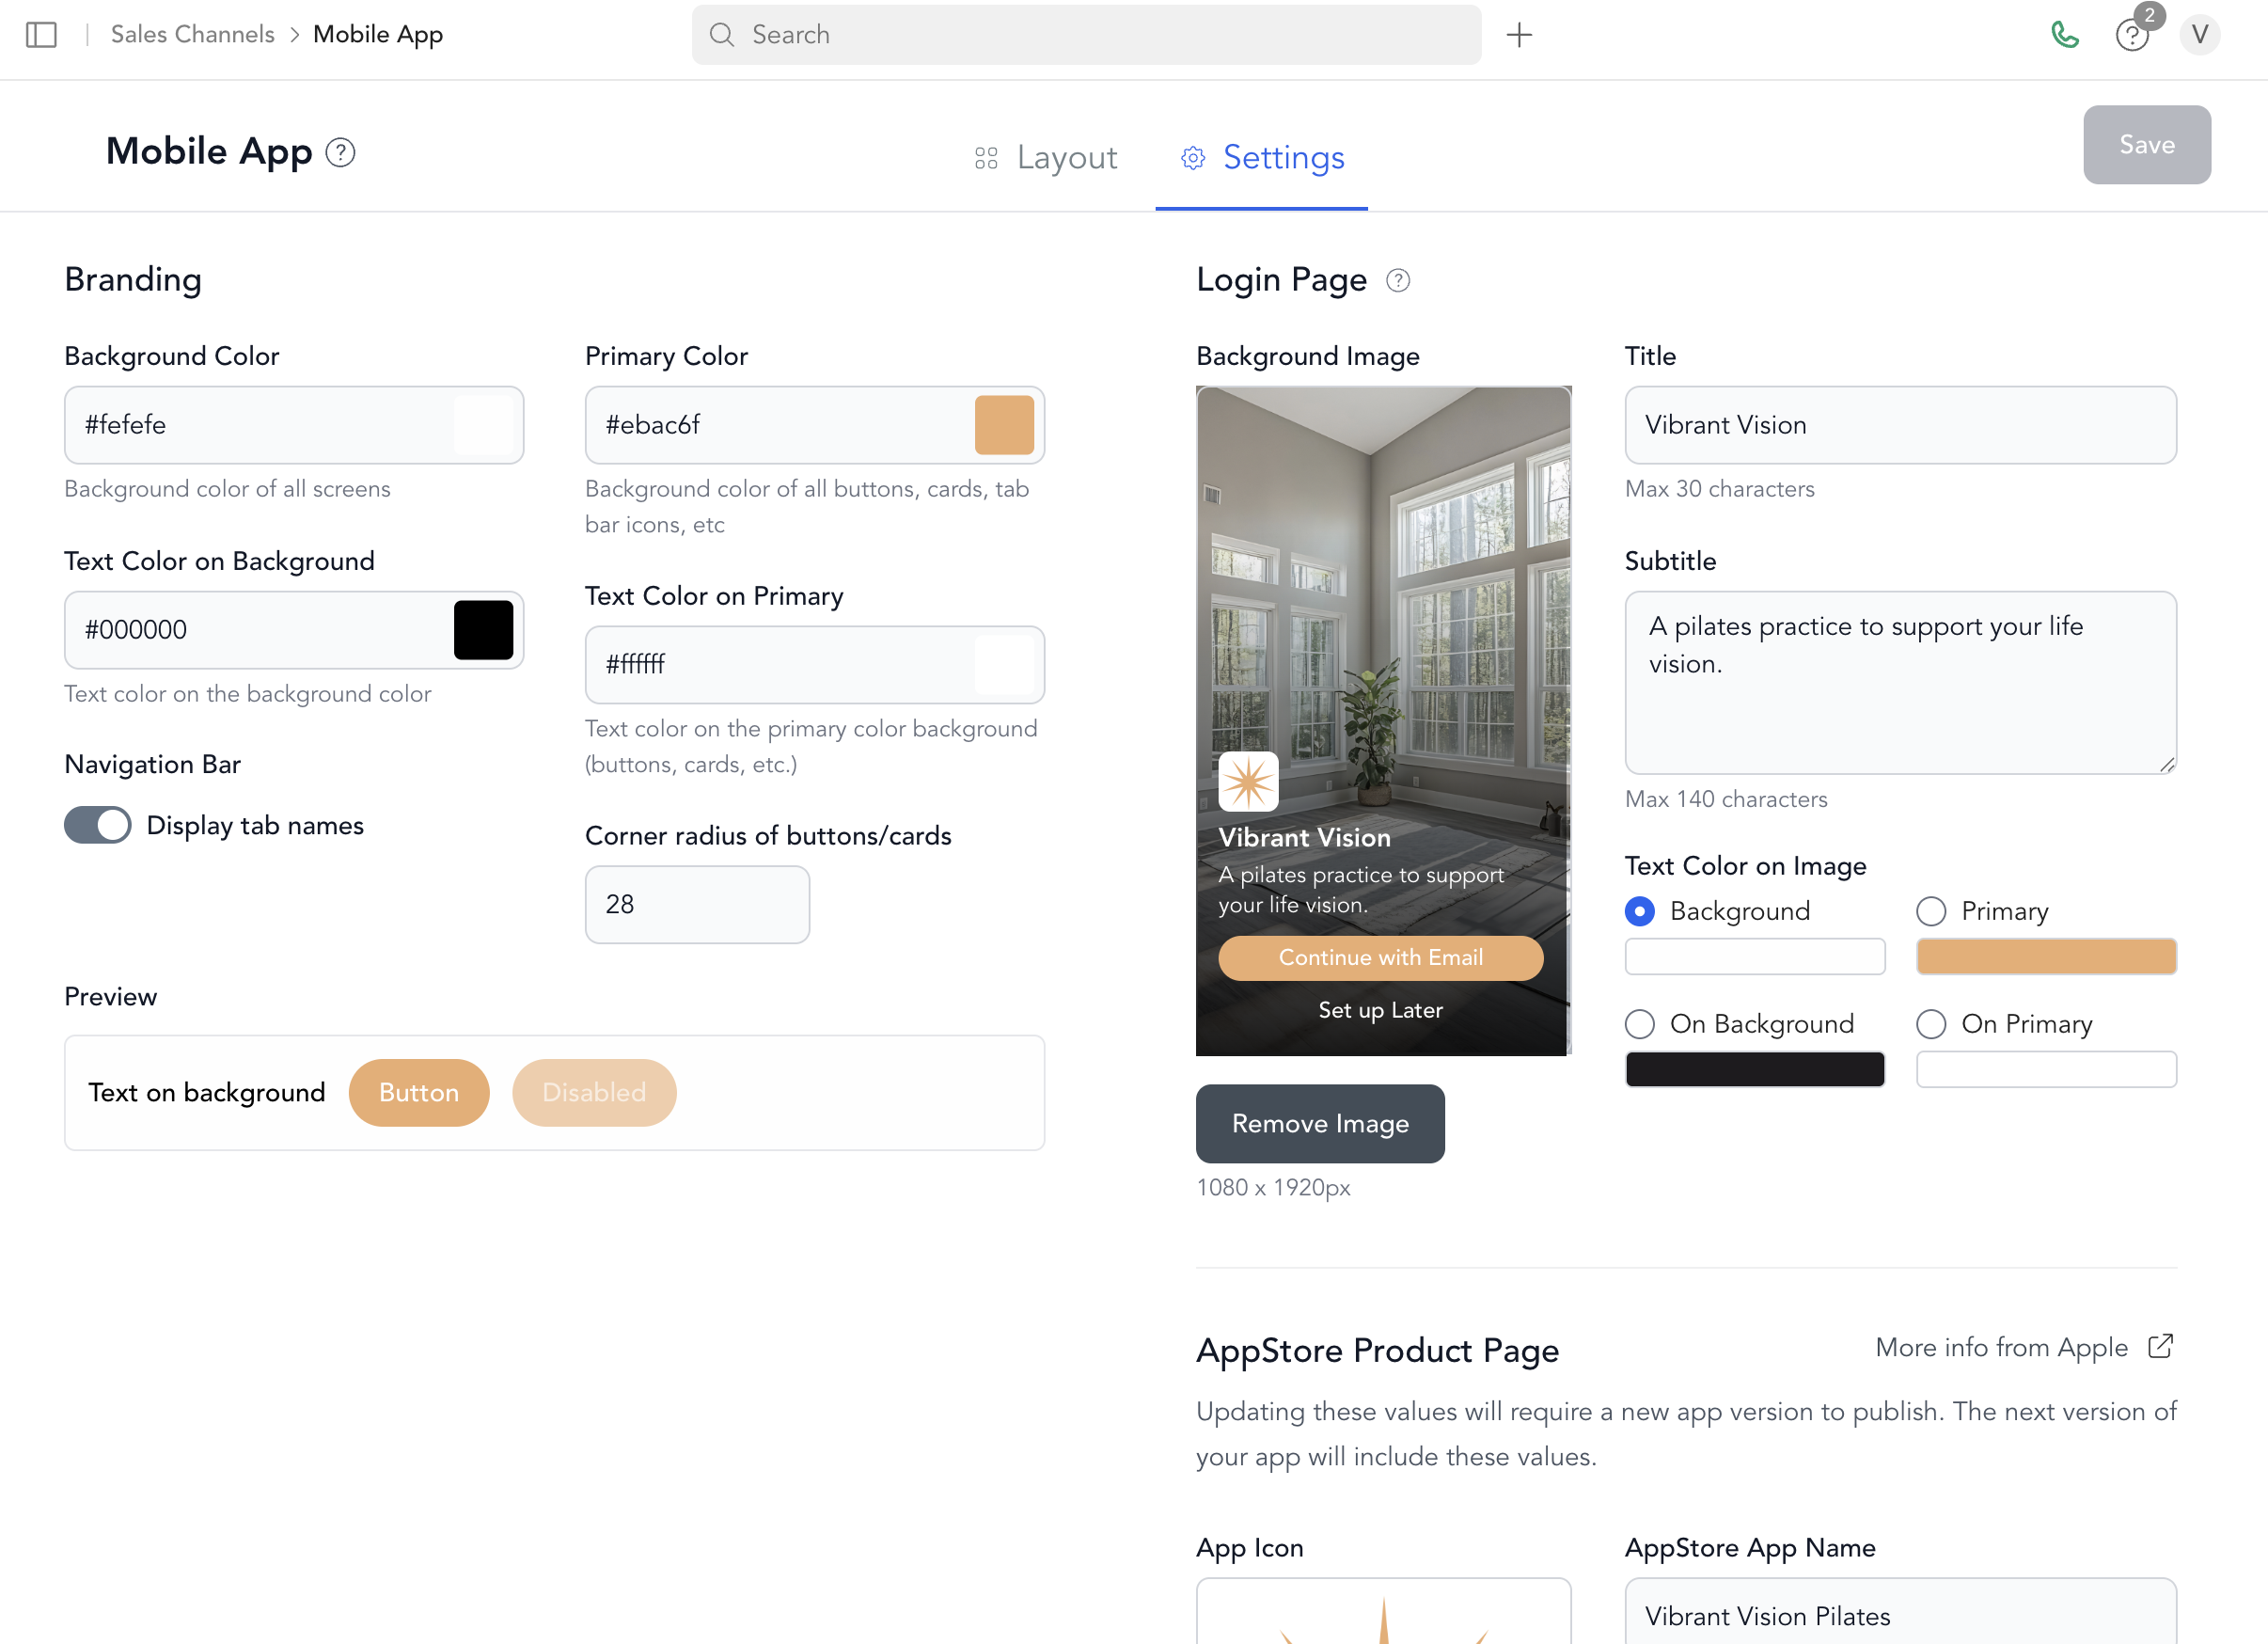
- Login page background image (1080 x 1920px)
- Brand colors (primary button, surface colors)
The path to going live on iOS
- Set up your Apple Developer account. The longest step, since Apple verifies your business. See Getting a D-U-N-S Number and Setting up your Apple Developer account below if you don't have one yet.
- Add Arketa to your account. Takes about two minutes once your account is active.
- Accept Apple's terms. Apple pushes an updated agreement into your account that only you can accept — your build can't move forward until you do.
- Send Arketa your app content. See What you provide above and What we need from you below.
- Arketa builds and submits. You'll review your App Store screenshots and approve them before anything goes to Apple.
- Apple reviews your app. Usually up to a week, occasionally longer — this part is out of everyone's hands.
- You're live.
Altogether, expect roughly 4–6 weeks from kickoff to live on iOS. Most of that time is the D-U-N-S Number and Apple's business verification, not the build or the review itself — so start those steps as soon as you decide to launch.
Don't create your app record or submit anything to the App Store yourself. That has to happen through Arketa, and doing it early can create conflicts that are painful to unwind.
Getting a D-U-N-S Number
A D-U-N-S Number is a free nine-digit business identifier issued by Dun & Bradstreet. Apple requires one from organizations so it can verify your legal entity, status, and address. If you already have one, skip to Setting up your Apple Developer account.
Check whether you already have one
Many businesses already have a D-U-N-S Number without ever requesting one — check before you apply, since it can save you days. Use Apple's D-U-N-S Number lookup tool, linked from Apple's D-U-N-S support page, and enter your business name, address, and contact details.
If you don't have one, request it
If the lookup doesn't find your business, the same tool lets you submit your information to Dun & Bradstreet for a free number. Have ready:
- Your business's exact legal entity name
- Physical address of your business headquarters
- Business phone number
- Business registration documents
Two things cause most rejections and delays:
- Use your legal entity name, not your trading name. Apple doesn't accept DBAs, fictitious business names, trade names, or branches for enrollment as a company or organization. If your studio operates as "Riverbend Yoga" but the LLC is "Riverbend Wellness Group LLC," use the LLC name.
- The name must match exactly between your D&B record and your Apple enrollment. A mismatch fails the enrollment.
A Dun & Bradstreet representative may contact you directly during verification to ask about your business type or number of employees, so keep your registration documents handy.
Dun & Bradstreet doesn't commit to a fixed turnaround — it can take several business days or longer. Start this step first, since it's the one most likely to hold up your launch date.
Sole proprietors: Apple's guidance is that sole proprietorships and single-person businesses enroll as individuals rather than organizations, so you can skip the D-U-N-S Number if that's your setup.
Setting up your Apple Developer account
Before you start, have these ready
- An Apple Account with two-factor authentication enabled
- Your business's legal name, address, and phone number
- Your D-U-N-S Number
- A public business website on your own domain
- A business email address on your company's domain (Gmail, Yahoo, Hotmail, and similar aren't accepted)
- A government-issued photo ID for the person enrolling
- That person's name and contact details
Whoever enrolls becomes the account holder and must have legal authority to bind your organization to agreements — an owner, founder, executive, or an employee granted that authority. If that isn't you, Apple asks for a reference who can confirm you're authorized to enroll on the business's behalf.
- Enroll. Go to Apple's Developer Program enrollment page and sign in with the Apple Account that will manage this developer account. Select Company/Organization as your entity type, then complete the contact form with your D-U-N-S Number, legal entity name, and a valid phone number — Apple uses it to reach you for verification. Enrolling as an organization ties the account to your business; your business name is what appears as the seller on your App Store listing.
- Verification. Apple verifies your legal entity, D-U-N-S Number, website, contact details, your identity, and your authority to enroll. An Apple representative calls the number you provided and may ask for a secondary contact. Answer that call — an unreturned verification call is the most common reason enrollment stalls.
- Pay Apple's fee. Once approved, complete your membership by paying Apple's $99 annual fee directly to Apple.
- Add Arketa to your team. Once your account is active, sign in to App Store Connect, go to Users and Access, invite apps@arketa.com with the Admin role, and let your Arketa contact know it's done. Apple's invitations expire after three days — if Arketa doesn't accept in time, just resend it.
- Accept Apple's terms when prompted. After Arketa is added, Apple may push an updated terms and conditions request into your account. Only the account holder can accept it, and your build can't move forward until you do — if you see a notice in App Store Connect, accept it and let Arketa know.
What we need from you
Arketa asks for all of this at once — getting it back in one go is the difference between a smooth build and a month of back-and-forth.
- Mobile App tab completed at Sales Channels → Mobile App
- Images on every service and appointment. These upload at the appointment template level, not in one central place. Any service without an image shows up blank in your app and in your App Store screenshots — this is the item studios most often miss.
- Service visibility set. Anything you don't want clients to see must be marked private on the template, or every service you've ever built appears in the app.
- Tabs chosen. Home is required; add Library, Book, or both.
Screenshots
Arketa reviews your App Store screenshots with you before submitting — nothing goes to Apple without your approval.
- Arketa uses standard screenshot templates and doesn't offer custom screenshot design in-house. For something bespoke, that's typically a job for your own designer or marketing team.
- Only one screenshot displays service types. If you'd like appointments featured there, events won't be, and vice versa — Arketa will ask you to pick.
- Screenshots can be changed any time after launch. It's tempting to keep polishing before submitting, but every round of revisions pushes your launch date back. Get live so clients can download and book, then refine at your own pace — people judge your app, not your store listing.
Launch screen
When a client first opens your app, a brief launch screen appears — your app logo centered on a solid background — before the app finishes loading. This is a static screen built into your published app, so it's separate from your in-app theme and login page, which update without a new build. By default the background is white; matching it to your brand color is part of your app's build setup, so changing it requires a new app store build — contact Arketa support.
After you launch
Your app isn't frozen once it's live.
You can change instantly, yourself, with no resubmission:
- Graphics
- Pages and content
- Turning tabs on and off
Needs a resubmission through Arketa, plus another review:
- Your app icon
- App Store or Google Play listing details
Arketa also ships updates to the mobile app every week, so your app always has the latest features and improvements — updates roll out automatically and you don't need to do anything to receive them.
If you cancel the app add-on
Your app isn't taken down automatically when billing ends. Contact Arketa support to request removal, and the Arketa team removes the listing from the App Store and Google Play. Until that happens, the app stays downloadable and clients can still sign in.
Your Android app is published under Arketa's developer account, so it can't be transferred to another developer account, and Arketa can't be embedded in an app built elsewhere. Your iOS app is published under your own Apple Developer account, so it stays yours — Arketa removes the build and submission work it did, but the account and app remain under your control.
Once a listing is removed, Apple and Google decide when your app name returns to the pool of available names. That can take a long time and there's no way to speed it up — worth planning around if you're launching a replacement app under the same name.