App design and branding
Customize colors, fonts, icons, and images for your branded app.
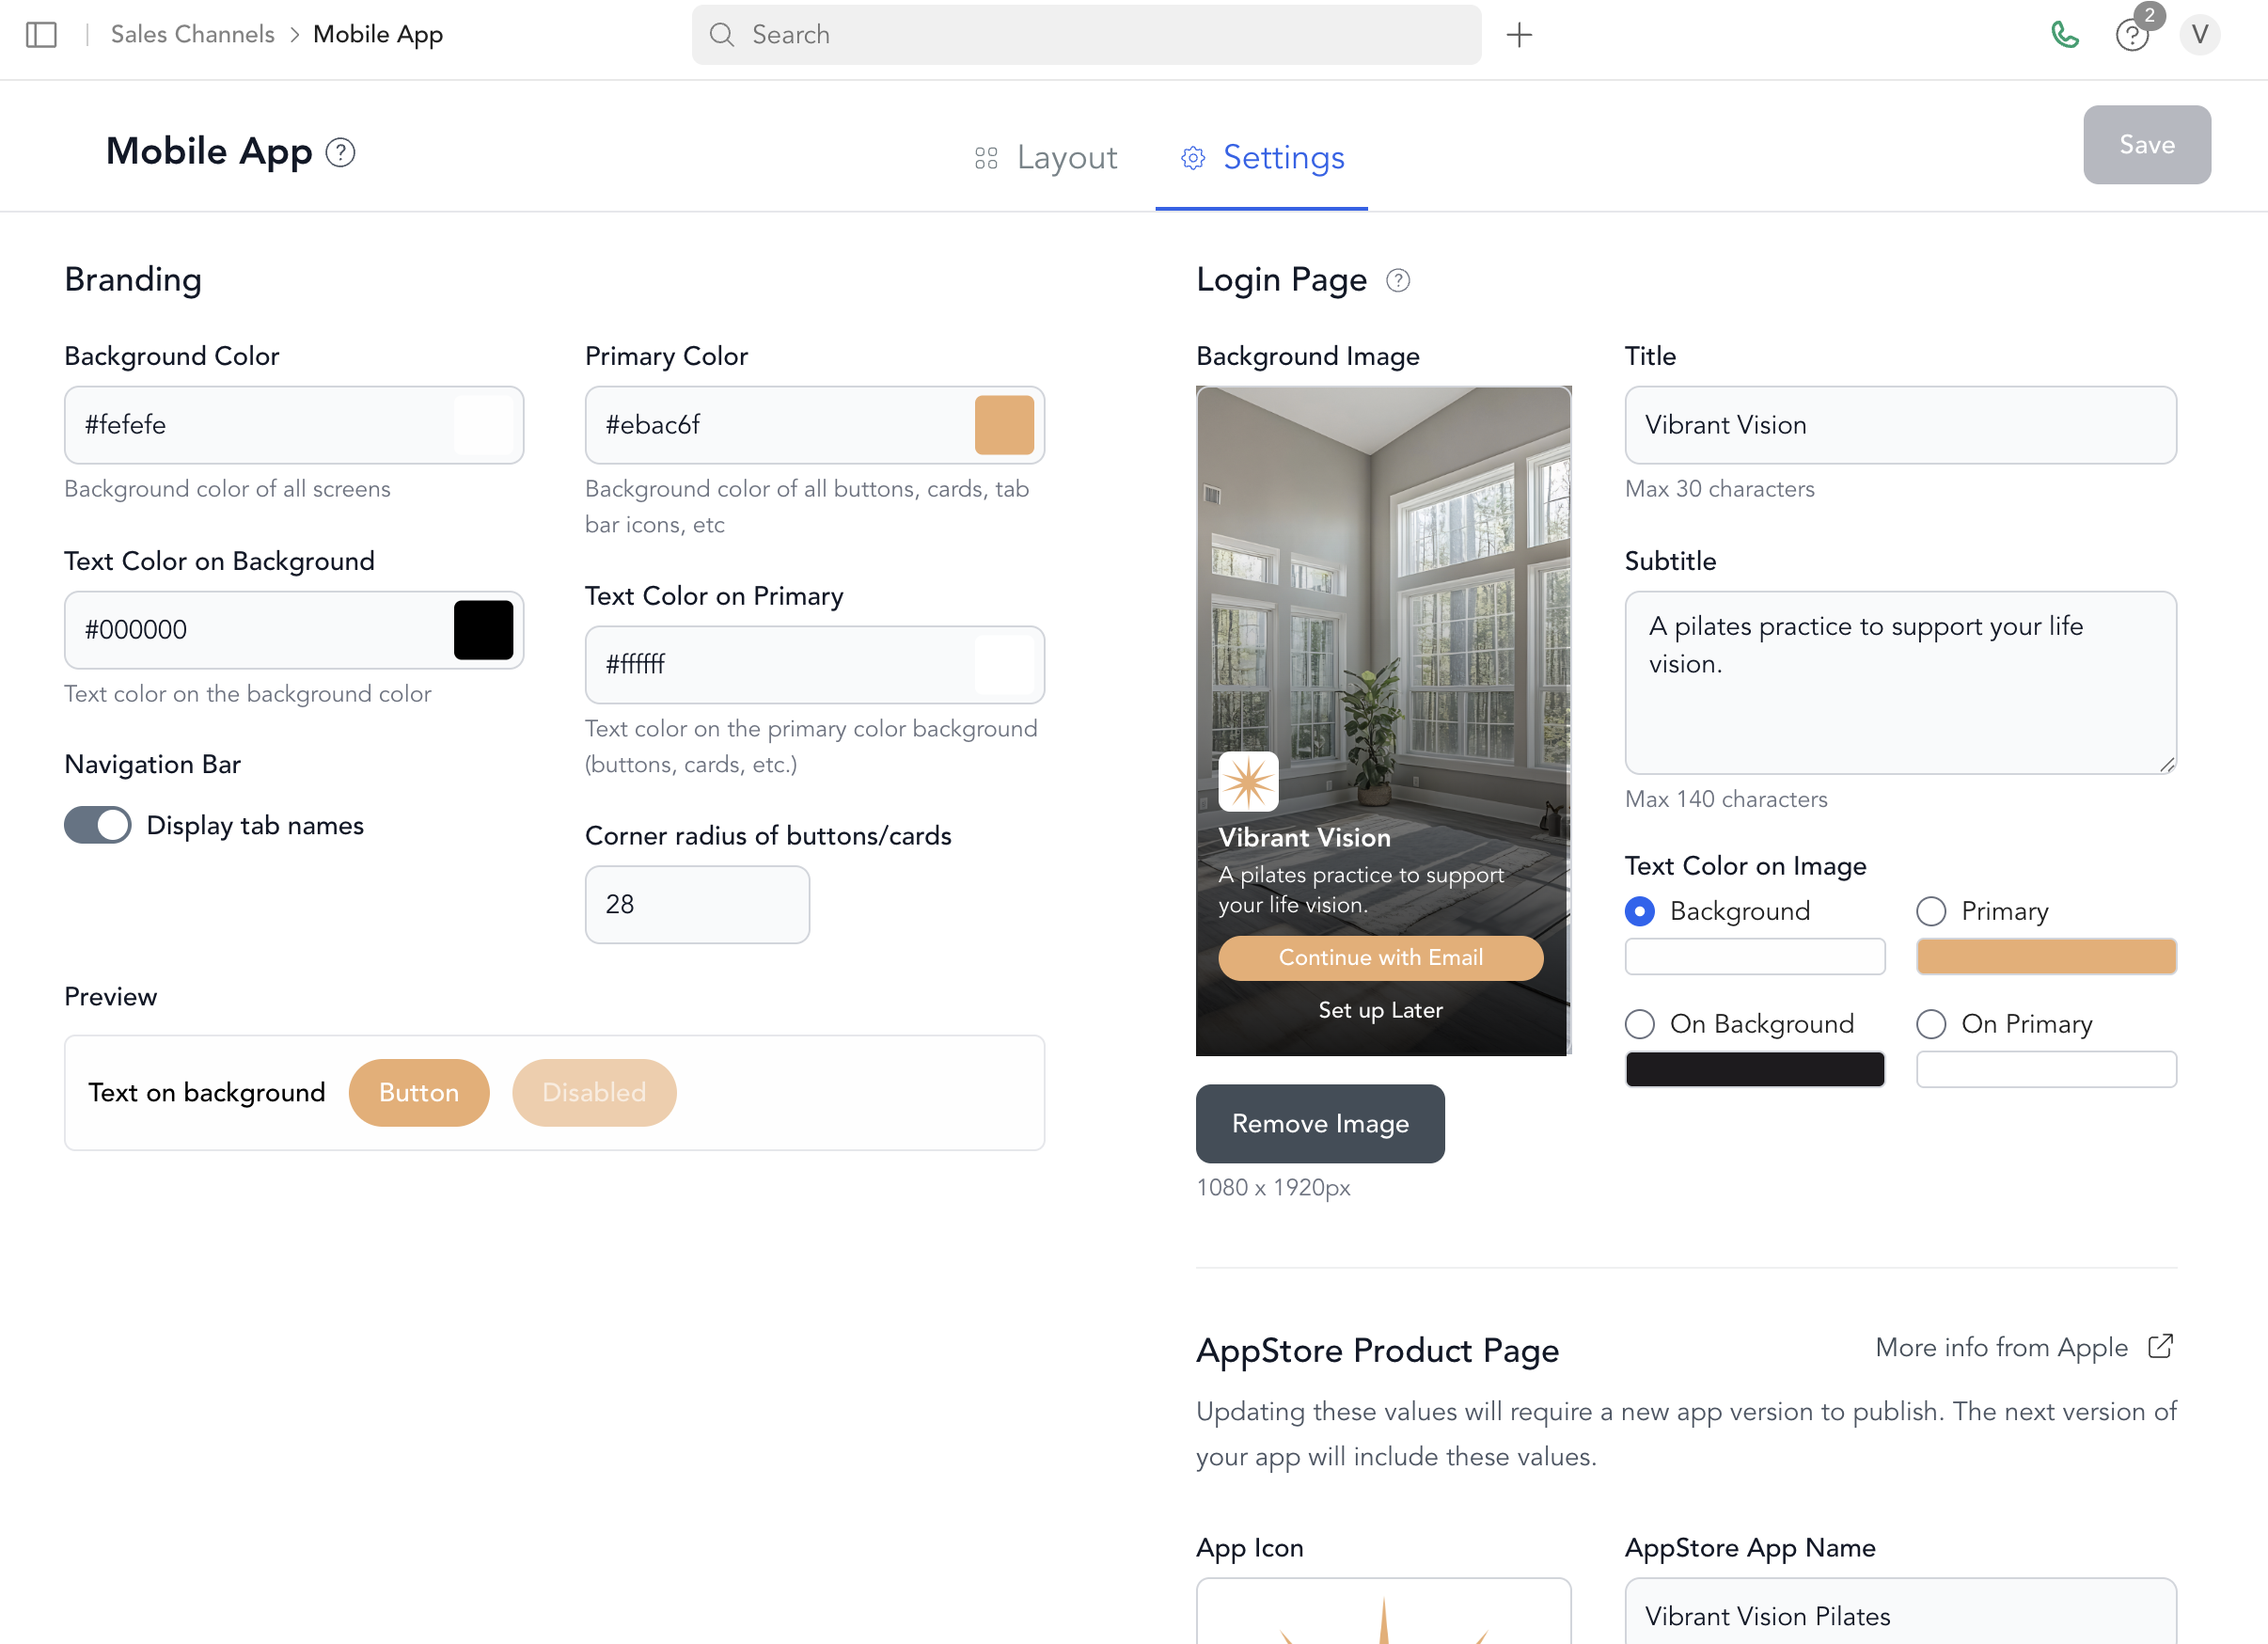
Styling settings
Go to Sales Channel → Mobile App → Styling to configure:
| Setting | Description |
|---|---|
| App name | Your studio name — max 30 characters |
| App description | Short description for the login screen — max 140 characters |
| Home page icon | Image displayed on the home screen after login |
| Primary button color | Color for main action buttons |
| Primary button text color | Text color on primary buttons |
| Surface color | Background color for cards and surfaces |
| Surface text color | Text color on surfaces |
| Login page background image | Full-screen image on the login screen |
Image specifications
| Image | Size |
|---|---|
| App icon (App Store / home screen) | 1024 × 1024px |
| Login page background | 1080 × 1920px |
| Home page icon | 480 × 180px |
The app icon is used for the App Store listing, the launch screen, and the login screen icon. Make sure it's high resolution with no transparency (JPEG or PNG with solid background).
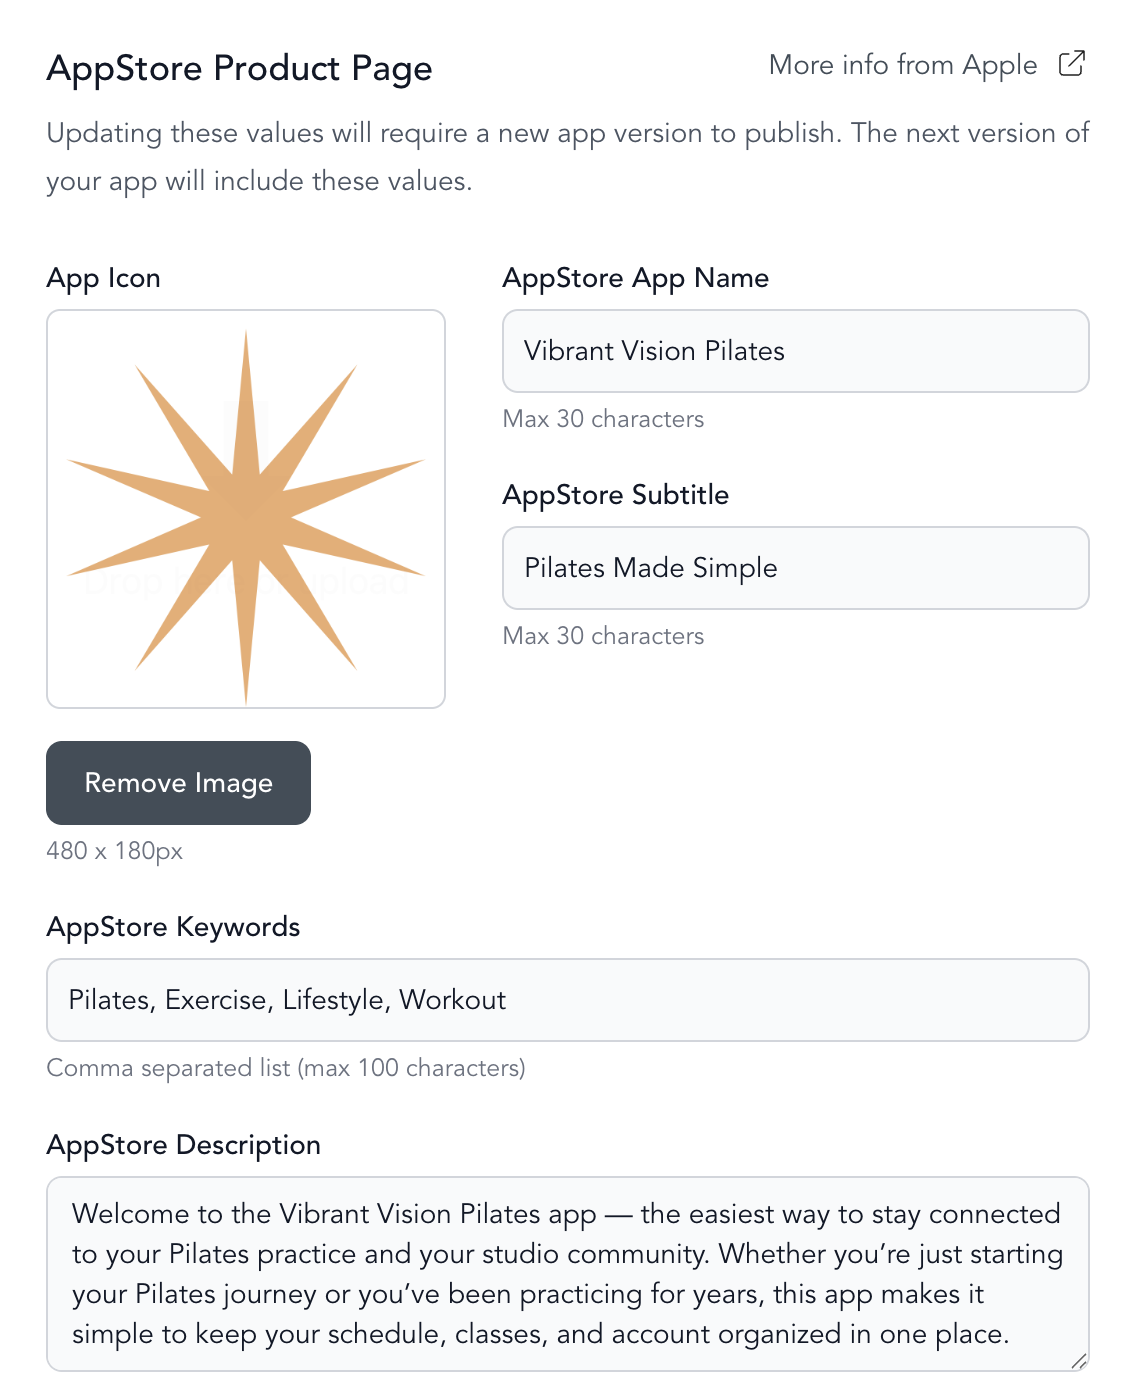
App Store information
| Field | Limit |
|---|---|
| App Store name | Max 30 characters |
| App Store subtitle | Max 30 characters |
| Keywords | Comma-separated, max 100 characters total |
| App Store description | Several paragraphs — focus on your studio's unique offering |
When do changes take effect?
Styling changes take effect immediately. Clients need to close and reopen the app (or refresh) to see updates.
Tab configuration changes also update immediately after saving.
Was this helpful?