
AI chatbot
Set up an AI-powered chat widget on your website to answer client questions and handle bookings.
The Arketa AI chatbot handles common client questions and basic bookings 24/7 — without requiring staff. It lives on your website as an embeddable chat widget, powered by AI and your own FAQ library.
The AI chatbot requires the Marketing Suite add-on.
What clients can do through the chatbot
- Book a class (redirects to checkout if no active purchase on file)
- Find and cancel upcoming reservations
- Cancel a subscription (if allowed online)
- Purchase intro offers, subscriptions, or packages
- Send a note to an instructor
- Get answers to studio-specific questions based on your FAQs
What it won't do:
- Take payments or show payment history
- Cancel subscriptions that can't be canceled online
- Schedule private appointments
Set up the AI chatbot
Step 1: Embed the chat widget
First, configure and embed the Arketa chat widget on your website. See Embed the widget on your website for setup instructions.
Step 2: Enable AI
- Go to Sales Channel → Embeddable Chat
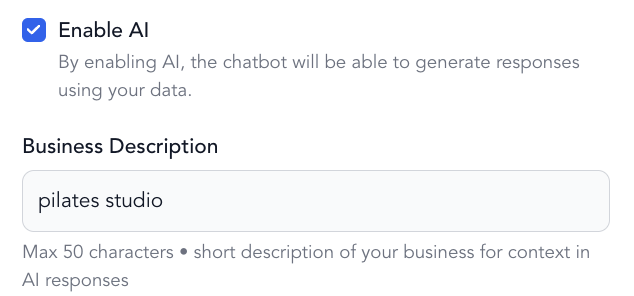
- Toggle on Enable AI
- Enter a short Business description — this shapes the AI's tone and focus
- Click Save & Continue
Step 3: Add FAQs
- Go to Settings → FAQs
- Click Add FAQ
- Enter the question and answer
- Click Save
Add questions that are specific to your studio — parking, what to bring, class formats, cancellation policy, locker room access, etc. The AI uses these to answer clients accurately.
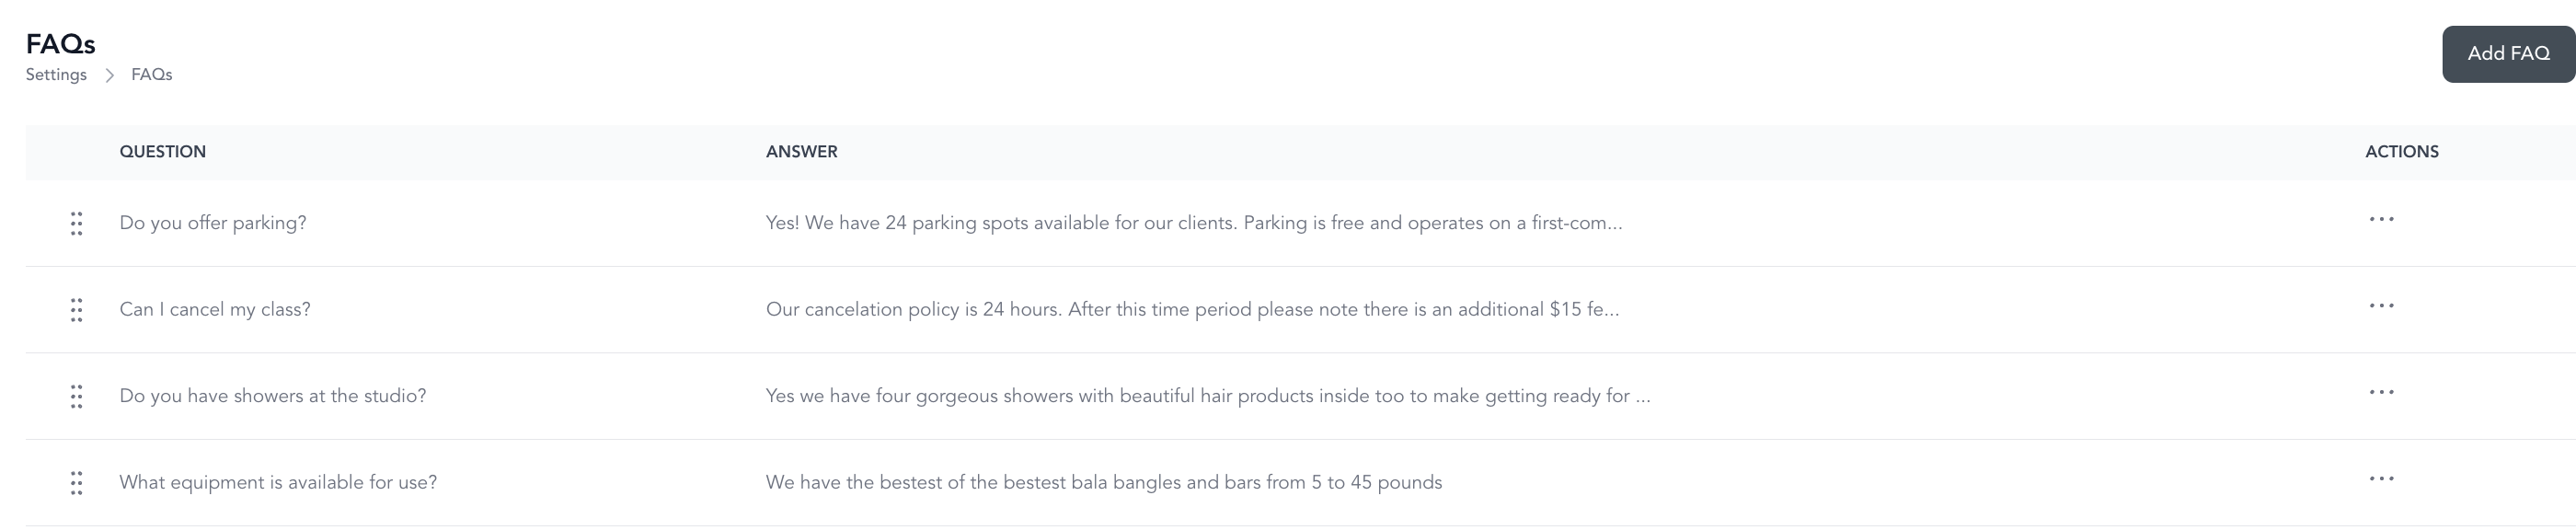
Start with the 10 questions you get asked most often. After a few weeks, check the message history to see what clients are asking that the AI isn't answering well, and add those as FAQs.
Configure the chat widget
Go to Sales Channel → Embeddable Chat to control how the widget looks and how leads from it are handled:
- Primary color — set the widget's color to match your brand.
- Positioning — choose where the widget appears on your site: top left, top right, bottom left, or bottom right.
- Animation delay — how long a visitor is on the page before the widget pops up.
- Border radius — adjust the roundness of the widget's corners to change its shape.
- Custom Lead Source — the source label applied to leads that come in through the chat. If left blank, it defaults to
chatbot. - Custom Lifecycle Stage — the lifecycle stage new chat leads are assigned. If you don't set one, it follows the default lead stage in your settings.
Customize the chat bubble
These fields set the text clients see inside the widget:
- Bubble title — the heading shown at the top of the chat widget (for example, "Welcome to our studio!" or "How can we help?").
- Welcome message — the first message clients see (for example, "Hi there! How can we help today?").
- Success message — the text shown after a client sends a message. This is a good place to state your response turnaround time (for example, "Thanks for reaching out! We'll get back to you within 1 business day.").
- Form description — the description of the form the client fills out.
- Button text — the label on the send button.
Embed the widget on your website
Once you've configured the widget, add it to your site:
- Go to Sales Channel → Embeddable Chat → Integration Guide
- Follow the steps in the Integration Guide to copy the widget code and paste it into your website.
If your site is built on another platform (like Squarespace, Wix, or WordPress), paste the code where that platform allows custom or embed code. Your web developer can also add it for you.
View message history
- Go to Sales Channel → Embeddable Chat
- Click View Message History (top right)
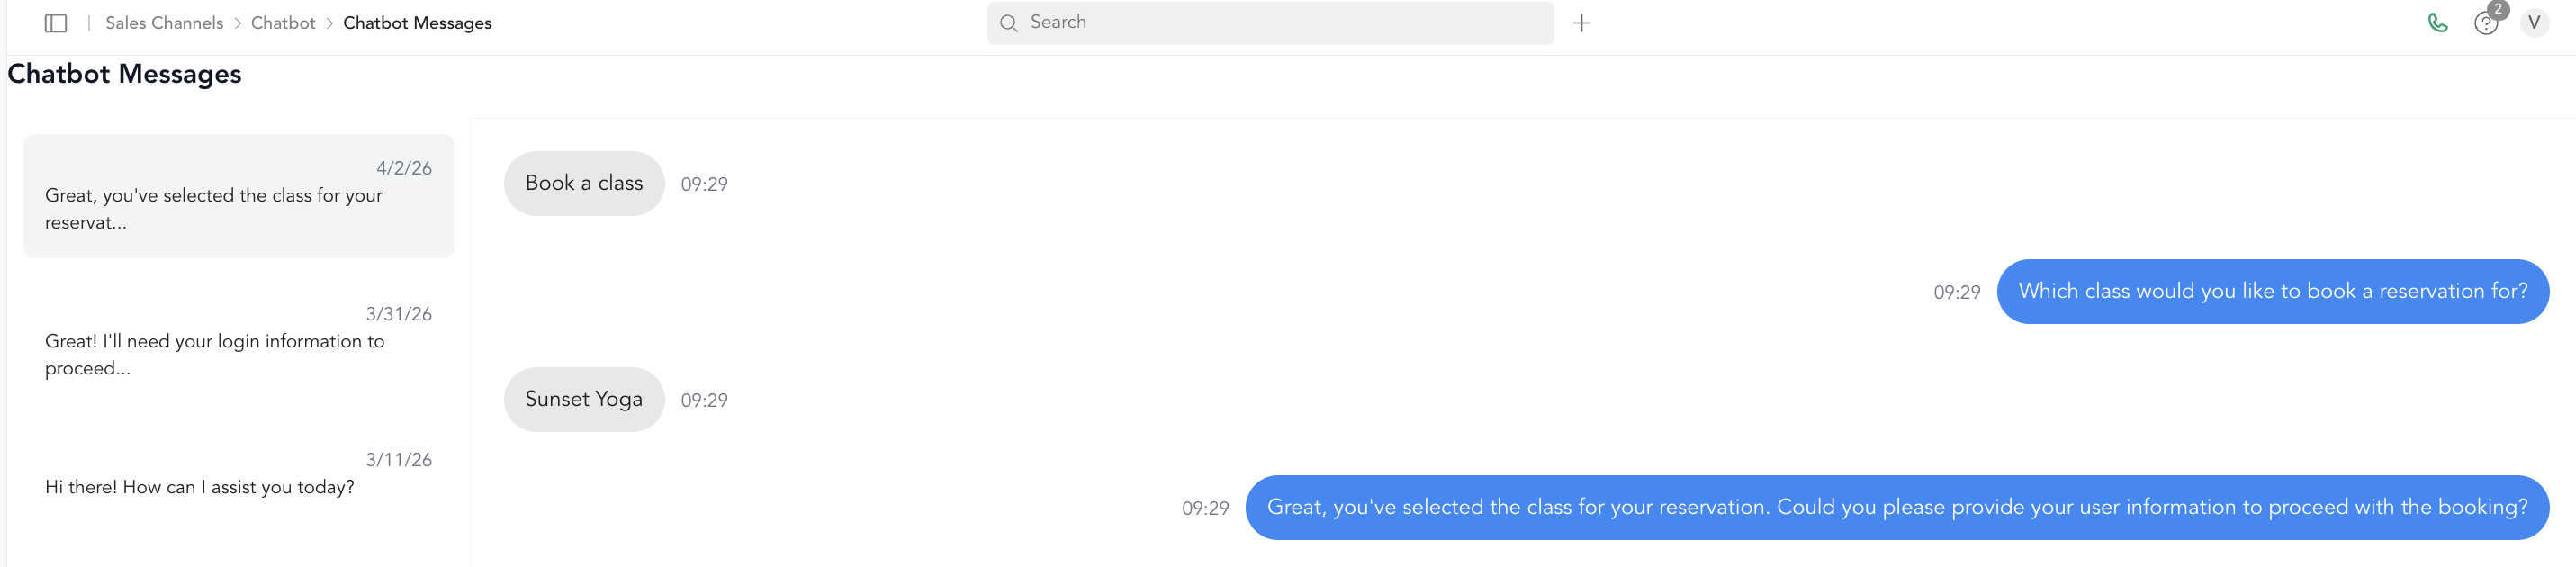
This shows all conversations, what clients asked, and how the AI responded. Use this to identify gaps in your FAQ coverage.
New leads from chatbot
When a new person messages through the chatbot, Arketa creates a lead (and a client profile) automatically. You can set up an automation with the Chatbot message received trigger to follow up with these leads automatically.