Manage community members
View, add, and remove members from a community.
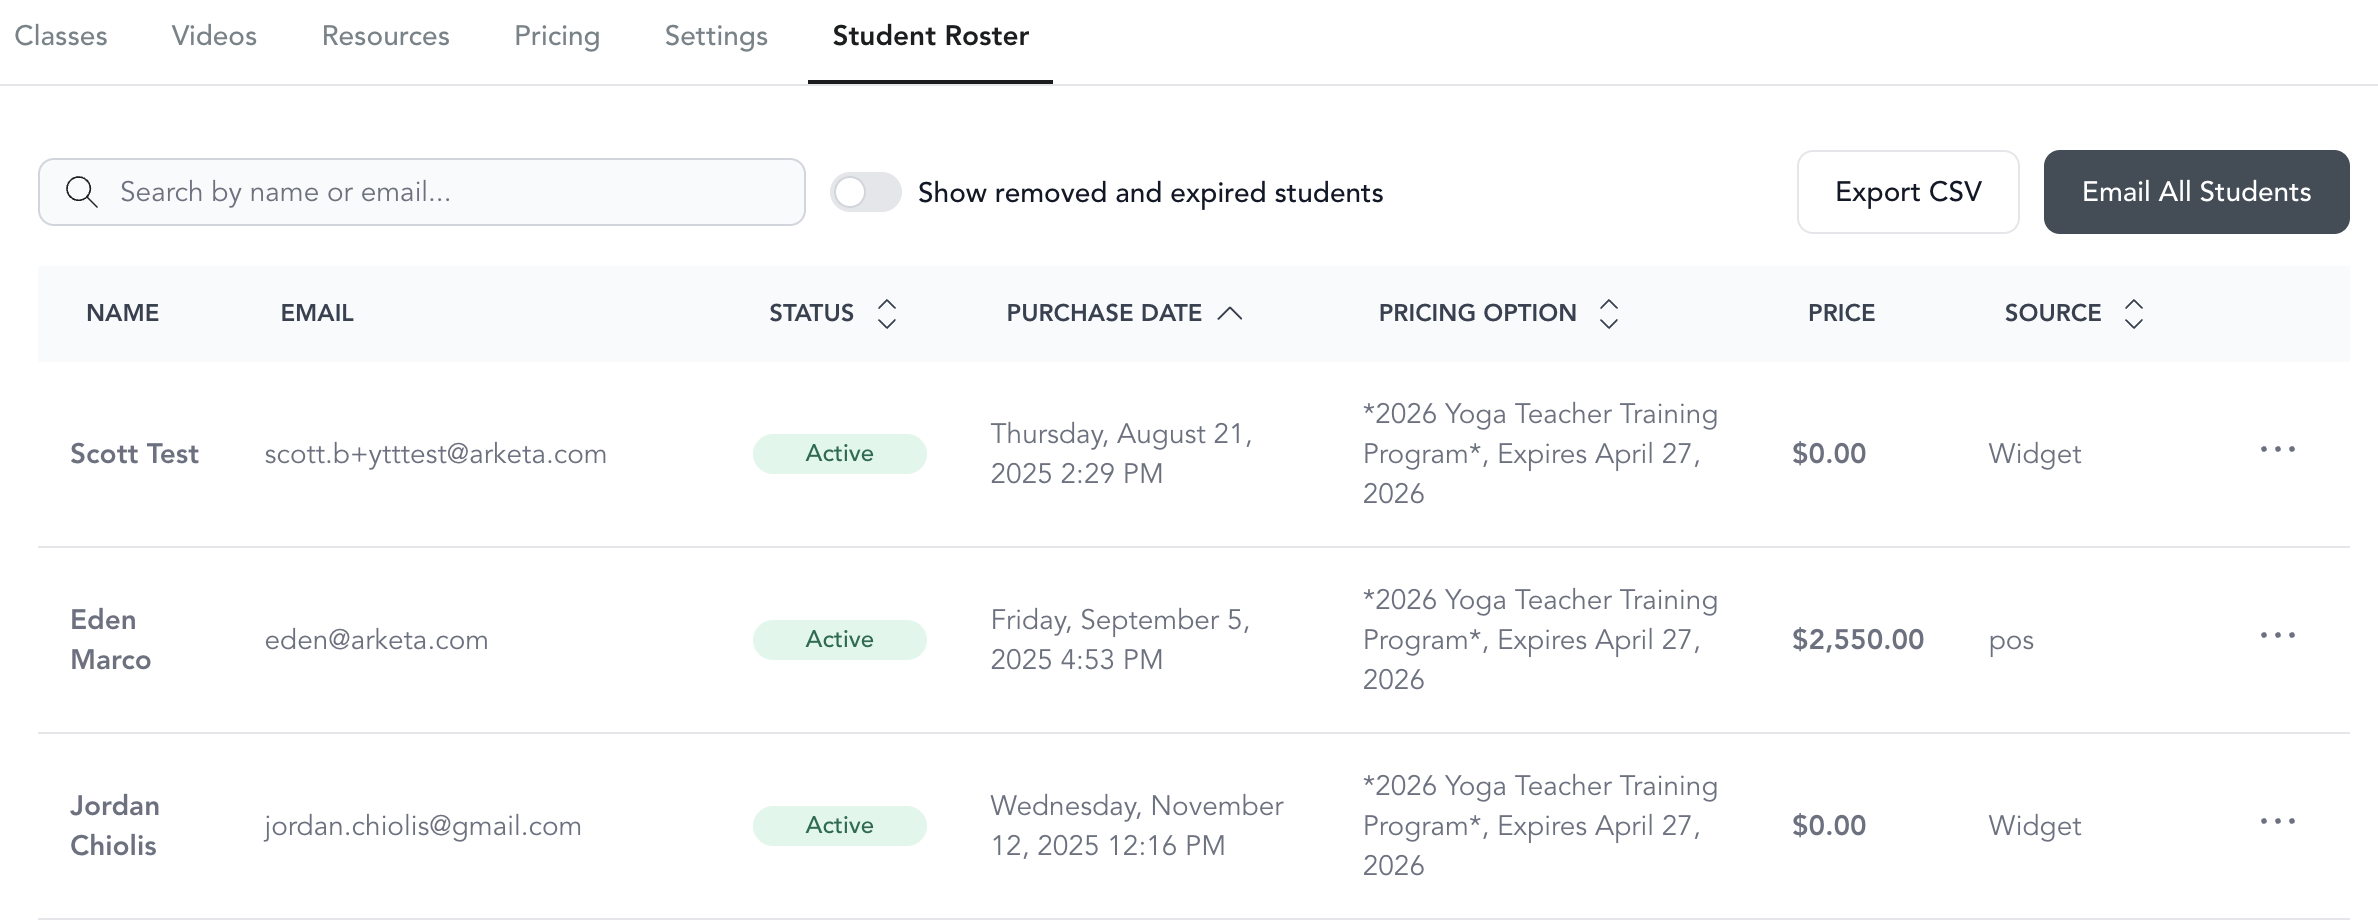
View members
- Go to Beyond Classes → Communities
- Click on the community
- Go to the Class Roster tab
You'll see all current members and their purchase status.
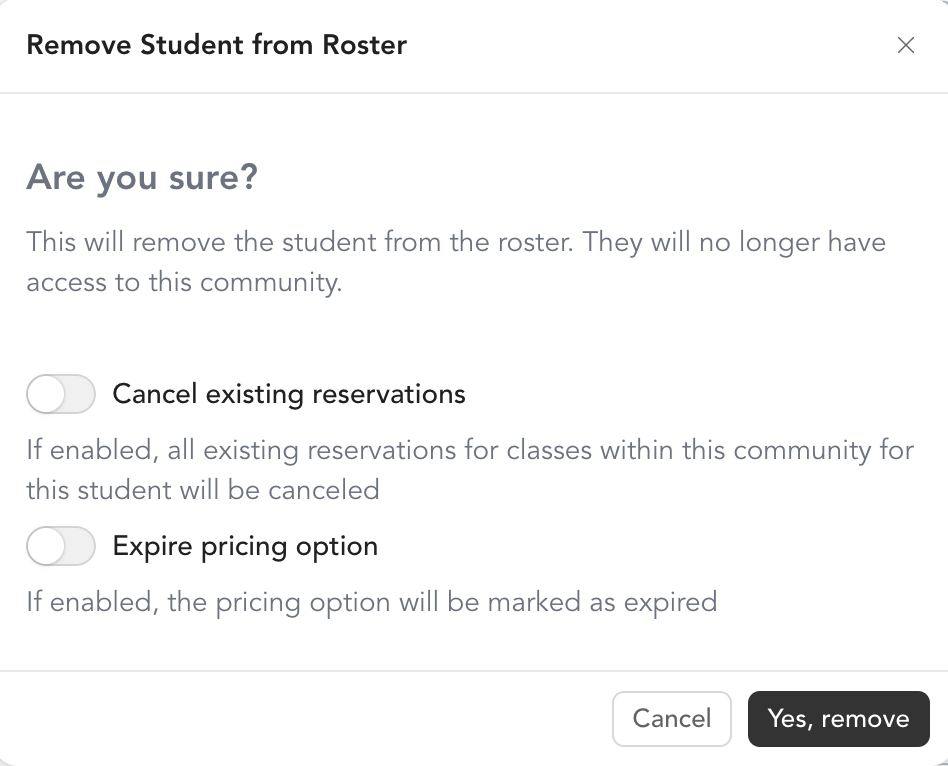
Remove a member
- In the community's Class Roster, find the client
- Click the three dots next to their name
- Click Delete
- Choose what to do:
| Option | What it does |
|---|---|
| Cancel existing reservations | Cancels the client's upcoming class reservations within this community |
| Expire pricing option | Marks their pricing option as expired, removing access to community content |
Choose both if you want to fully remove their access and cancel any scheduled classes.
Add a member
To give a client access to a community, sell them the pricing option through:
- The POS from the client's profile
- Sending them the direct purchase link
- Adding them as a complimentary member by including the community in their membership
There's no way to manually grant access without a purchase or membership — the access is tied to a pricing option.
Was this helpful?